INSTALLATION
Continued
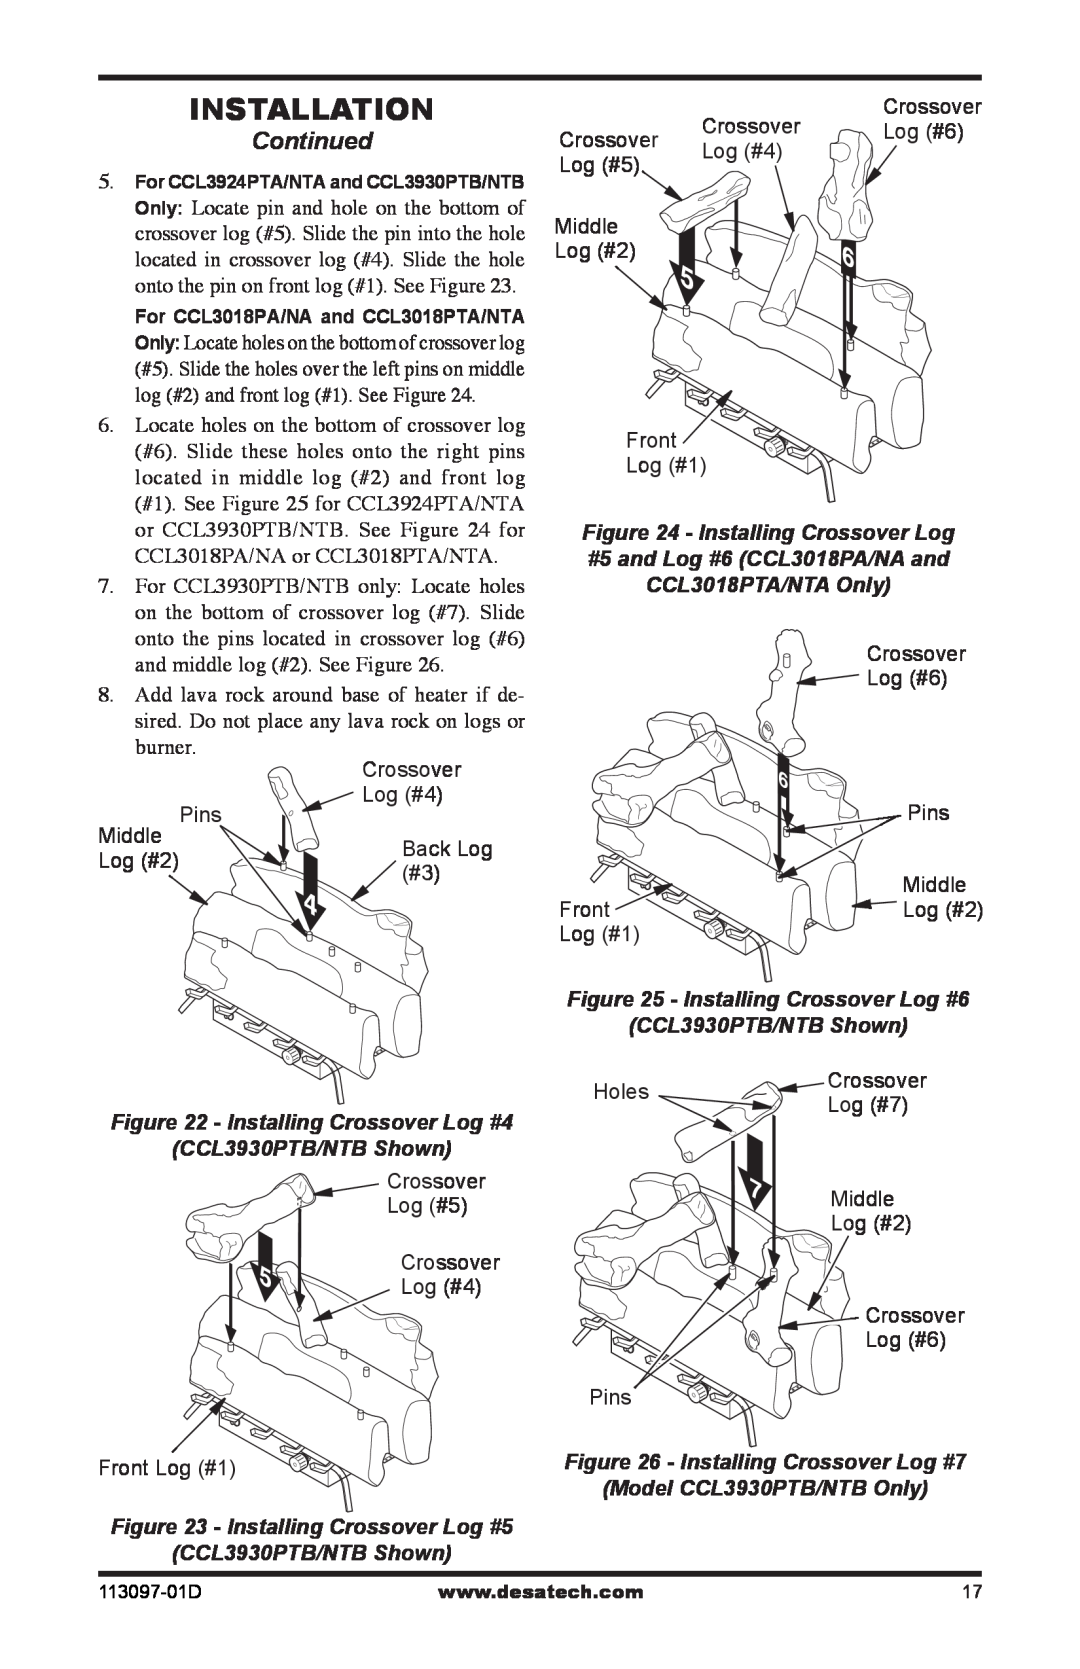
5.For CCL3924PTA/NTA and CCL3930PTB/NTB Only: Locate pin and hole on the bottom of crossover log (#5). Slide the pin into the hole located in crossover log (#4). Slide the hole onto the pin on front log (#1). See Figure 23.
For CCL3018PA/NA and CCL3018PTA/NTA Only: Locate holes on the bottom of crossover log (#5). Slide the holes over the left pins on middle log (#2) and front log (#1). See Figure 24.
6.Locate holes on the bottom of crossover log (#6). Slide these holes onto the right pins located in middle log (#2) and front log (#1). See Figure 25 for CCL3924PTA/NTA or CCL3930PTB/NTB. See Figure 24 for CCL3018PA/NA or CCL3018PTA/NTA.
7.For CCL3930PTB/NTB only: Locate holes on the bottom of crossover log (#7). Slide onto the pins located in crossover log (#6) and middle log (#2). See Figure 26.
8.Add lava rock around base of heater if de- sired. Do not place any lava rock on logs or burner.
| Crossover | |
| Log (#4) | |
Middle | Pins | |
Back Log | ||
Log (#2) | ||
(#3) | ||
|
| Crossover | Crossover |
Crossover | Log (#6) | |
Log (#4) |
| |
Log (#5) |
| |
|
| |
Middle |
|
|
Log (#2) |
|
|
Front ![]()
Log (#1)
Figure 24 - Installing Crossover Log
#5 and Log #6 (CCL3018PA/NA and
CCL3018PTA/NTA Only)
Crossover
![]() Log (#6)
Log (#6)
| 6 |
| Pins |
| Middle |
Front | Log (#2) |
Log (#1) |
|
Figure 22 - Installing Crossover Log #4
(CCL3930PTB/NTB Shown)
Crossover
Log (#5)
Crossover
Log (#4)
Front Log (#1)
Figure 23 - Installing Crossover Log #5 (CCL3930PTB/NTB Shown)
Figure 25 - Installing Crossover Log #6 | ||
(CCL3930PTB/NTB Shown) | ||
Holes | Crossover | |
Log (#7) | ||
| ||
7 | Middle |
| |
| Log (#2) |
| Crossover |
| Log (#6) |
Pins |
|
Figure 26 - Installing Crossover Log #7 | |
(Model CCL3930PTB/NTB Only) | |
www.desatech.com | 17 |