Dell PowerVault MD32xxi Configuration Guide for VMware ESX4.1 Server Software
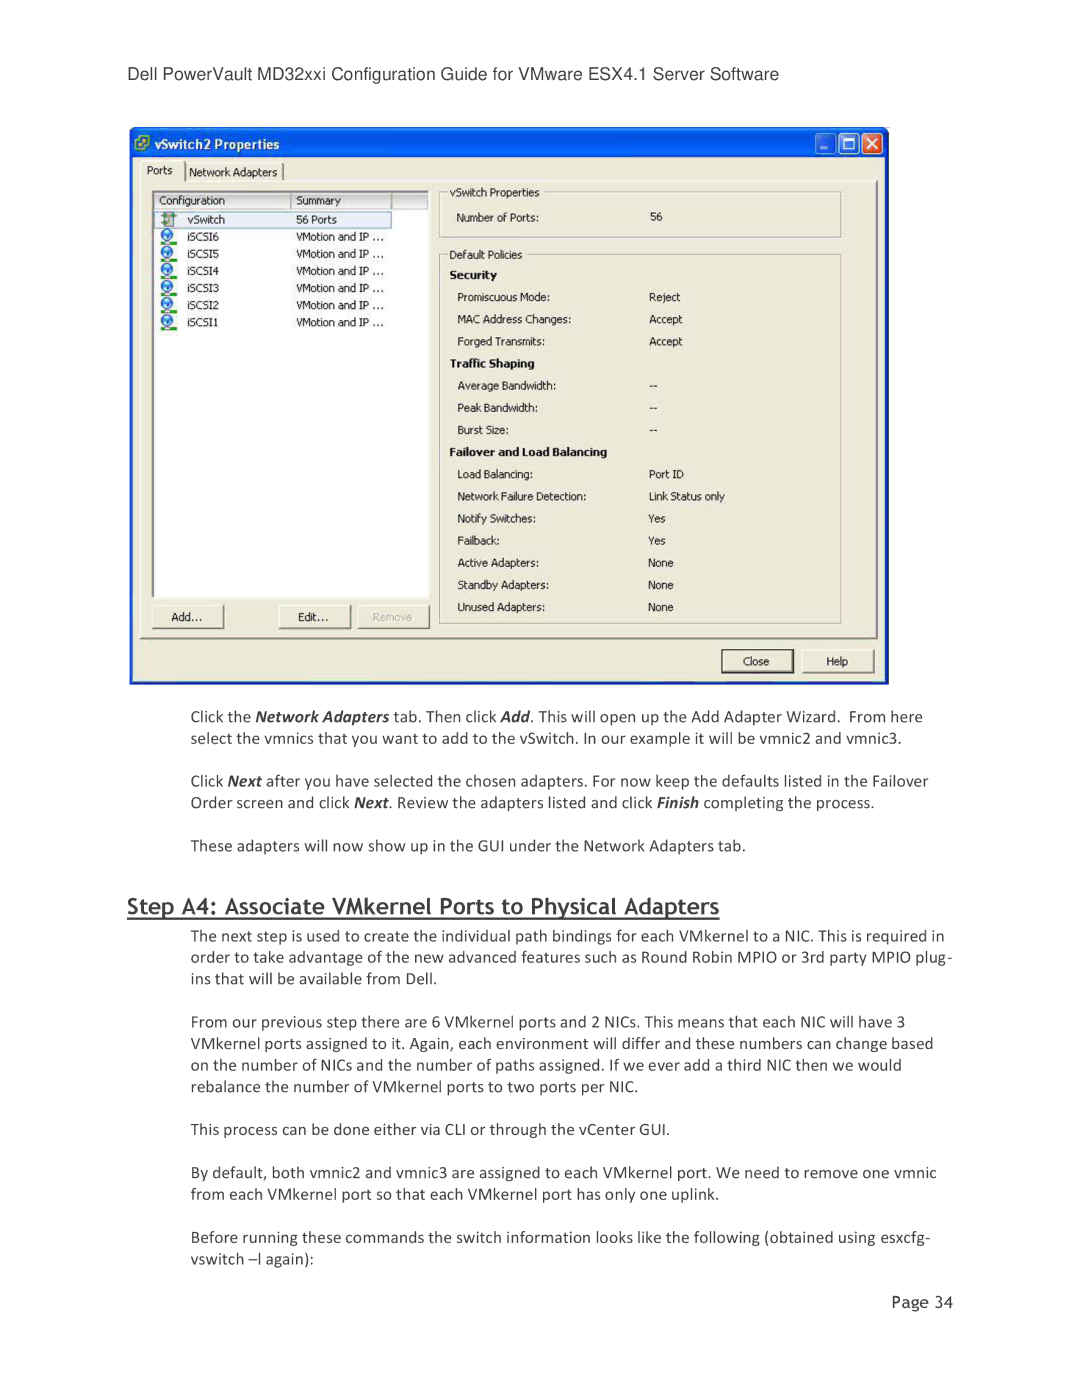
Click the Network Adapters tab. Then click Add. This will open up the Add Adapter Wizard. From here select the vmnics that you want to add to the vSwitch. In our example it will be vmnic2 and vmnic3.
Click Next after you have selected the chosen adapters. For now keep the defaults listed in the Failover Order screen and click Next. Review the adapters listed and click Finish completing the process.
These adapters will now show up in the GUI under the Network Adapters tab.
Step A4: Associate VMkernel Ports to Physical Adapters
The next step is used to create the individual path bindings for each VMkernel to a NIC. This is required in order to take advantage of the new advanced features such as Round Robin MPIO or 3rd party MPIO plug- ins that will be available from Dell.
From our previous step there are 6 VMkernel ports and 2 NICs. This means that each NIC will have 3 VMkernel ports assigned to it. Again, each environment will differ and these numbers can change based on the number of NICs and the number of paths assigned. If we ever add a third NIC then we would rebalance the number of VMkernel ports to two ports per NIC.
This process can be done either via CLI or through the vCenter GUI.
By default, both vmnic2 and vmnic3 are assigned to each VMkernel port. We need to remove one vmnic from each VMkernel port so that each VMkernel port has only one uplink.
Before running these commands the switch information looks like the following (obtained using esxcfg- vswitch
Page 34