ASSEMBLY
ATTACHING LATHE BED TO PEDESTALS
1.Remove the tailstock, headstock, and tool rest from the lathe bed.
NOTE: See “ADJUSTING HEADSTOCK AND TAILSTOCK” and “TOOL REST” for removal/installation instructions.
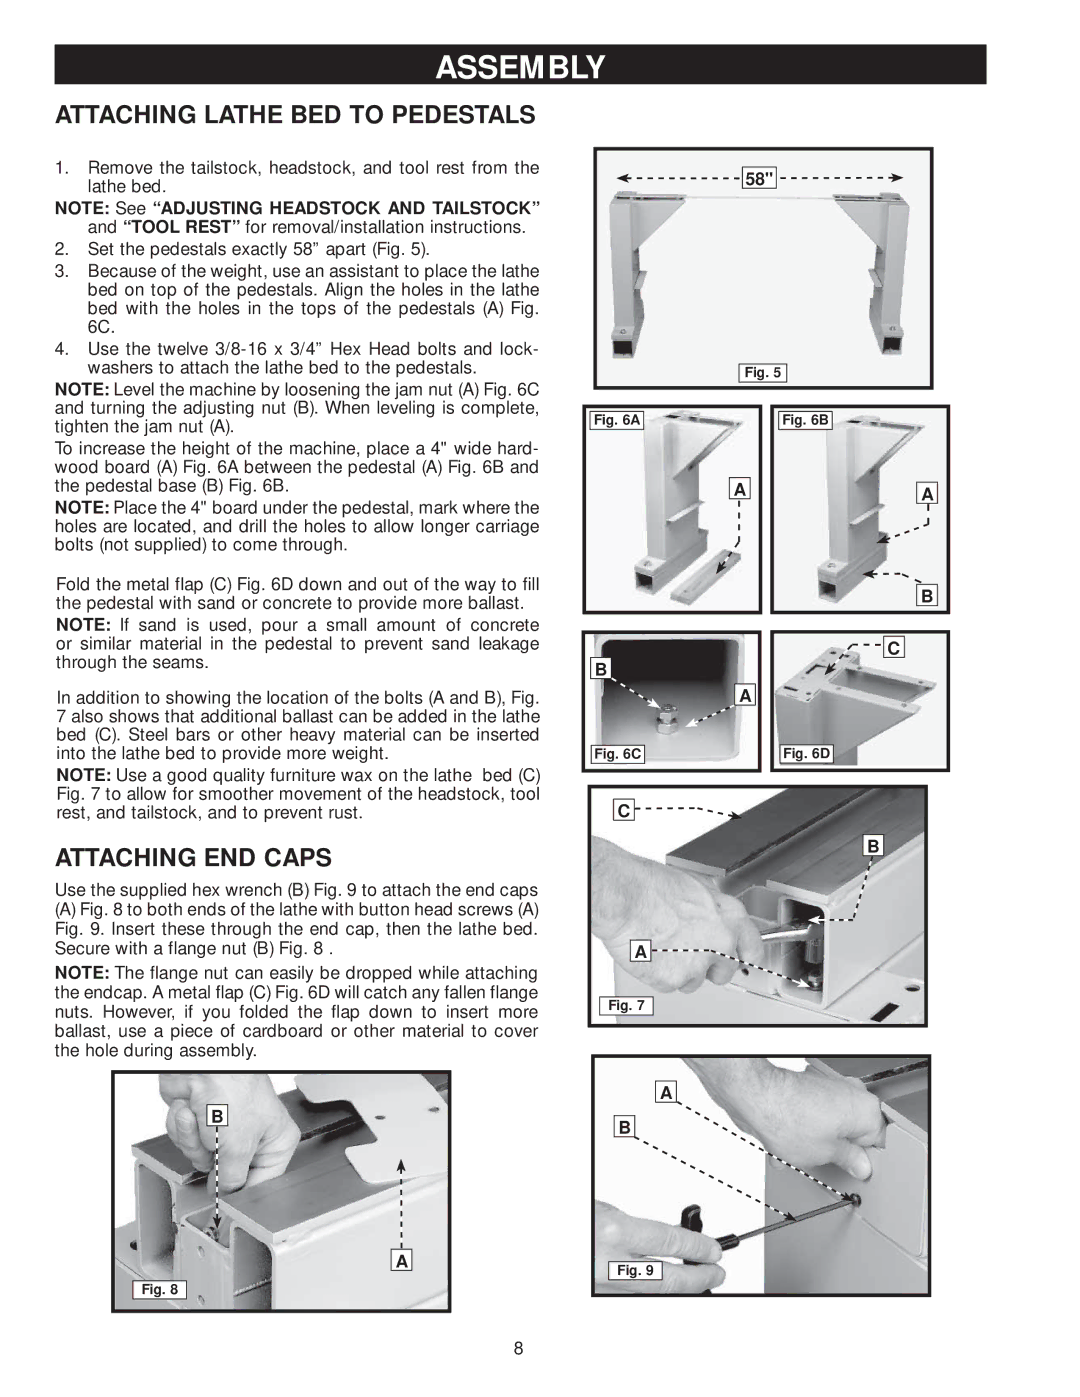
2.Set the pedestals exactly 58” apart (Fig. 5).
3.Because of the weight, use an assistant to place the lathe bed on top of the pedestals. Align the holes in the lathe bed with the holes in the tops of the pedestals (A) Fig. 6C.
4.Use the twelve
NOTE: Level the machine by loosening the jam nut (A) Fig. 6C and turning the adjusting nut (B). When leveling is complete, tighten the jam nut (A).
To increase the height of the machine, place a 4" wide hard- wood board (A) Fig. 6A between the pedestal (A) Fig. 6B and the pedestal base (B) Fig. 6B.
NOTE: Place the 4" board under the pedestal, mark where the holes are located, and drill the holes to allow longer carriage bolts (not supplied) to come through.
Fold the metal flap (C) Fig. 6D down and out of the way to fill the pedestal with sand or concrete to provide more ballast.
NOTE: If sand is used, pour a small amount of concrete or similar material in the pedestal to prevent sand leakage through the seams.
In addition to showing the location of the bolts (A and B), Fig. 7 also shows that additional ballast can be added in the lathe bed (C). Steel bars or other heavy material can be inserted into the lathe bed to provide more weight.
NOTE: Use a good quality furniture wax on the lathe bed (C) Fig. 7 to allow for smoother movement of the headstock, tool rest, and tailstock, and to prevent rust.
ATTACHING END CAPS
Use the supplied hex wrench (B) Fig. 9 to attach the end caps
(A)Fig. 8 to both ends of the lathe with button head screws (A) Fig. 9. Insert these through the end cap, then the lathe bed. Secure with a flange nut (B) Fig. 8 .
NOTE: The flange nut can easily be dropped while attaching the endcap. A metal flap (C) Fig. 6D will catch any fallen flange nuts. However, if you folded the flap down to insert more ballast, use a piece of cardboard or other material to cover the hole during assembly.
B
![]()
![]() 58"
58" ![]()
![]()
Fig. 5
Fig. 6A |
| Fig. 6B |
A |
|
| |
| A | ||
|
B
| C |
B |
|
| A |
Fig. 6C | Fig. 6D |
C |
|
B
A ![]()
![]()
![]()
Fig. 7
A
B
A
Fig. 8
Fig. 9
8