Assembly
Assembly Steps
It is important for your safety and to get accurate cuts that you put the saw
together according to these instructions. Note: This manual covers three models.
Depending on the model saw, you will be in- structed to skip some steps, or do extra steps. The diffe.rences have to do with whether the cabinet ha.s doors or drawers, and whether or not it has casters.
Follow these steps in order.
WARNING
Plugging in saw during assembly
can result in electrical shock, or severe cuts from contact with spin- ning blade.
Do not plug in saw at anytime during assembly.
Plug in saw only when it is to be used.
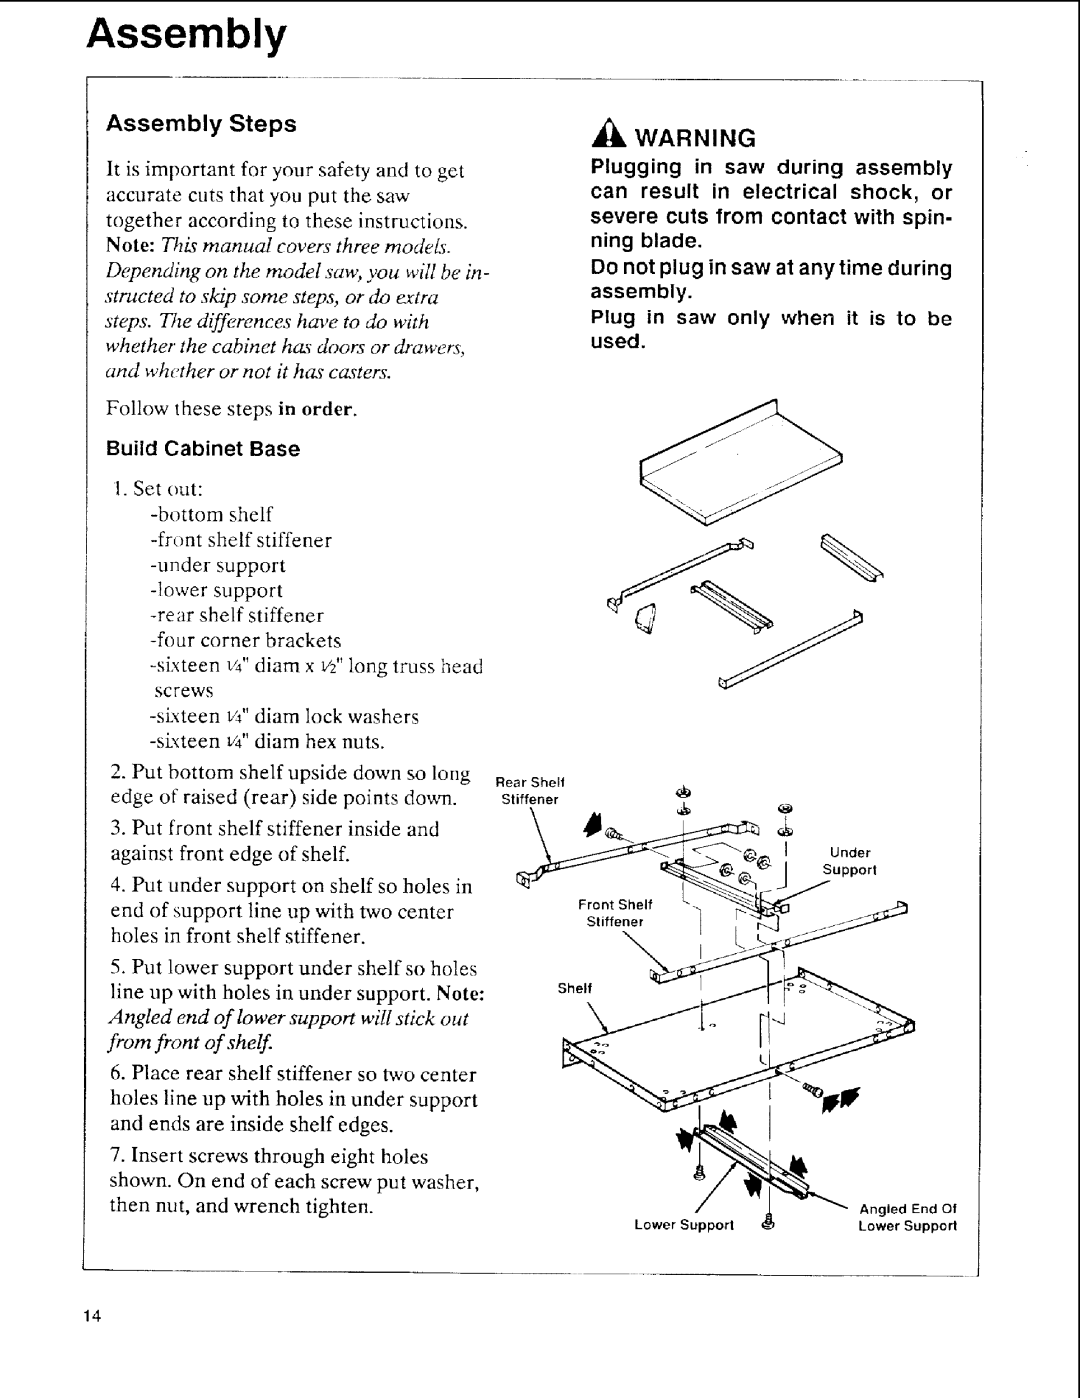
Build Cabinet Base
1. Set out:
2.Put bottom shelf upside down so long edge of raised (rear) side points do_m.
3.Put front shelf stiffener inside and against front edge of shelf.
4.Put under support on shelf so holes in
end of support line up with two center holes in front shelf stiffener.
5.Put lower support under shelf so holes line up with holes in under support. Note:
Angled end of lower support will stick out from front of shelf.
6.Place rear shelf stiffener so two center holes line up with holes in under support and ends are inside shelf edges.
7.Insert screws through eight holes shown. On end of each screw put washer, then m_t, and wrench tighten.
Rear Shell
Stiffener
Shelf
| Angled | End Of |
Lower Support | Lower | Support |
14