Ripping
Ripping Set-up Procedure
Follow these steps before ripping. These
steps must be repeated each time a dif-
ferent thickness workpiece is ripped. A
kerr must be made for each different
width cut.
1. Prepare | table: |
|
|
|
|
|
auxiliary fence when blade is set 1/2to 2" | ||||||
from | fence) |
|
|
|
|
|
table | locks. |
|
|
| ||
2. Prepare | blade: |
|
|
|
| |
radial | arm | at | 0 ° miter |
| ||
motor | at | desired bevel | angle | |||
blade | in | position* |
| |||
blade | carriage | desired | distance | |||
from fence. Make sure wMest part of | ||||||
workpiece will be between blade and fence. | ||||||
*use | ||||||
set 12" or | more | from | fence |
| ||
3.Make kerf:
i)turn saw on
ii)lower blade about vl6" into table
iii)turn saw off and remove yellow key.
4.Place workpiece parallel to and up
against blade. Note: Workpiece wilt be be- tween blade and table front.
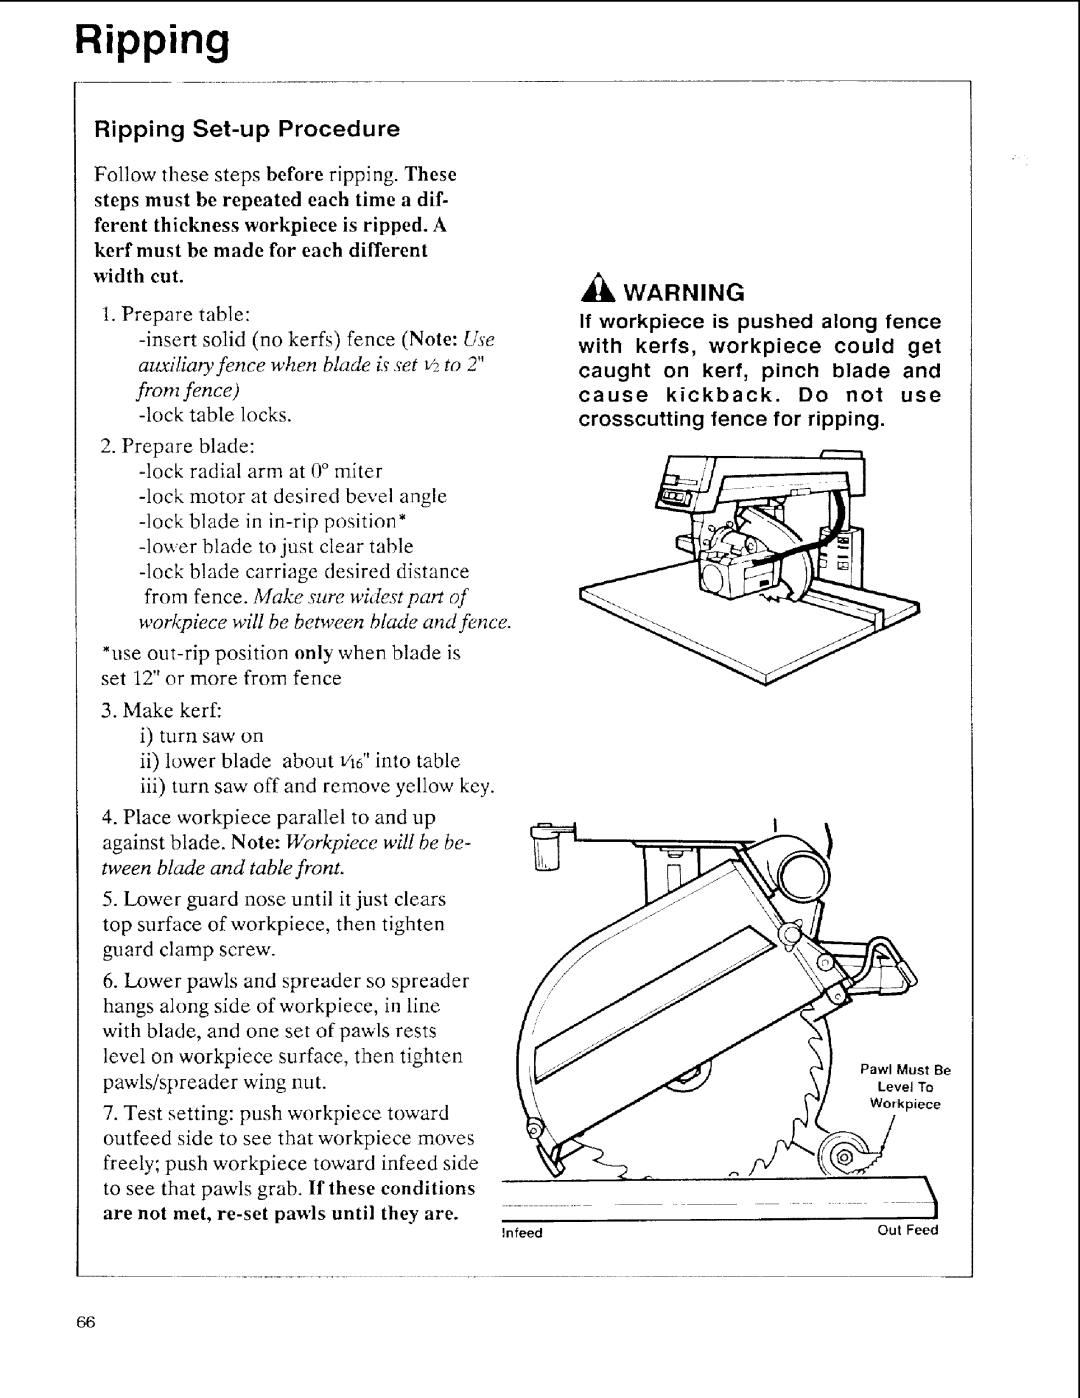
5.lower guard nose until it just clears
top surface of workpiece, then tighten guard clamp screw.
6.Lower pawls and spreader so spreader
hangs along side ofworkpiece, in line with blade, and one set of pawls rests
level on workpiece surface, then tighten
pawls/spreader wing nut.
7.Test setting: push workpiece toward outfeed side to see that workpiece moves
freely; push workpiece toward infeed side
to see that pawls grab. If these conditions
are not met,
Infeed
_, WARNING
If workpiece is pushed along fence
with kerfs, workpiece could get
caught on kerr, pinch blade and
cause kickback. Do not use
crosscutting fence for ripping.
Pawl Must Be
Level To
Workpiece
Out Feed
66