Assembly
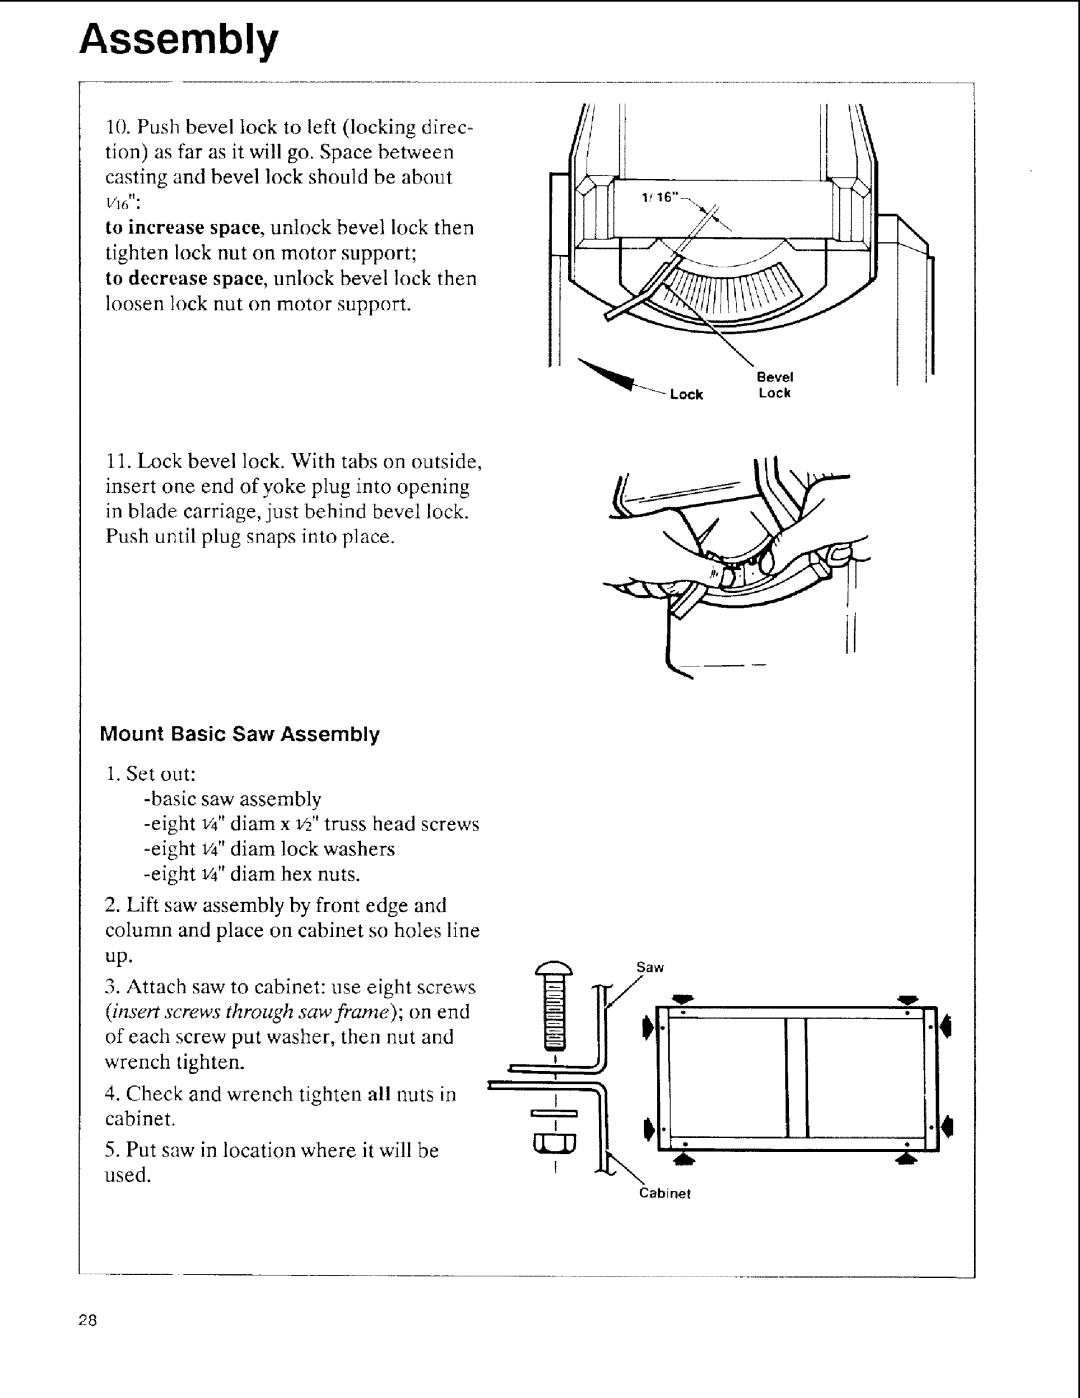
10.Push bevel lock to left (locking direc- tion) as far as it will go. Space between casting and bevel lock should be about
1/16" :
to increase space, unlock bevel lock then tighten lock nut on motor support;
to decrease space, unlock bevel lock then loosen lock nut on motor support.
Bevel
_'_ LockLock
11.Lock bevel lock. With tabs on outside, insert one end of yoke plug into opening in blade carriage, just behind bevel lock. Push until plug snaps into place.
Mount Basic Saw Assembly
1. Set out:
2.Lift saw assembly by front edge and column and place on cabinet so holes line up.
3.Attach saw to cabinet: use eight screw's (insert screws through saw frame); on end of each screw put washer, then nut and
wrench tighten. | .L | ! |
used. |
| I |
k,I | ||
4. Check and wrench tighten all nuts in |
|
|
cabinet. |
|
|
5. Put saw in location where it will be |
|
|
Cabinet
28