Assembly
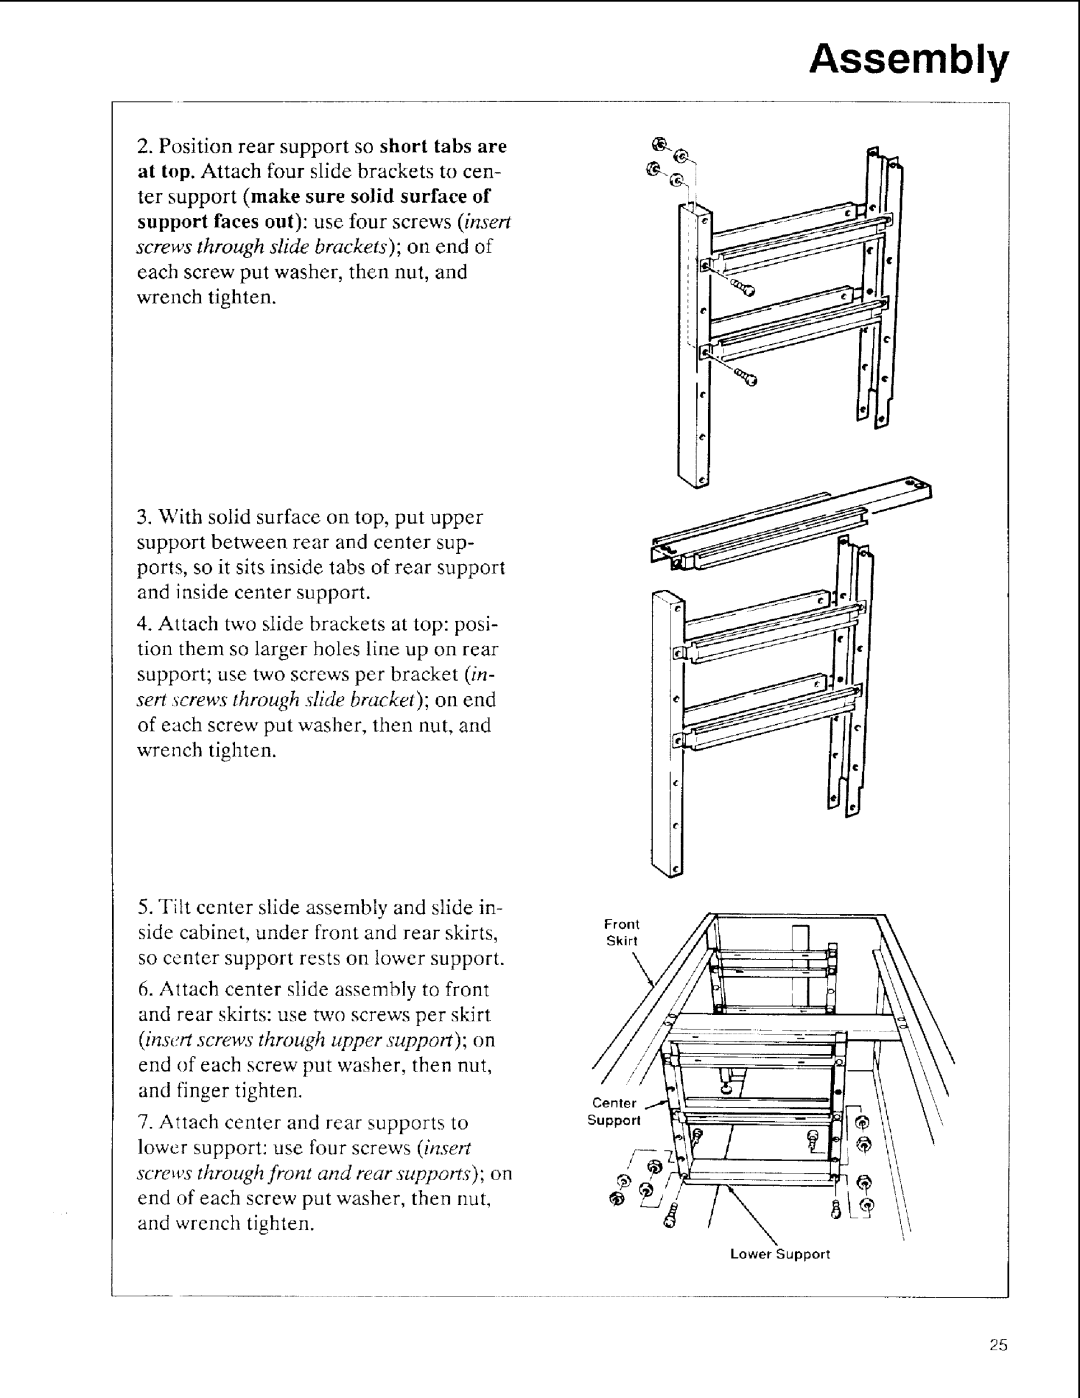
2. Position rear support so short tabs are
at top. Attach four slide brackets to cen-
ter support (make sure solid surface of
support faces out): use four screws (insert screws through slide brackets'); on end of
each screw put washer, then nut, and wrench tighten.
3.With solid surface on top, put upper support between rear and center sup- ports, so it sits inside tabs of rear support and inside center support.
4.Attach two slide brackets at top: posi- tion them so larger holes line up on rear support; use two screws per bracket (in-
sert screws through slide bracket); on end of each screw put washer, then nut, and wrench tighten.
5.Tilt center slide assembly and slide in- side cabinet, under front and rear skirts, so center support rests on lower support.
6.Attach center slide assembly to front and rear skirts: use tw'o screws per skirt (insert screws through upper support); on end of each screw put washer, then nut, and finger tighten.
7.Attach center and rear supports to lower support: use four screws (insert
screws through front and rear supports); on end of each screw put washer, then nut, and wrench tighten.
Front
Skirt
Center
Support
I
/
g
Lower Support
25