Alignment and Adjustment
This section applies to all three models covered by this manual. The saw and blade must be aligned correctly for two reasons:
1)to prevent binding of the blade and workpiece, which can cause jams, kick- backs, or thrown workpieces;
2)to make accurate cuts.
WARNING
Plugging in saw during alignment
could result in accidental
spinning blade.
Do not plug in saw at any time during alignment or adjustment.
Plug in saw only when it is to be used.
Alignment and Adjustment Steps
The following alignments and adjustments must be made in order. If you miss an ad- justment, you must go back, make the
missed adjustment, and repeat all steps from that point on.
These adjustments are like fine tuning a
piece of equipment. Often, a series of steps must be repeated more than once in
order to get the adjustment right.
There are many adjustments to make. Be-
cause some adjustments may be awkward, you may want to ask someone to help you.
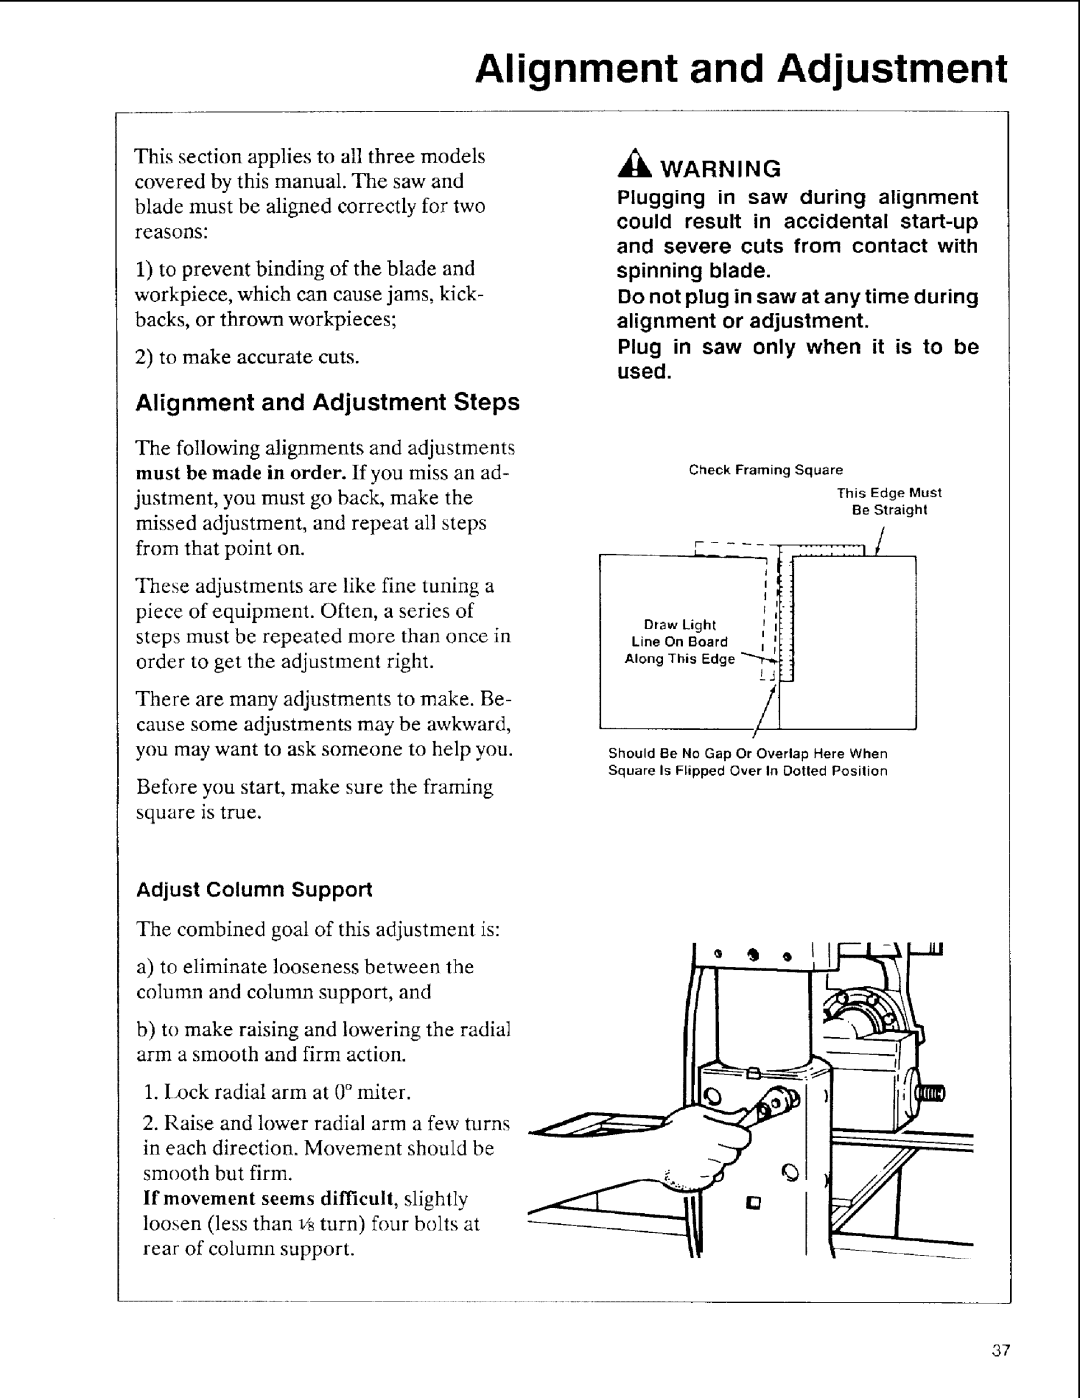
Before you start, make sure the framing squ_re is true.
Adjust Column Support
The combined goal of this adjustment is:
a)to eliminate looseness between the column and column support, and
b)to make raising and lowering the radial arm a smooth and firm action.
1.ix3ck radial arm at 0 ° miter.
2.Raise and lower radial arm a few turns in each direction. Movement shouId be smooth but firm.
If movement seems difficult, slightly loosen (less than v_ turn) four bolts at rear of colurma support.
Check Framing Square
This Edge Must
Be Straight
|
| |
|
| 1 |
|
| 1 |
|
| I |
|
| I |
Draw | Light | I |
Line On Board | j | |
Along | This Edge |
|
|
| /LJ |
Should Be No Gap Or Overlap Here When Square Is Flipped Over In Dotted Position
37