Cutting Aides
Auxiliary Fence for Edging
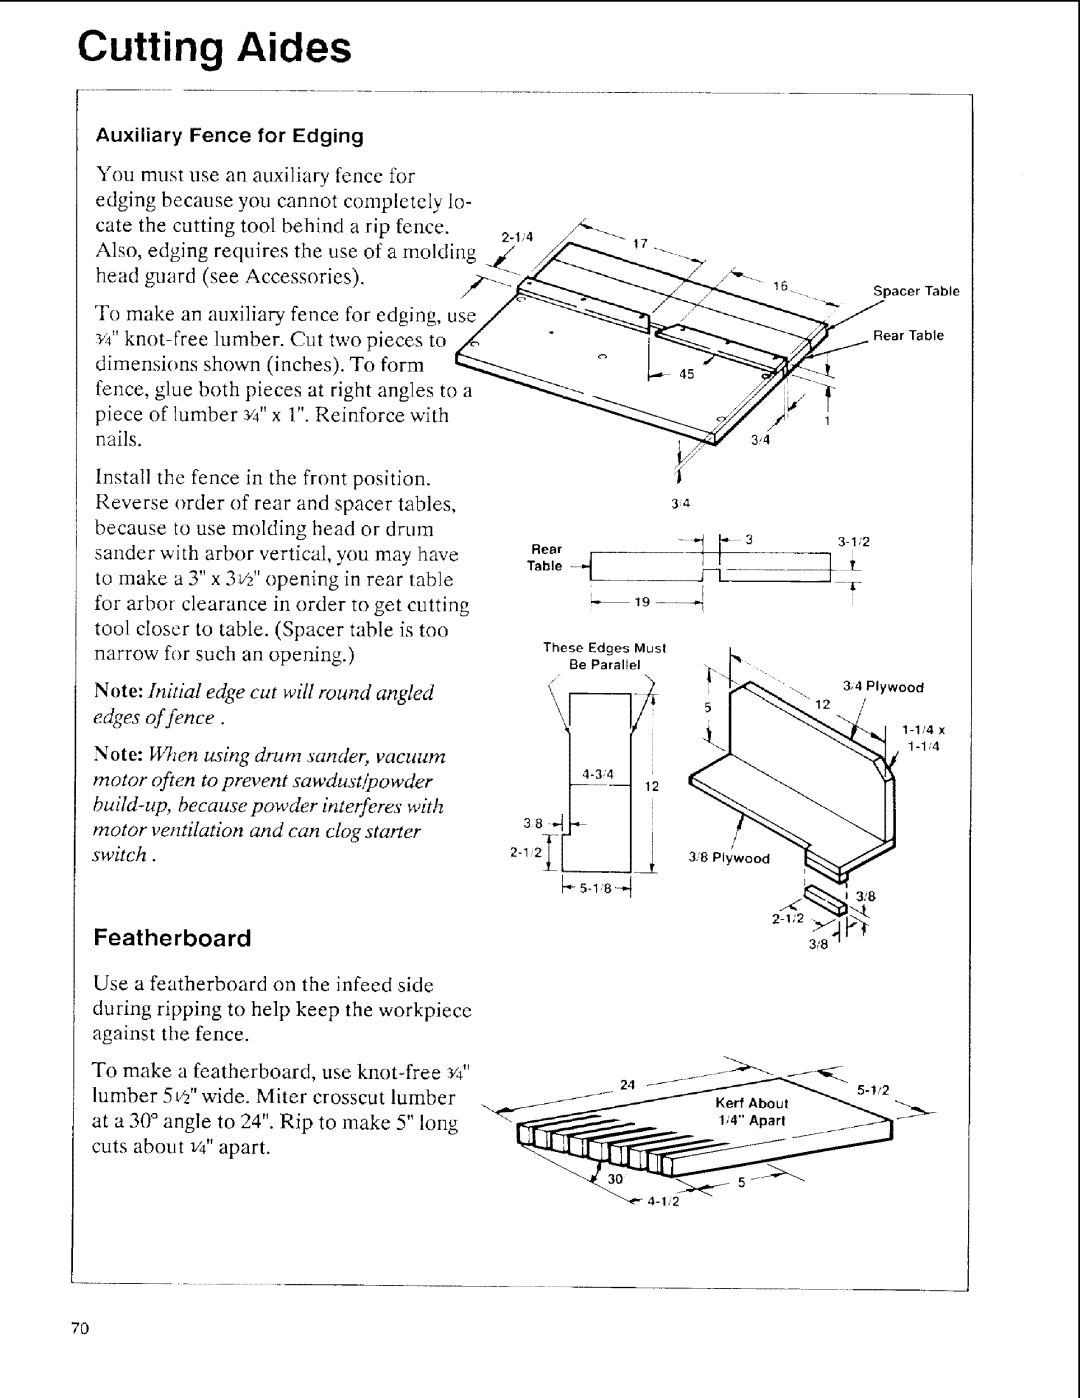
You must use an auxiliary fence for
edging because you cannot completely lo-
cate the cutting tool behind a rip fence.
Also, edging requires the use of a molding head guard (see Accessories).
To make an auxiliary fence for edging, use
dimensions shown (inches). To form
fence, glue both pieces at right angles to a piece of lumber _/4"x 1". Reinforce with nails.
Install the fence in the front position. Reverse order of rear and spacer tables, because to use molding head or drum sander with arbor vertical, you may have to make a 3" x 31/F opening in rear table for arbor clearance in order to get cutting tool closer to table. (Spacer table is too narrow for such an opening.)
Note: Initial edge cut will round angled
edges offence.
Note: I47zen using drum sander, vacuum motor @en to prevent sawdust!powder
Featherboard
Use a featherboard on the infeed side during ripping to help keep the workpiece against the fence.
To make a featherboard, use
at a 30 ° angle to 24". Rip to make 5" long cuts about 1/4"apart.
17
16 | Spacer Table |
| |
| Rear Table |
| 3¸¸¸4 |
|
|
|
Rear | - 1 |
| ||
Table- 4 | _ |
| _ | _ |
|
|
|
| U |
| _19_ |
|
|
|
These | Edges Musl |
|
|
|
Be | Parallel |
|
|
|
\ |
|
|
| 3,4 Plywood |
|
|
|
| |
|
| 5 | "12 | / |
1 - 1/4 x
l!
3,'8 Plywood
_'_
3/8
3/8
5
7O