Ripping
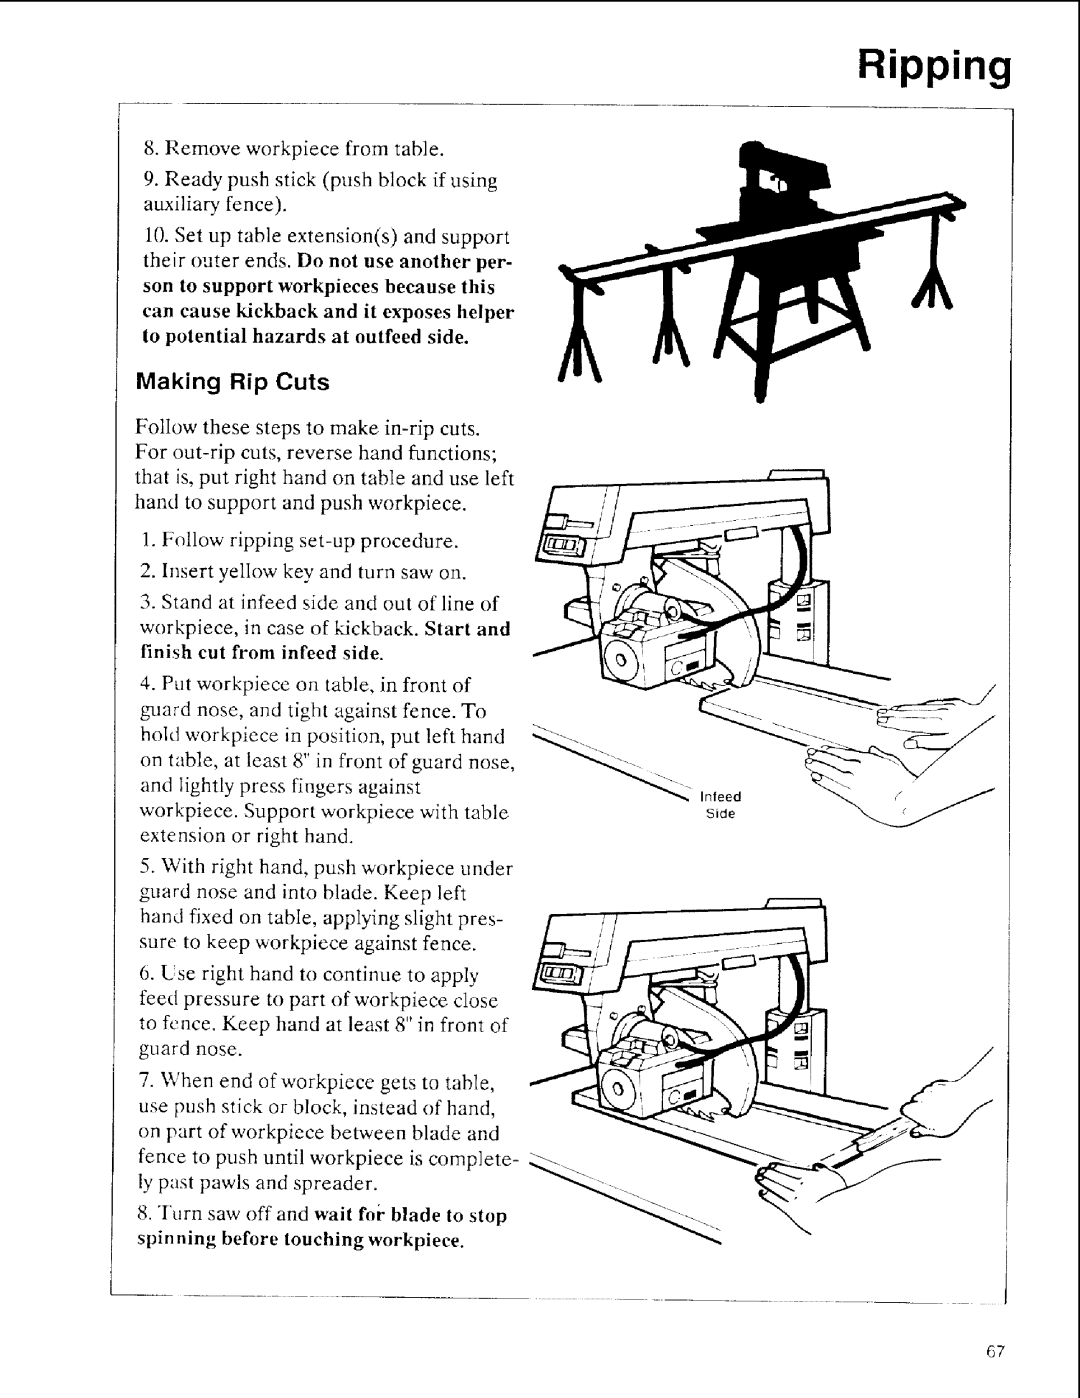
8. Remove workpiece from table.
9.Ready push stick (push block if using auxiliary fence).
10.Set up table extension(s) and support their outer ends. Do not use another per-
son to support workpieces because this can cause kickback and it exposes helper to potential hazards at outfeed side.
Making Rip Cuts
Follow these steps to make
1.Follow ripping
2.lnsert yellow key and turn saw on.
3.Stand at infeed side and out of line of
workpiece, in case of kickback. Start and finish cut from infeed side.
4.Put workpiece on table, in front of guard nose, and tight against fence. To
hold workpiece in position, put left hand _...
on table, at least 8" in front of guard nose,
and lightly | press fingers against | _ | Inleed | |
workpiece. | Support | workpiece with table |
| s,ae |
extension | or right | hand. |
|
|
5.With right hand, push workpiece under guard nose and into blade. Keep left hand fixed on table, applying slight pres- sure to keep workpiece against fence.
6.Lse right hand to continue to apply feed pressure to part of workpiece close to fence. Keep hand at least 8" in front of guard nose.
7.When end ofworkpiece gets to table, use push stick or block, instead of hand, on part of workpiece between blade and
fence to push until workpiece is complete- ",_. ly past pawls and spreader.
8."l't_rn saw off and wait foi" blade to stop spinning before touching workpieee.
..................... | ] |
67