Finish Cabinet (Only Door Models; Drawer Model: Go to "Complete Cen-
ter Slide Assembly")
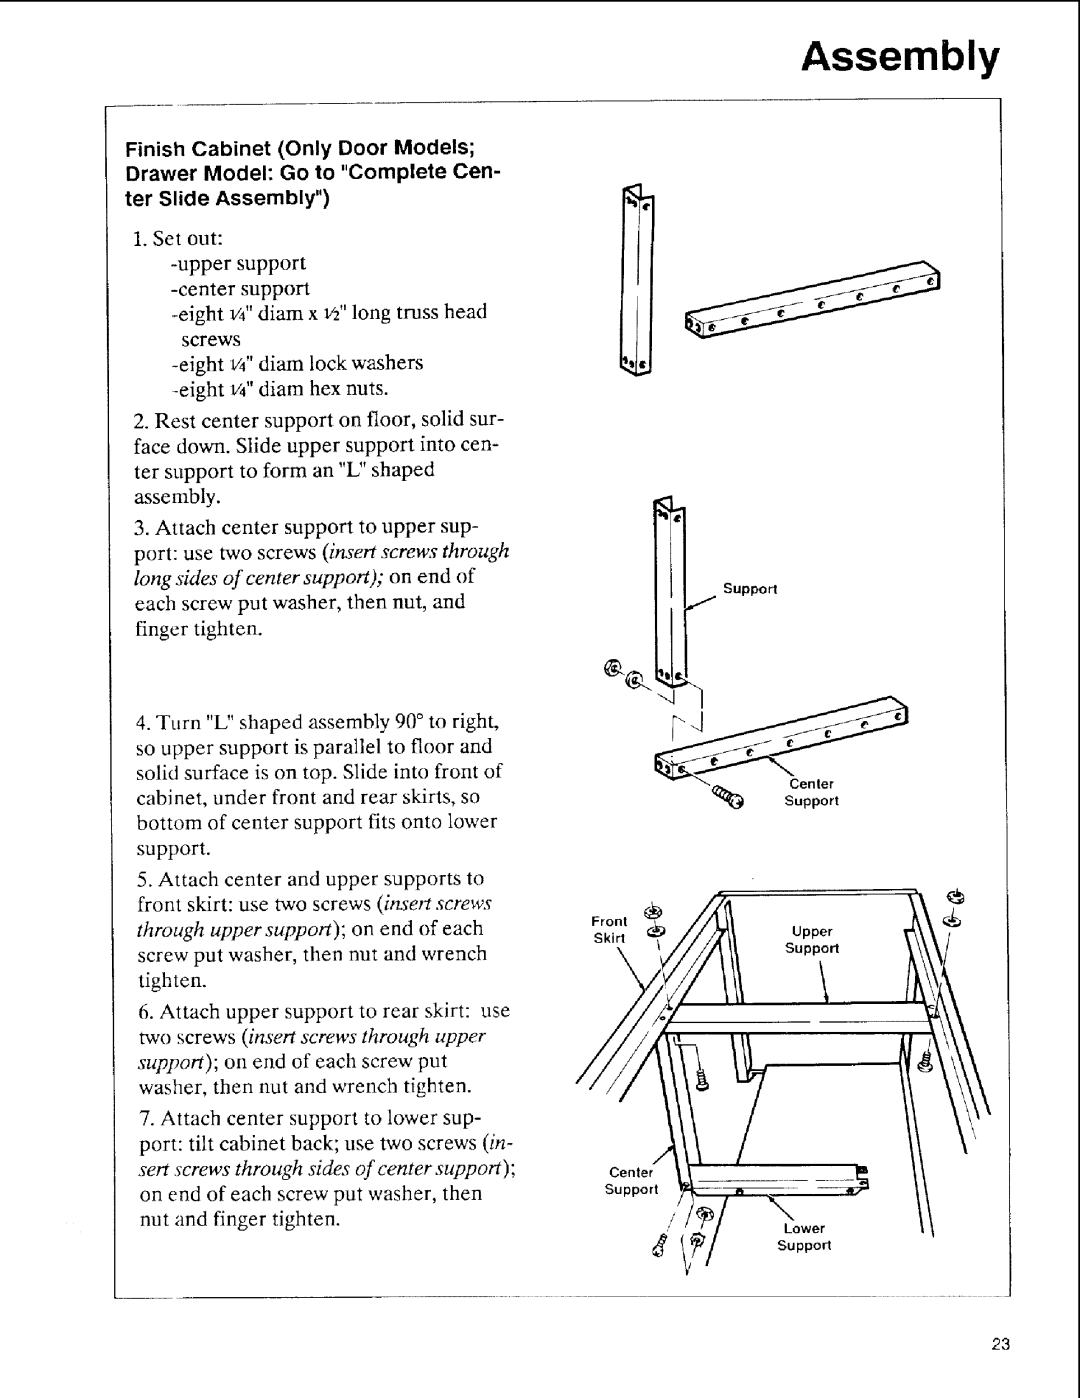
1. Set out:
screws
2.Rest center support on floor, solid sur- face down. Slide upper support into cen-
ter support to form an "L" shaped assembly.
Assembly
3.Attach center support to upper sup- port: use two screws (insert screws through long sides of center support); on end of
each screw put washer, then nut, and finger tighten.
4.Turn "L" shaped assembly 90 ° to right, so upper support is parallel to floor and solid surface is on top. Slide into front of cabinet, under front and rear skirts, so bottom of center support fits onto lower support.
5.Attach center and upper supports to front skirt: use two screws (insert screws through upper support); on end of each screw put washer, then nut and wrench tighten.
6.Attach upper support to rear skirt: use two screws (insert screws through upper support); on end of each screw put washer, then nut and wrench tighten.
7.Attach center support to lower sup- port: tilt cabinet back; use two screws (in-
sert screws through sides of center support); on end of each screw put washer, then nut and finger tighten.
Front
Skirt
\
Center
Support
Support
_-
Center
Support
Upper
Support
Lower
Support
23
