Grounding:
Before any connection to the output connectors is made, the unit shall be connected to a protective earth conductor via the
Several installation tips are listed below:
After installation, the extra length of the power cord, if any, should be neatly arranged to avoid any tripping accidents. The EQUIPMENT should be firmly placed at position where users/doctors can access easily.
4. OPERATION
![]() NOTE: Always read the operating instruction before use.
NOTE: Always read the operating instruction before use.
4.1 GENERAL OPERATION
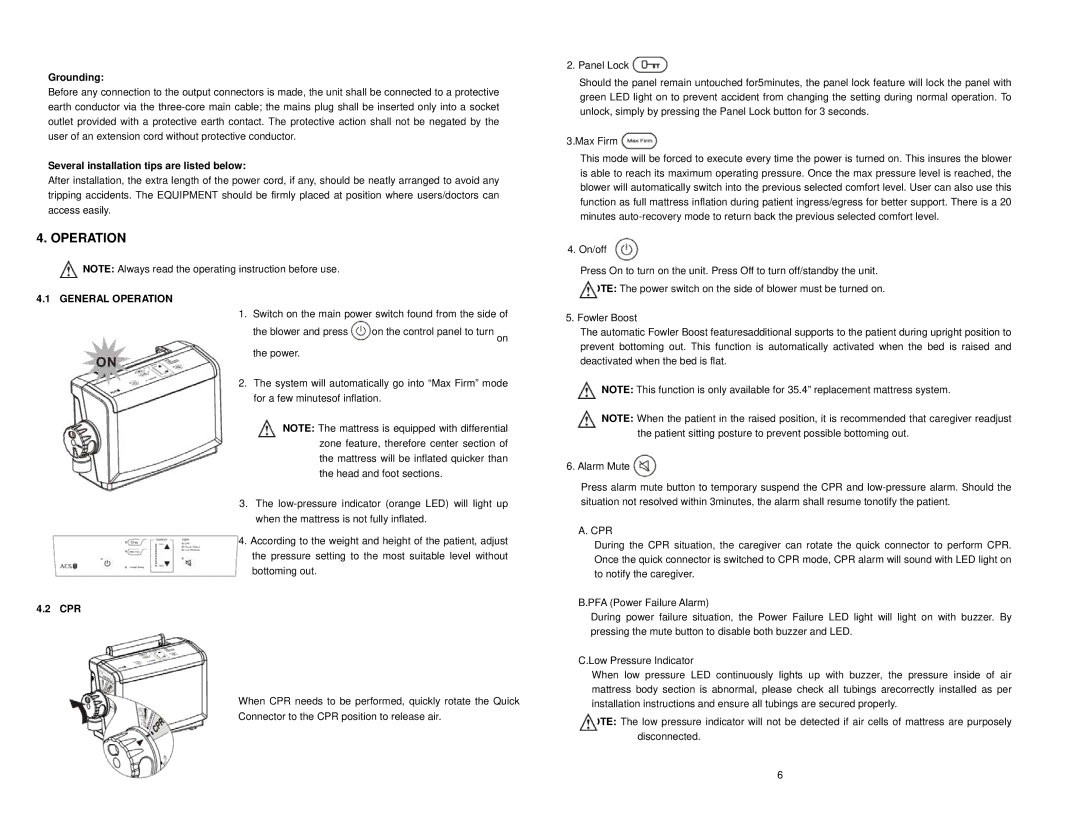
1.Switch on the main power switch found from the side of
the blower and press ![]() on the control panel to turn on the power.
on the control panel to turn on the power.
2.The system will automatically go into “Max Firm” mode for a few minutesof inflation.
NOTE: The mattress is equipped with differential zone feature, therefore center section of the mattress will be inflated quicker than the head and foot sections.
3.The
4.According to the weight and height of the patient, adjust the pressure setting to the most suitable level without bottoming out.
4.2 CPR
When CPR needs to be performed, quickly rotate the Quick
Connector to the CPR position to release air.
2.Panel Lock ![]()
Should the panel remain untouched for5minutes, the panel lock feature will lock the panel with green LED light on to prevent accident from changing the setting during normal operation. To unlock, simply by pressing the Panel Lock button for 3 seconds.
3.Max Firm ![]()
This mode will be forced to execute every time the power is turned on. This insures the blower is able to reach its maximum operating pressure. Once the max pressure level is reached, the blower will automatically switch into the previous selected comfort level. User can also use this function as full mattress inflation during patient ingress/egress for better support. There is a 20 minutes
4.On/off 
Press On to turn on the unit. Press Off to turn off/standby the unit. NOTE: The power switch on the side of blower must be turned on.
5.Fowler Boost
The automatic Fowler Boost featuresadditional supports to the patient during upright position to prevent bottoming out. This function is automatically activated when the bed is raised and deactivated when the bed is flat.
NOTE: This function is only available for 35.4” replacement mattress system.
NOTE: When the patient in the raised position, it is recommended that caregiver readjust the patient sitting posture to prevent possible bottoming out.
6. Alarm Mute ![]()
Press alarm mute button to temporary suspend the CPR and
A. CPR
During the CPR situation, the caregiver can rotate the quick connector to perform CPR. Once the quick connector is switched to CPR mode, CPR alarm will sound with LED light on to notify the caregiver.
B.PFA (Power Failure Alarm)
During power failure situation, the Power Failure LED light will light on with buzzer. By pressing the mute button to disable both buzzer and LED.
C.Low Pressure Indicator
When low pressure LED continuously lights up with buzzer, the pressure inside of air mattress body section is abnormal, please check all tubings arecorrectly installed as per installation instructions and ensure all tubings are secured properly.
NOTE: The low pressure indicator will not be detected if air cells of mattress are purposely disconnected.
6
