Dynacord DTI 2000 owner manual Remove these screws Loosen these screws

Models: DTI 2000

1 14
Download 14 pages 4.52 Kb
Page 6
Image 6

2.2Internal DIP switches (S202 and S203)

To make any changes to the internal DIP-switch settings, you first have to remove the cover plate by loosening/removing the screws on the rear panel, as indicated in the diagram below.

Remove these screws

Loosen these screws

Slightly lift the cover plate at the rear and remove it. Now you are able to change the DIP-switch settings.

For installing the cover plate back in place, first position the case top in the guidance slots of the case bottom and slide it in as far to the front until it rests in place. Put the screws back in place and tighten them. Do not forget to tighten the previously loosened screws.

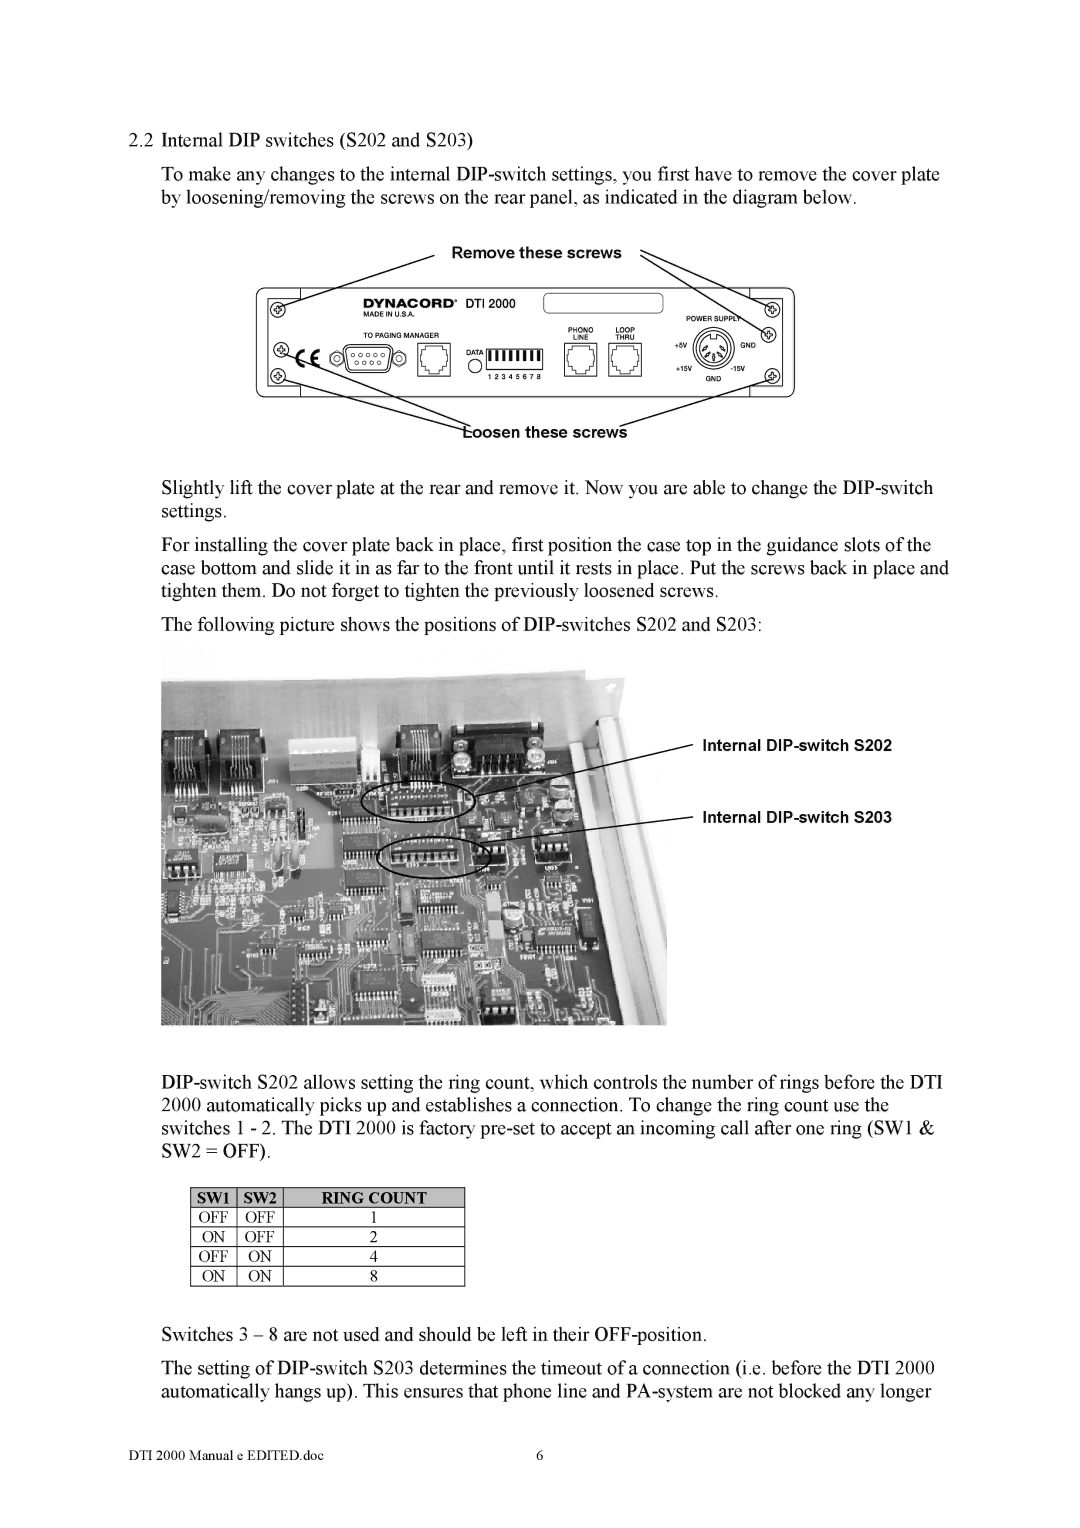
The following picture shows the positions of DIP-switches S202 and S203:

Internal DIP-switch S202

Internal DIP-switch S203

DIP-switch S202 allows setting the ring count, which controls the number of rings before the DTI 2000 automatically picks up and establishes a connection. To change the ring count use the switches 1 - 2. The DTI 2000 is factory pre-set to accept an incoming call after one ring (SW1 & SW2 = OFF).

SW1

SW2

RING COUNT

OFF

OFF

1

ON

OFF

2

OFF

ON

4

ON

ON

8

Switches 3 – 8 are not used and should be left in their OFF-position.

The setting of DIP-switch S203 determines the timeout of a connection (i.e. before the DTI 2000 automatically hangs up). This ensures that phone line and PA-system are not blocked any longer

DTI 2000 Manual e EDITED.doc

6

Page 6
Image 6
Dynacord DTI 2000 owner manual Remove these screws Loosen these screws