Intelligent Technologies (IT.) QSNAP
February 2002
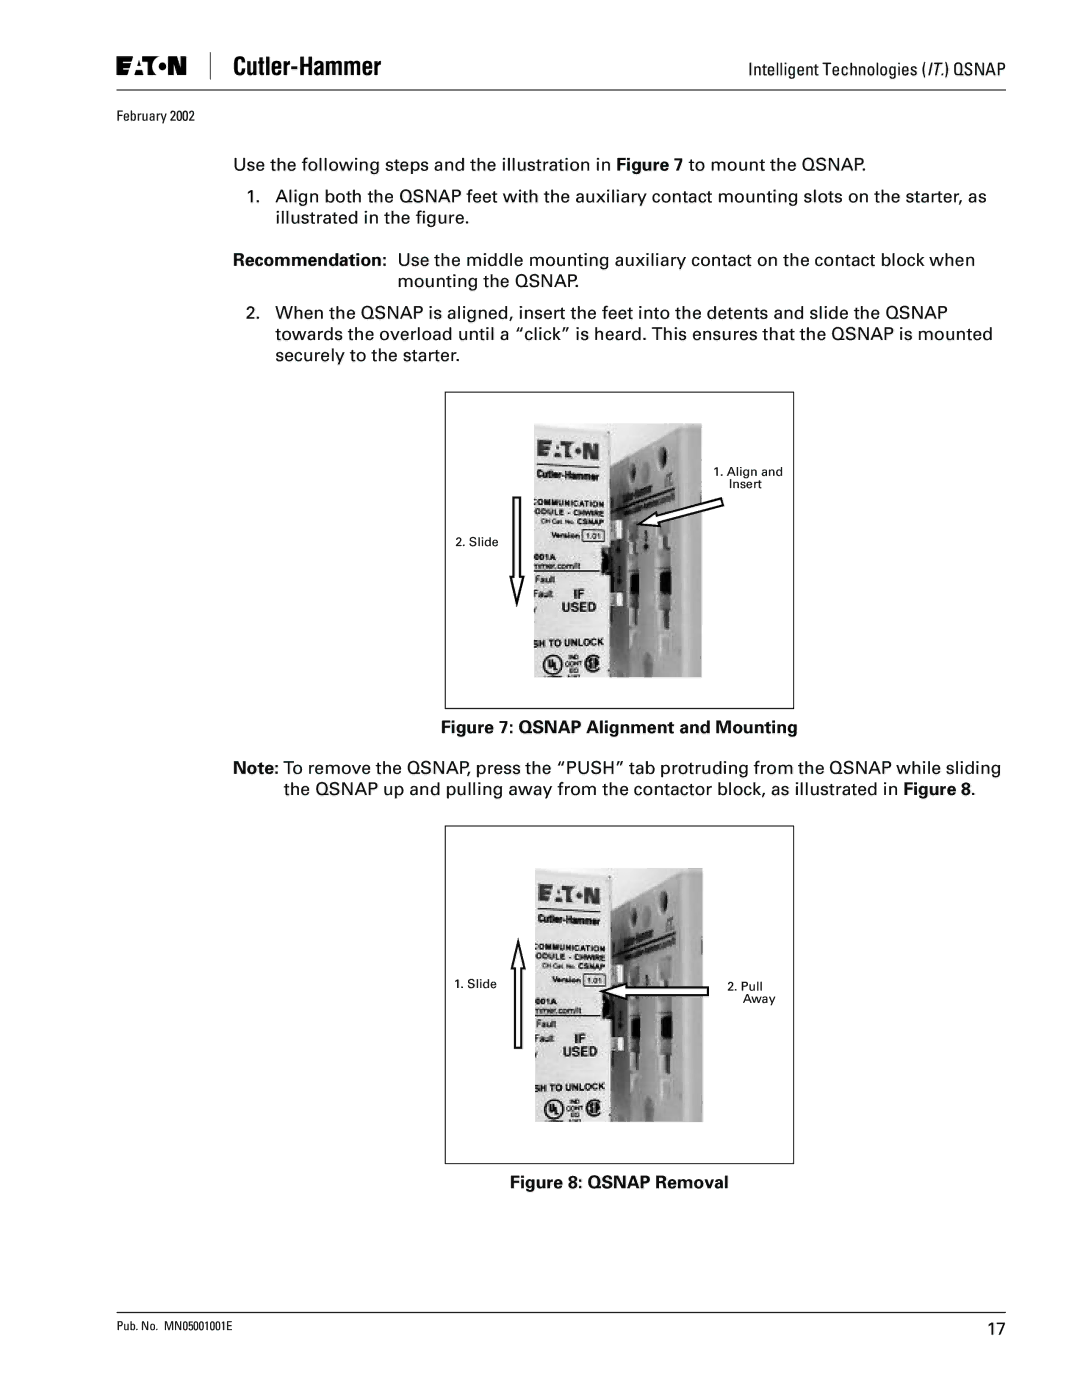
Use the following steps and the illustration in Figure 7 to mount the QSNAP.
1.Align both the QSNAP feet with the auxiliary contact mounting slots on the starter, as illustrated in the figure.
Recommendation: Use the middle mounting auxiliary contact on the contact block when mounting the QSNAP.
2.When the QSNAP is aligned, insert the feet into the detents and slide the QSNAP towards the overload until a “click” is heard. This ensures that the QSNAP is mounted securely to the starter.
1. Align and
Insert
2. Slide
Figure 7: QSNAP Alignment and Mounting
Note: To remove the QSNAP, press the “PUSH” tab protruding from the QSNAP while sliding the QSNAP up and pulling away from the contactor block, as illustrated in Figure 8.
1. Slide | 2. Pull |
| Away |
Figure 8: QSNAP Removal
Pub. No. MN05001001E | 17 |