Part Names and Functions
Remote Control
e w | q | ||||||
|
|
|
|
|
|
|
|
|
|
|
|
|
|
|
|
|
|
|
|
|
|
|
|
r![]()
![]() !5
!5
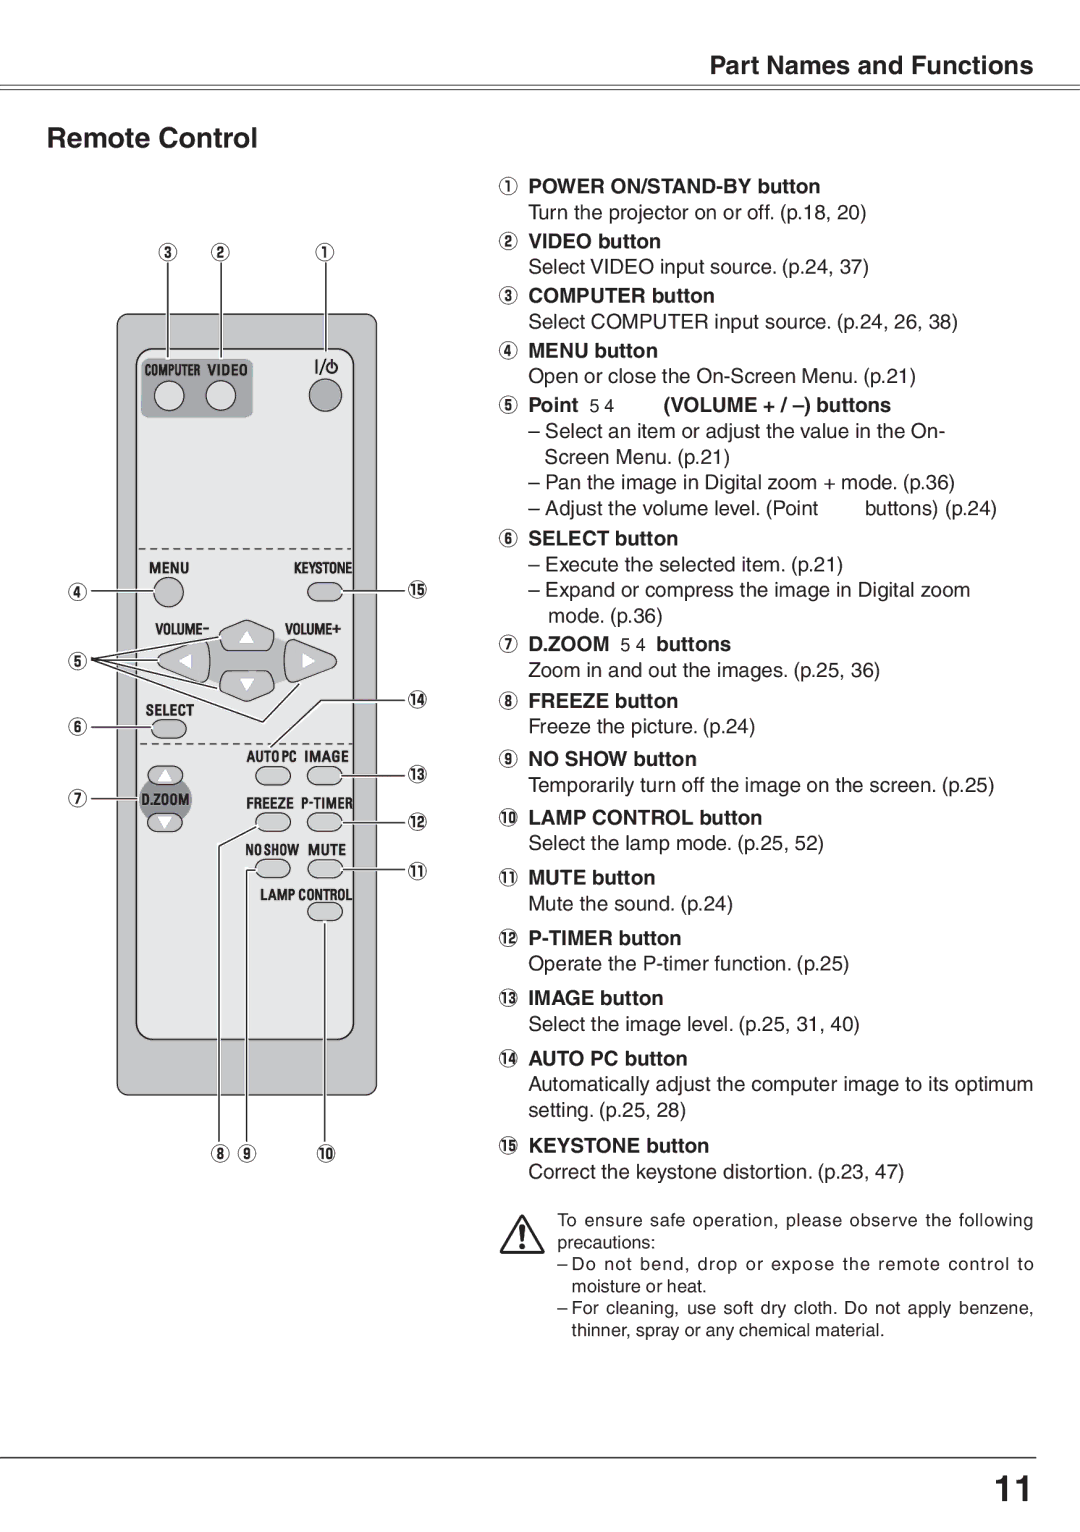
qPOWER
wVIDEO button
Select VIDEO input source. (p.24, 37)
eCOMPUTER button
Select COMPUTER input source. (p.24, 26, 38)
rMENU button
Open or close the
tPoint ed 7 8 (VOLUME + / –) buttons
–Select an item or adjust the value in the On- Screen Menu. (p.21)
–Pan the image in Digital zoom + mode. (p.36)
–Adjust the volume level. (Point 7 8 buttons) (p.24) y SELECT button
–Execute the selected item. (p.21)
–Expand or compress the image in Digital zoom mode. (p.36)
t |
| u D..ZOOM ed buttons | |
| Zoom in and out the images. (p.25, 36) | ||
|
| ||
| !4 | i FREEZE button | |
y |
| Freeze the picture. (p.24) | |
| !3 | o NO SHOW button | |
| Temporarily turn off the image on the screen. (p.25) | ||
u |
| ||
| !0LAMP CONTROL button | ||
| !2 | ||
|
| Select the lamp mode. (p.25, 52) | |
| !1 | !1MUTE button | |
|
| ||
|
| Mute the sound. (p.24) | |
|
| ||
|
| Operate the | |
|
| !3IMAGE button | |
|
| Select the image level. (p.25, 31, 40) | |
|
| !4AUTO PC button | |
|
| Automatically adjust the computer image to its optimum | |
|
| setting. (p.25, 28) | |
i o | !0 | !5KEYSTONE button | |
Correct the keystone distortion. (p.23, 47) | |||
|
|
To ensure safe operation, please observe the following precautions:
– Do not bend, drop or expose the remote control to moisture or heat.
– For cleaning, use soft dry cloth. Do not apply benzene, thinner, spray or any chemical material.
11