EMERSON QUICK START GUIDE
Wiring Ceiling Fan (page 10)
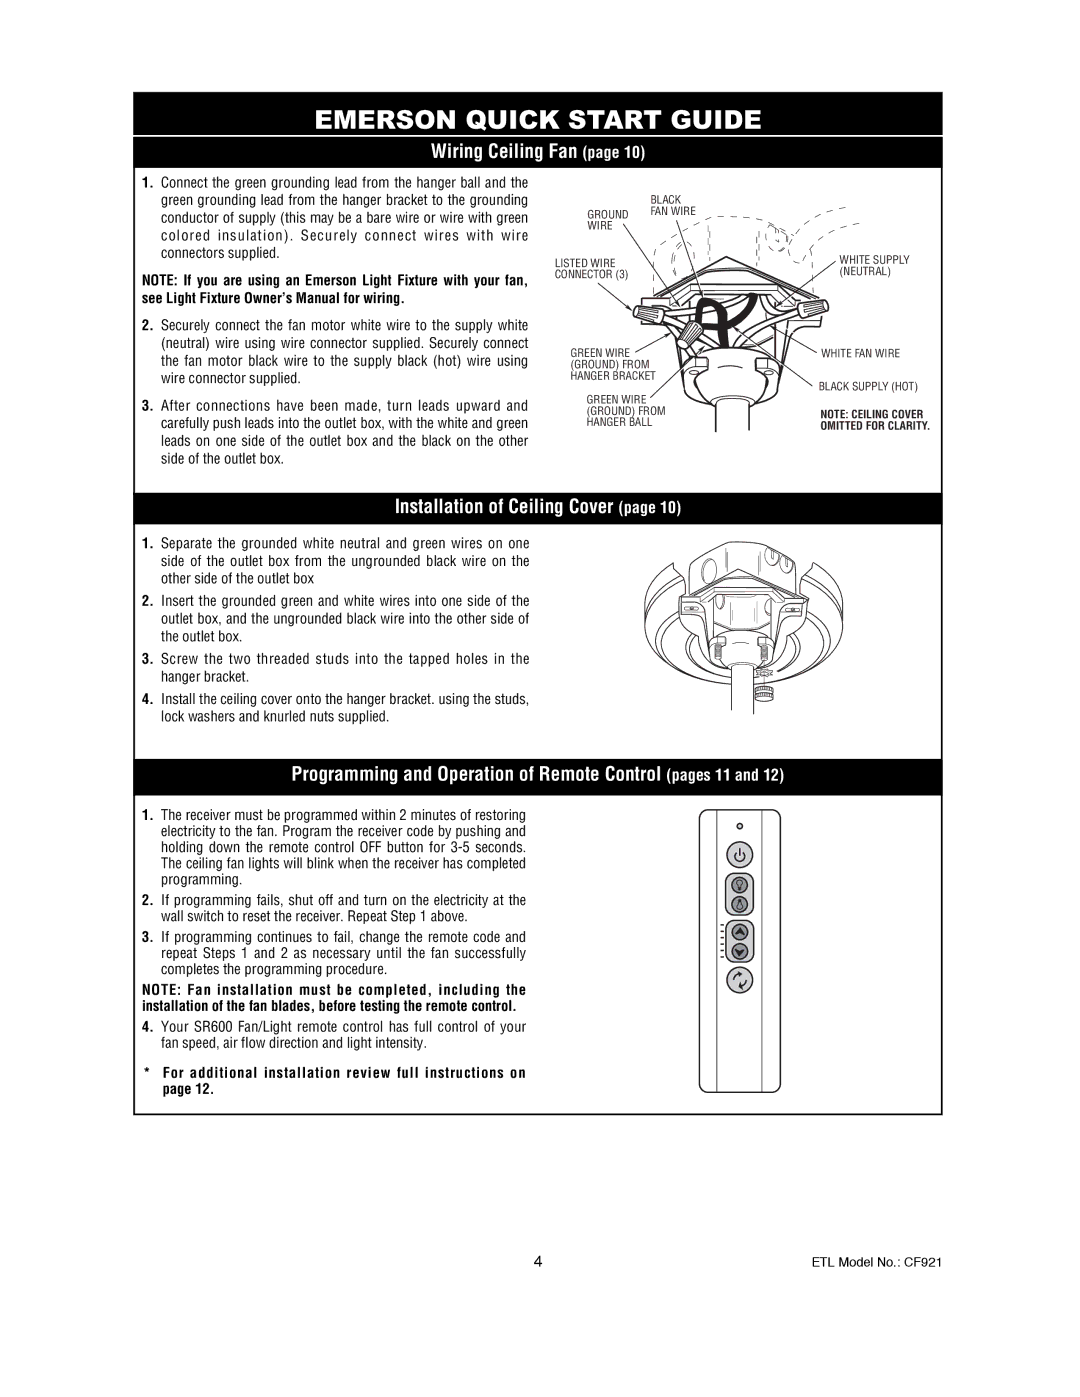
1.Connect the green grounding lead from the hanger ball and the green grounding lead from the hanger bracket to the grounding conductor of supply (this may be a bare wire or wire with green colored insulation). Securely connect wires with wire connectors supplied.
NOTE: If you are using an Emerson Light Fixture with your fan, see Light Fixture Owner’s Manual for wiring.
2.Securely connect the fan motor white wire to the supply white (neutral) wire using wire connector supplied. Securely connect the fan motor black wire to the supply black (hot) wire using wire connector supplied.
3.After connections have been made, turn leads upward and carefully push leads into the outlet box, with the white and green leads on one side of the outlet box and the black on the other side of the outlet box.
| BLACK |
|
GROUND | FAN WIRE |
|
WIRE |
|
|
LISTED WIRE |
| WHITE SUPPLY |
CONNECTOR (3) |
| (NEUTRAL) |
GREEN WIRE |
| WHITE FAN WIRE |
(GROUND) FROM |
|
|
HANGER BRACKET | BLACK SUPPLY (HOT) | |
GREEN WIRE |
| |
|
| |
(GROUND) FROM | NOTE: CEILING COVER | |
HANGER BALL | OMITTED FOR CLARITY. | |
|
| |
Installation of Ceiling Cover (page 10)
1.Separate the grounded white neutral and green wires on one side of the outlet box from the ungrounded black wire on the other side of the outlet box
2. Insert the grounded green and white wires into one side of the outlet box, and the ungrounded black wire into the other side of the outlet box.
3. Screw the two threaded studs into the tapped holes in the hanger bracket.
4. Install the ceiling cover onto the hanger bracket. using the studs, lock washers and knurled nuts supplied.
Programming and Operation of Remote Control (pages 11 and 12)
1.The receiver must be programmed within 2 minutes of restoring
electricity to the fan. Program the receiver code by pushing and holding down the remote control OFF button for
2. If programming fails, shut off and turn on the electricity at the wall switch to reset the receiver. Repeat Step 1 above.
3. If programming continues to fail, change the remote code and repeat Steps 1 and 2 as necessary until the fan successfully completes the programming procedure.
NOTE: Fan installation must be completed, including the installation of the fan blades, before testing the remote control.
4.Your SR600 Fan/Light remote control has full control of your fan speed, air flow direction and light intensity.
*For additional installation review full instructions on page 12.
4 | ETL Model No.: CF921 |
