ELECTRONIC TIMER |
|
| A |
| B C |
|
|
| ||
|
|
|
|
|
|
|
| |||
|
|
|
|
|
|
|
| |||
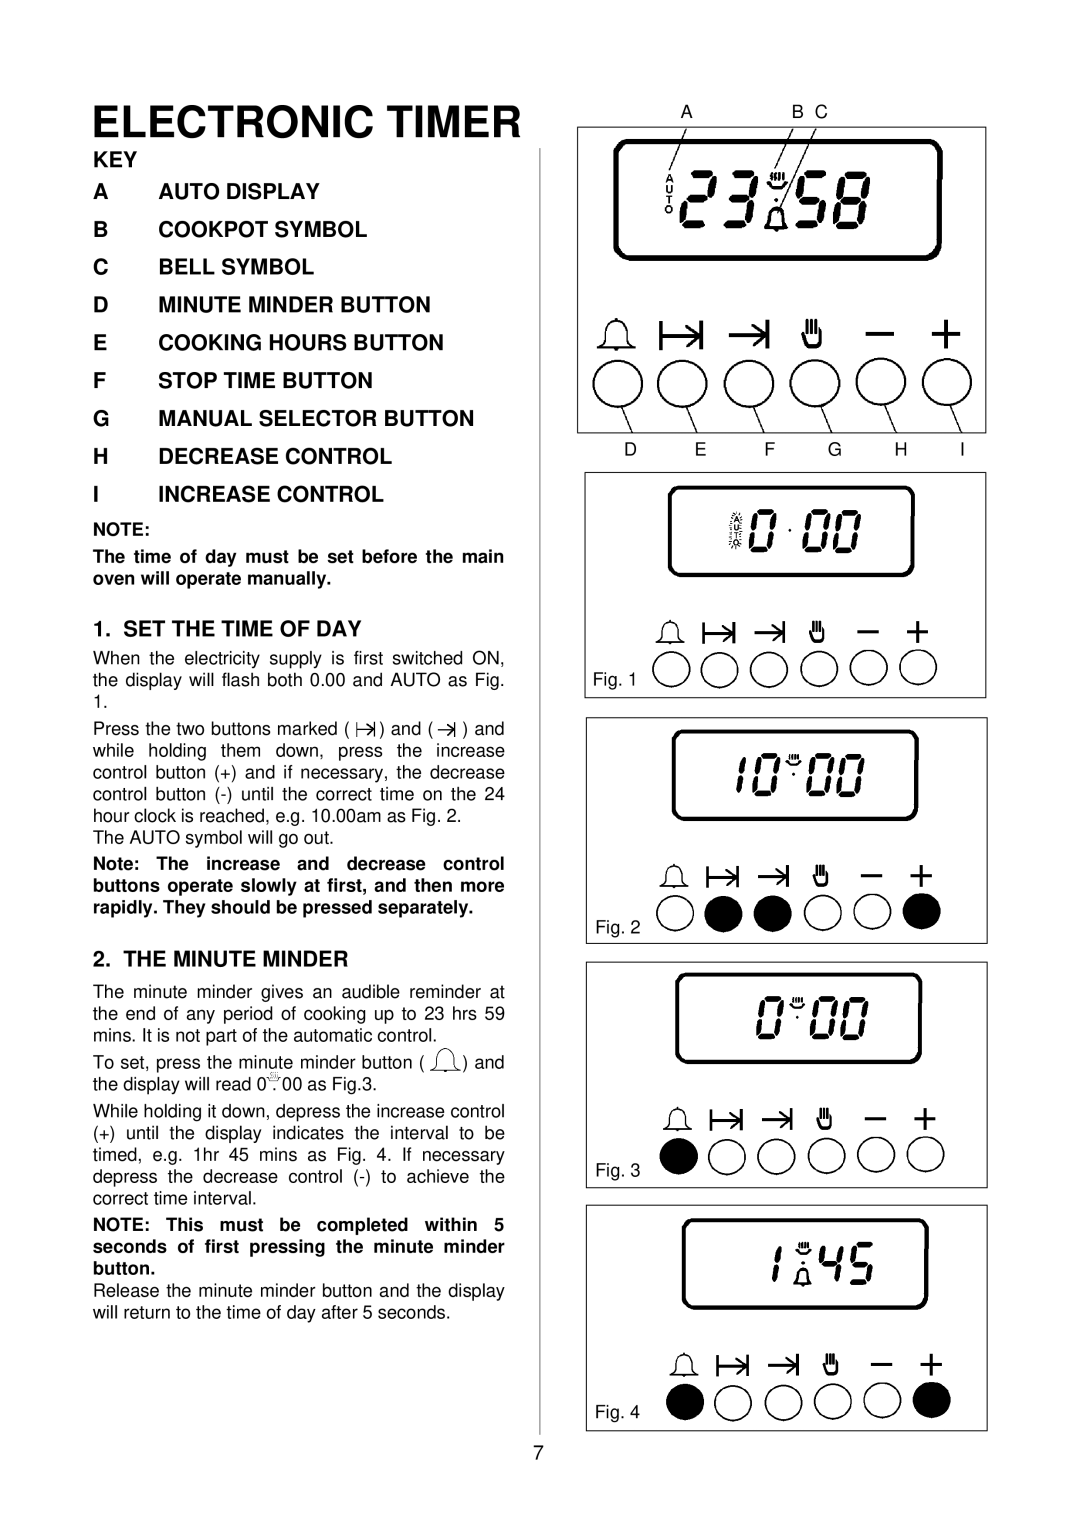
KEY |
|
|
|
|
|
|
|
|
|
|
A | AUTO DISPLAY |
|
|
|
|
|
|
|
|
|
B | COOKPOT SYMBOL |
|
|
|
|
|
|
|
|
|
C | BELL SYMBOL |
|
|
|
|
|
|
|
|
|
D | MINUTE MINDER BUTTON |
|
|
|
|
|
|
|
|
|
E | COOKING HOURS BUTTON |
|
|
|
|
|
|
|
|
|
F | STOP TIME BUTTON |
|
|
|
|
|
|
|
|
|
G | MANUAL SELECTOR BUTTON |
|
|
|
|
|
|
|
| |
H | DECREASE CONTROL |
|
| D | E | F | G | H | I | |
I | INCREASE CONTROL |
|
|
|
|
|
|
|
|
|
|
|
|
|
|
|
|
|
| ||
NOTE: |
|
|
|
|
|
|
|
|
|
|
The time of day must be set before the main |
|
|
|
|
|
|
|
| ||
oven will operate manually. |
|
|
|
|
|
|
|
|
| |
1. SET THE TIME OF DAY |
|
|
|
|
|
|
|
|
| |
When the electricity supply is first switched ON, |
|
|
|
|
|
|
|
| ||
the display will flash both 0.00 and AUTO as Fig. |
| Fig. 1 |
|
|
|
|
|
| ||
1. |
|
|
|
|
|
|
|
|
|
|
|
|
|
|
|
|
|
|
|
| |
Press the two buttons marked ( ) and ( | ) and |
|
|
|
|
|
|
|
| |
|
|
|
|
|
|
|
| |||
while holding them down, press the increase |
|
|
|
|
|
|
|
| ||
control button (+) and if necessary, the decrease |
|
|
|
|
|
|
|
| ||
control button |
|
|
|
|
|
|
|
| ||
hour clock is reached, e.g. 10.00am as Fig. 2. |
|
|
|
|
|
|
|
|
| |
The AUTO symbol will go out. |
|
|
|
|
|
|
|
|
| |
Note: The increase and decrease control |
|
|
|
|
|
|
|
| ||
buttons operate slowly at first, and then more |
|
|
|
|
|
|
|
| ||
rapidly. They should be pressed separately. |
| Fig. 2 |
|
|
|
|
|
| ||
|
|
|
|
|
|
|
|
|
| |
2. THE MINUTE MINDER |
|
|
|
|
|
|
|
|
| |
|
|
|
|
|
|
|
|
| ||
|
|
|
|
|
|
|
|
| ||
The minute minder gives an audible reminder at |
|
|
|
|
|
|
|
| ||
the end of any period of cooking up to 23 hrs 59 |
|
|
|
|
|
|
|
| ||
mins. It is not part of the automatic control. |
|
|
|
|
|
|
|
|
| |
To set, press the minute minder button ( | ) and |
|
|
|
|
|
|
|
| |
the display will read 0 . 00 as Fig.3. |
|
|
|
|
|
|
|
|
| |
While holding it down, depress the increase control |
|
|
|
|
|
|
|
| ||
(+) until the display indicates the interval to be |
|
|
|
|
|
|
|
| ||
timed, e.g. 1hr 45 mins as Fig. 4. If necessary |
| Fig. 3 |
|
|
|
|
|
| ||
depress the decrease control |
|
|
|
|
|
|
| |||
|
|
|
|
|
|
|
| |||
correct time interval. |
|
|
|
|
|
|
|
|
| |
NOTE: This must be completed within 5 |
|
|
|
|
|
|
|
| ||
seconds of first pressing the minute minder |
|
|
|
|
|
|
|
| ||
button. |
|
|
|
|
|
|
|
|
|
|
Release the minute minder button and the display |
|
|
|
|
|
|
|
| ||
will return to the time of day after 5 seconds. |
|
|
|
|
|
|
|
|
| |
Fig. 4
7