BP7315 Florissant 3/7/06 8:42 AM Page 7
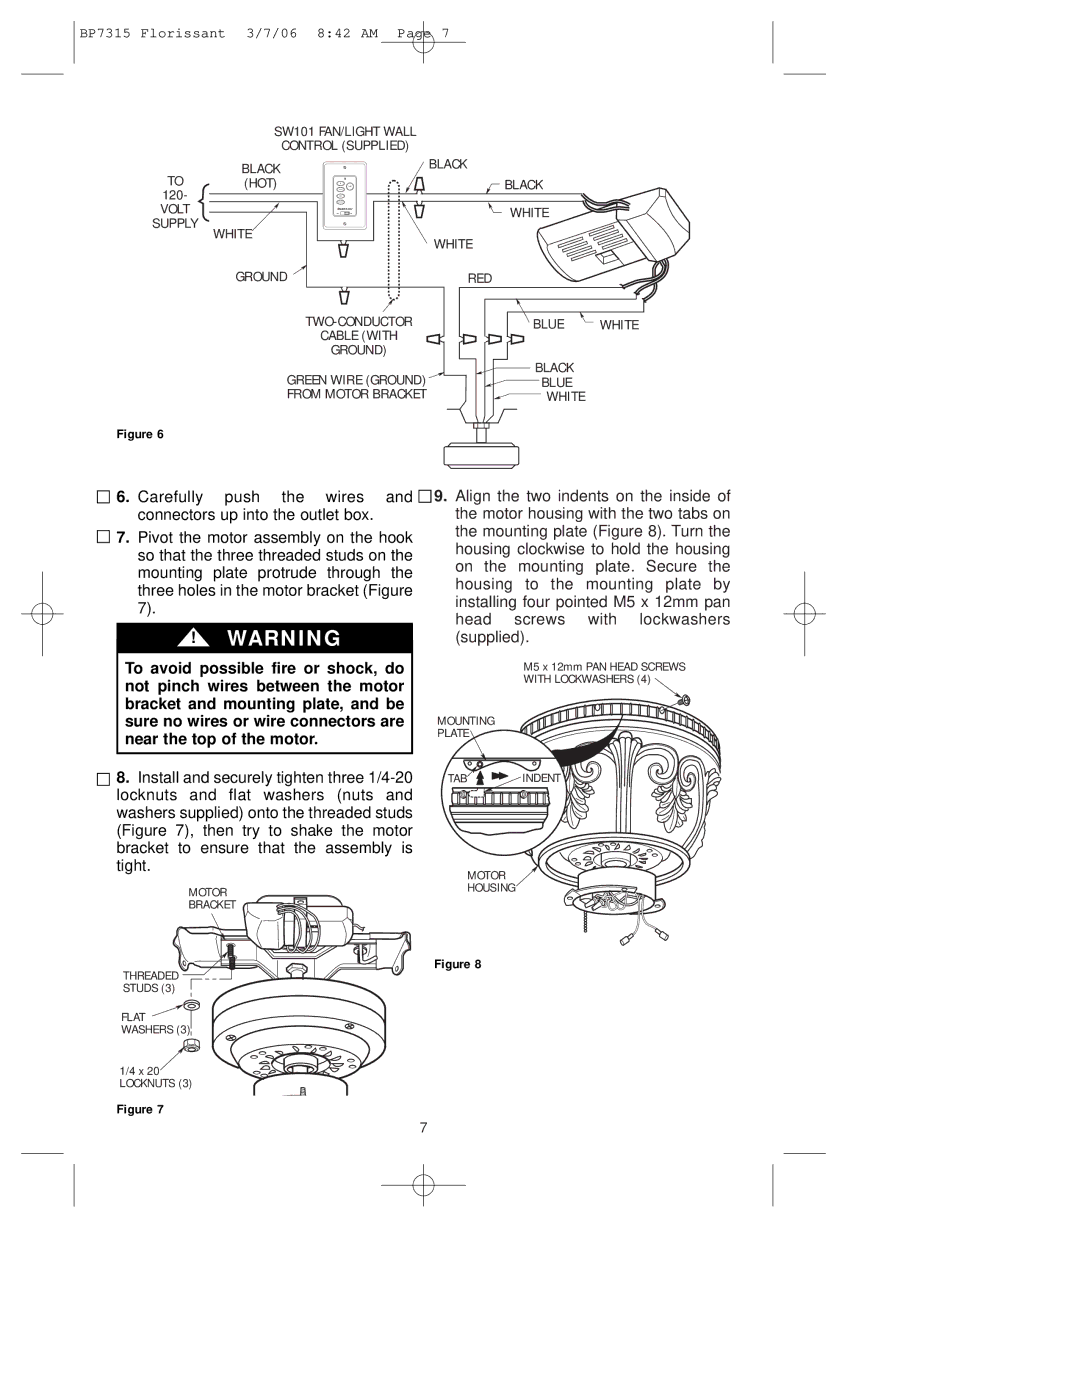
SW101 FAN/LIGHT WALL
CONTROL (SUPPLIED)
TO | BLACK | BLACK |
|
(HOT) | BLACK |
| |
120- |
| WHITE |
|
VOLT | EMERSON |
| |
SUPPLY | WHITE |
|
|
| WHITE |
| |
|
|
| |
| GROUND | RED |
|
| BLUE | WHITE | |
| CABLE (WITH |
|
|
| GROUND) |
|
|
| GREEN WIRE (GROUND) | BLACK |
|
| BLUE |
| |
| FROM MOTOR BRACKET | WHITE |
|
Figure 6
![]()
![]() 6. Carefully push the wires and
6. Carefully push the wires and
connectors up into the outlet box.
![]()
![]() 7. Pivot the motor assembly on the hook so that the three threaded studs on the mounting plate protrude through the three holes in the motor bracket (Figure 7).
7. Pivot the motor assembly on the hook so that the three threaded studs on the mounting plate protrude through the three holes in the motor bracket (Figure 7).
!WARNING
To avoid possible fire or shock, do not pinch wires between the motor bracket and mounting plate, and be sure no wires or wire connectors are near the top of the motor.
![]()
![]() 8. Install and securely tighten three
8. Install and securely tighten three
MOTOR
BRACKET
THREADED
STUDS (3)
FLAT
WASHERS (3)
1/4 x 20 LOCKNUTS (3)
![]()
![]() 9. Align the two indents on the inside of the motor housing with the two tabs on the mounting plate (Figure 8). Turn the housing clockwise to hold the housing on the mounting plate. Secure the housing to the mounting plate by installing four pointed M5 x 12mm pan head screws with lockwashers (supplied).
9. Align the two indents on the inside of the motor housing with the two tabs on the mounting plate (Figure 8). Turn the housing clockwise to hold the housing on the mounting plate. Secure the housing to the mounting plate by installing four pointed M5 x 12mm pan head screws with lockwashers (supplied).
M5 x 12mm PAN HEAD SCREWS
WITH LOCKWASHERS (4) 
MOUNTING
PLATE 
TAB

 INDENT
MOTOR
HOUSING
Figure 8
Figure 7
7