Epson Stylus Pro
Ink cartridge clamps Ink cartridge compartment door
Epson Stylus Pro
Printer Guide
Trademarks
Declaration of Conformity
FCC Compliance Statement
Contents Introduction
Setting Up the Printer
Printing with Epson Drivers for Windows
Printing on Various Papers
Printing with Epson Drivers for Macintosh
Monitoring the Printer
Maintaining and Transporting the Printer
Troubleshooting
Specifications
Index
Print in about 5 minutes
Color accuracy from job to job
Per-copy printing costs
800 873-7766 for dealer referral
Optional Equipment and Software
Optional equipment and software
Introduction
Macintosh System Requirements
Windows System Requirements
Energy Star Compliance
Where To Get Help
Service Access
Http//prographics.epson.com
Important Safety Instructions
Introduction
Introduction
Here’s what is included in the box
Unpacking the Printer
Installing the Optional Lower Paper Cassette
2Setting Up the Printer
Setting Up the Printer
Place your printer on top of the cassette as shown
Installing the Paper Tray
4Setting Up the Printer
Installing the Ink Cartridges
Open the left and right ink cartridge compartment doors
6Setting Up the Printer
Loading Paper
8Setting Up the Printer
Setting Up the Printer
10Setting Up the Printer
Paper size lever Media type lever
12Setting Up the Printer
Running a Printer Check
Connecting the Printer to Your Computer
Connecting to the USB Port
14Setting Up the Printer
Connecting to a Parallel Port Windows Only
Interface card Part number
Connecting to an Optional Interface Card
16Setting Up the Printer
Setting Up the Printer
Installing Printer Software for Windows
18Setting Up the Printer
Installing Printer Software for Macintosh
20Setting Up the Printer
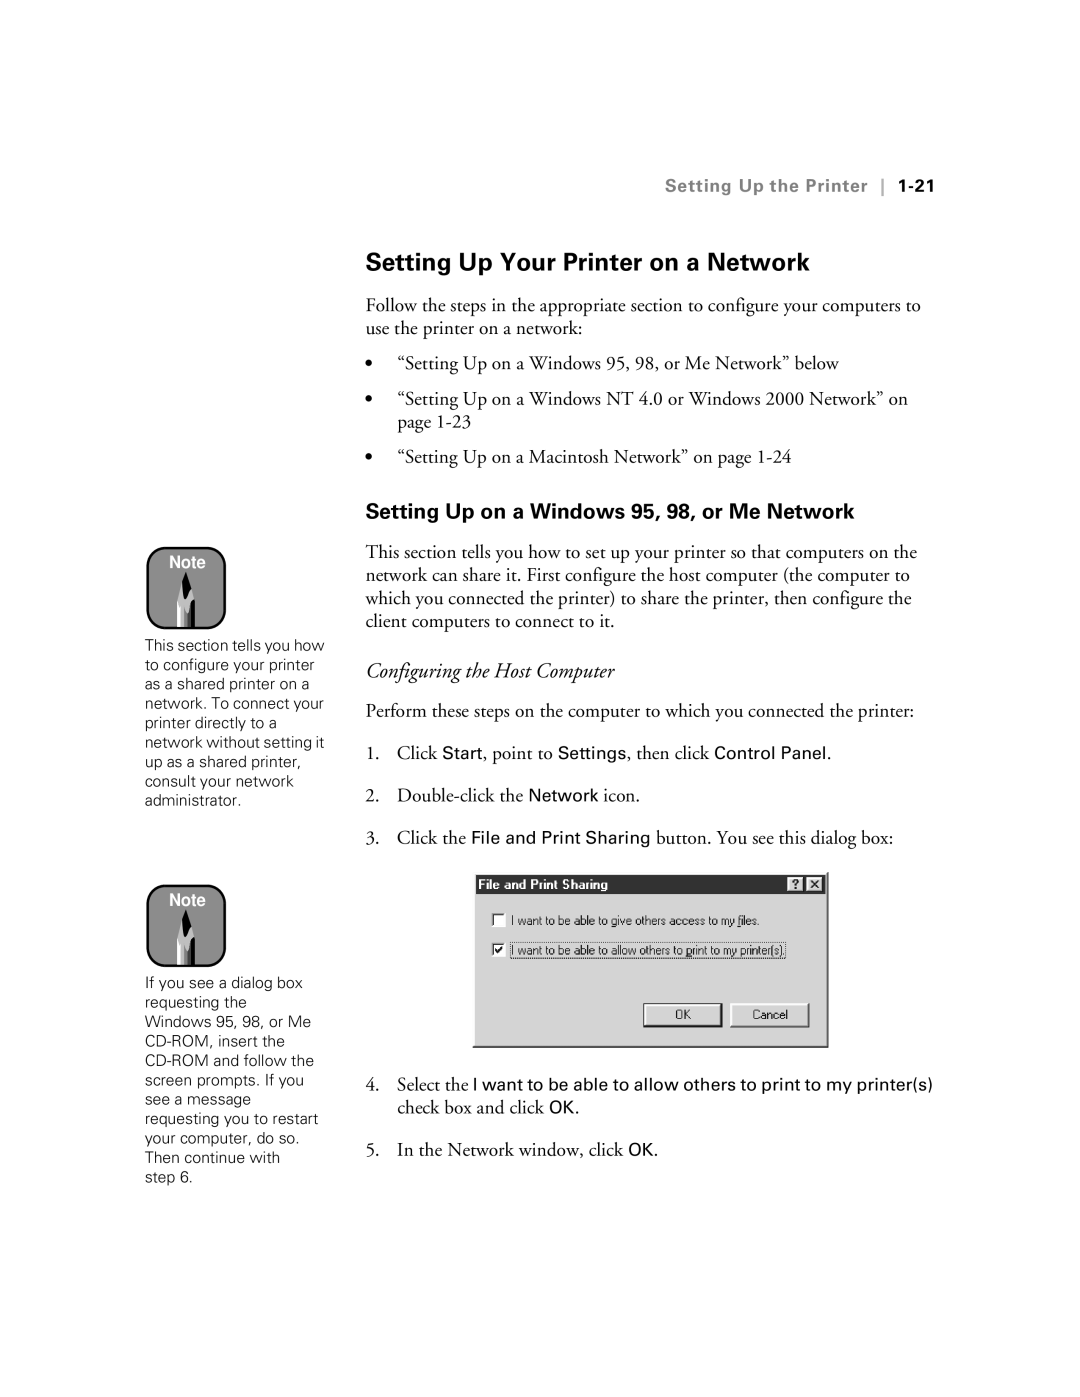
Network window, click OK
Setting Up Your Printer on a Network
Setting Up on a Windows 95, 98, or Me Network
Configuring the Client Computers
22Setting Up the Printer
Setting Up on a Windows NT 4.0 or Windows 2000 Network
Setting Up on a Macintosh Network
24Setting Up the Printer
Configuring the Client Macintosh Computers
Running the Print Head Alignment Utility
26Setting Up the Printer
Aligning the Print Head
When you’re finished, click Finish
28Setting Up the Printer
Printing on Various Papers
Selecting a Paper Path
2Printing on Various Papers
Using the Standard and Optional Paper Trays
Paper sizes and paper paths
Paper type Paper tray capacity Additional information
Paper Tray Loading Capacities and Guidelines
Printing on Various Papers
Paper Media type lever setting
Setting the Paper Tray Levers
Media type lever settings
4Printing on Various Papers
Media size Paper size lever setting
Following table identifies the paper size lever settings
Paper size lever settings
6Printing on Various Papers
Using the Front Manual Feed Slot
Loading Paper in the Optional Lower Tray
Using the Rear Manual Feed Slot
8Printing on Various Papers
Selecting Epson Paper
Product codes for Epson papers
Clearing Paper Jams
10Printing on Various Papers
Paper guide Paper path cover
12Printing on Various Papers
Choosing Page Setup Options
Printing with Epson Drivers for Macintosh
Lets the printer select which paper tray to load from
After making your settings, click OK
Choosing Basic Print Options
2Printing with Epson Drivers for Macintosh
Printing with Epson Drivers for Macintosh
Custom print job settings
Setting Usage
4Printing with Epson Drivers for Macintosh
Product name Media Type setting
Selecting the Correct Media Type
To save ink
For high-quality charts and graphs
Choosing Advanced Print Options
For drafts and everyday printing
For printing a mirror image of your file
Choose one of the following Color Management configurations
Choose any of the following
6Printing with Epson Drivers for Macintosh
PhotoEnhance4 settings
Color Management Settings
Color control modes and Gamma settings
Managing Print Jobs
Setting Up Background Printing
ColorSync Rendering Intent settings
To turn background printing on, click the On button
Using Monitor3
Cancelling Printing
10Printing with Epson Drivers for Macintosh
Printing with Epson Drivers for Windows
Dialog box like the following appears
2Printing with Epson Drivers for Windows
Printing with Epson Drivers for Windows
ICM
Choosing Paper and Layout Options
4Printing with Epson Drivers for Windows
Choose the appropriate settings, then click OK
You see a dialog box like the following
6Printing with Epson Drivers for Windows
ICM
Color Management Settings
8Printing with Epson Drivers for Windows
Using the Progress Meter
Using the Spool Manager
10Printing with Epson Drivers for Windows
Control panel lights Problem Response
Responding to the Control Panel Lights
2Monitoring the Printer
Checking Printer Status from a Macintosh
Monitoring the Printer
4Monitoring the Printer
Configuring Printer Monitoring
To close the Status Monitor, click OK
Checking Printer Status from Windows
Click the Utility tab. You see the Utility menu
6Monitoring the Printer
Setting Monitoring Preferences
8Monitoring the Printer
Running a Cleaning Cycle
Maintaining and Transporting the Printer
Using the Head Cleaning Utility
2Maintaining and Transporting the Printer
Cleaning the Print Head Using the Control Panel
Maintaining and Transporting the Printer
4Maintaining and Transporting the Printer
Replacing an Ink Cartridge
Close the compartment door and resume printing
6Maintaining and Transporting the Printer
Aligning the Print Head
8Maintaining and Transporting the Printer
Pattern # Black H ink out Cyan H ink out Magenta H ink out
Ink out light indicators for misaligned pattern
Aligning the Print Head from the Control Panel
Pattern # Black Cyan Magenta Yellow Ink out
Ink out light indicators for correctly aligned pattern
10Maintaining and Transporting the Printer
Click Start, point to Settings, then click Printers
Select from the following options
Cleaning the Printer
12Maintaining and Transporting the Printer
Transporting the Printer
14Maintaining and Transporting the Printer
Maintaining and Transporting the Printer
16Maintaining and Transporting the Printer
Diagnosing Problems
Improving Print Quality
2Troubleshooting
If this happens Try this
Solving General Printing Problems
Troubleshooting
4Troubleshooting
Off the printer and contact Epson as described on
6Troubleshooting
Solving Paper Problems
Here for solutions
Uninstalling and Reinstalling the Printer Software
Macintosh
8Troubleshooting
Printing
Printing method On-demand ink jet Nozzle configuration
Size Paper types Thickness Weight
Paper
Printable Areas
2Specifications
Ink Cartridges
Single sheets
Mechanical
Environmental
Safety Approvals
Electrical
USB Interface
Interfaces
Parallel Interface
Index a
Index
Index
Index
USB
Paper tray

