Printing a document 51
Printing a document
Windows 95 applications always print to the currently selected default printer. If you want to change the default printer, refer to the previous section, Preparing to print.
To print from any Windows 95 application, proceed as follows:.
❏Click on the application’s File menu.
❏Click on the Print command.
Note:
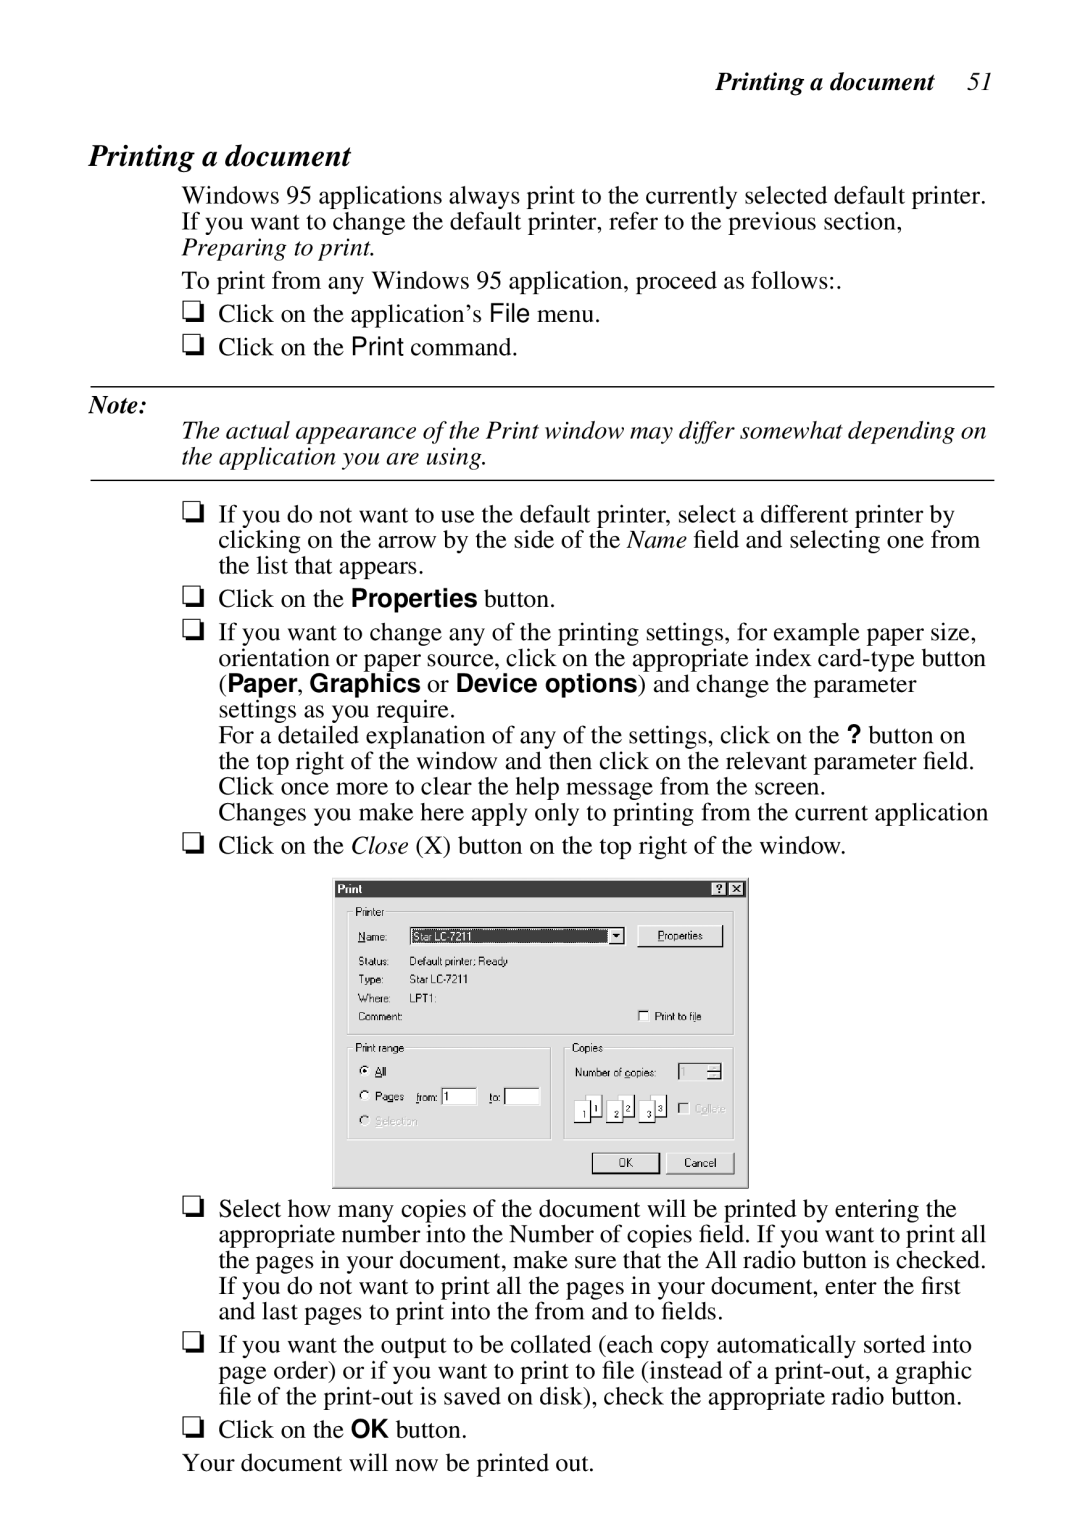
The actual appearance of the Print window may differ somewhat depending on the application you are using.
❏If you do not want to use the default printer, select a different printer by clicking on the arrow by the side of the Name field and selecting one from the list that appears.
❏Click on the Properties button.
❏If you want to change any of the printing settings, for example paper size, orientation or paper source, click on the appropriate index
For a detailed explanation of any of the settings, click on the ? button on the top right of the window and then click on the relevant parameter field. Click once more to clear the help message from the screen.
Changes you make here apply only to printing from the current application
❏Click on the Close (X) button on the top right of the window.
❏Select how many copies of the document will be printed by entering the appropriate number into the Number of copies field. If you want to print all the pages in your document, make sure that the All radio button is checked. If you do not want to print all the pages in your document, enter the first and last pages to print into the from and to fields.
❏If you want the output to be collated (each copy automatically sorted into page order) or if you want to print to file (instead of a
❏Click on the OK button.
Your document will now be printed out.
