Adjustment of the Projection Screen
Making Adjustments with the Adjusters
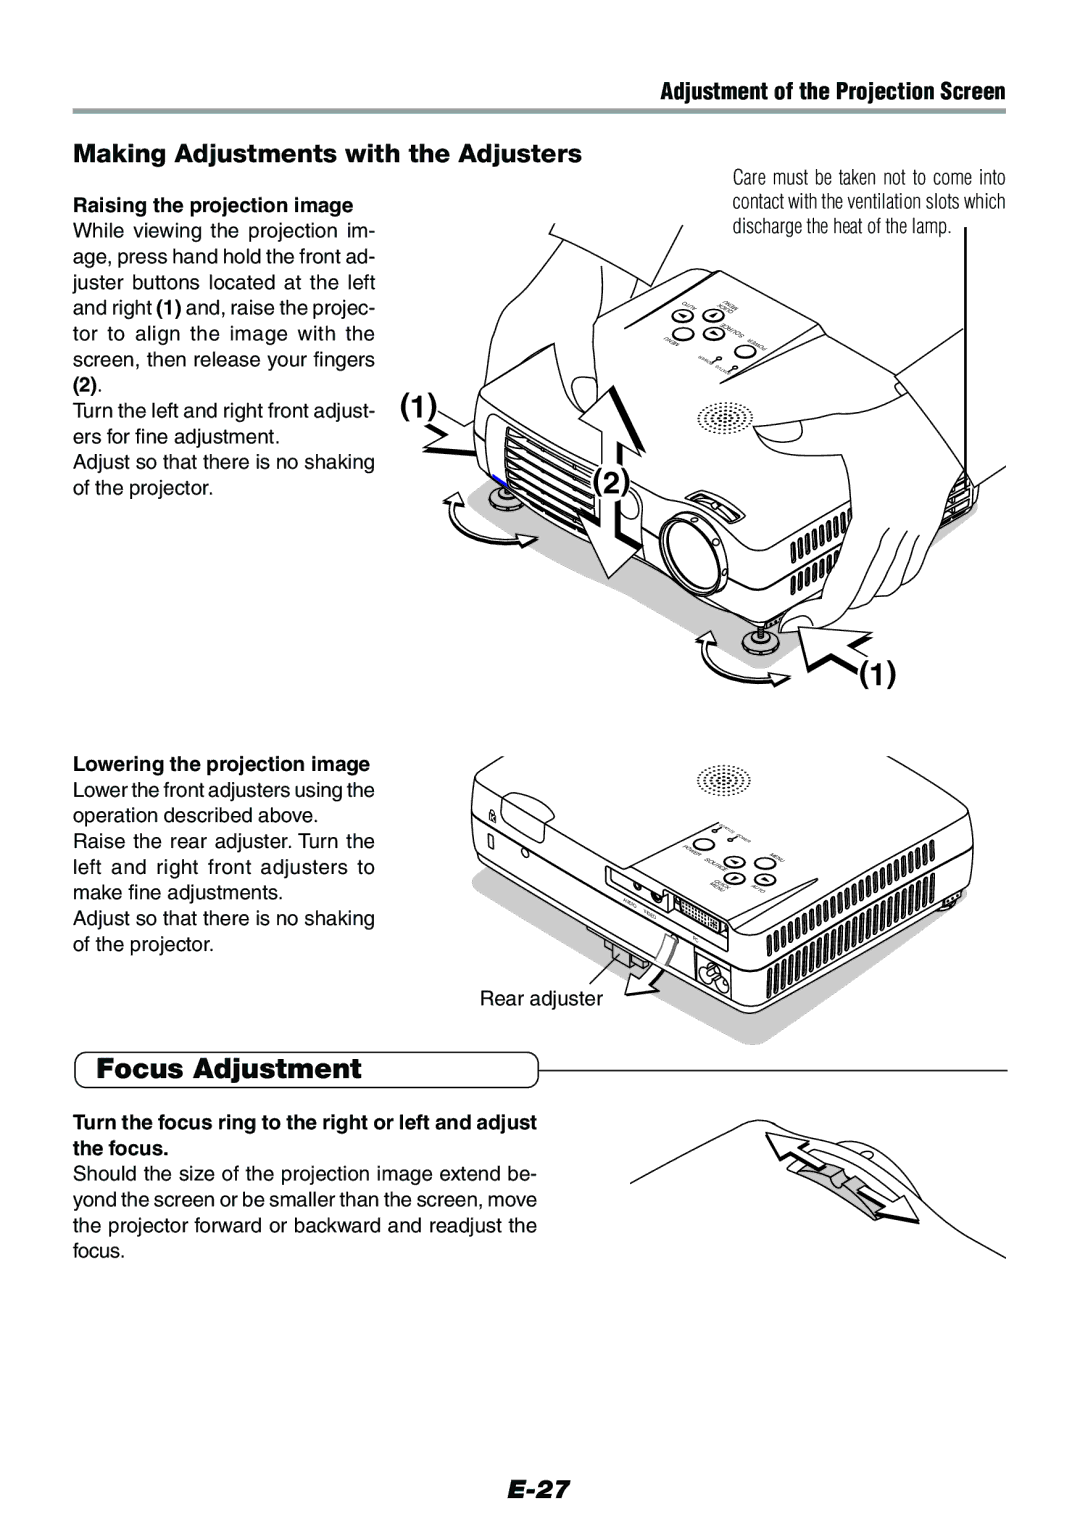
Raising the projection image
While viewing the projection im- age, press hand hold the front ad- juster buttons located at the left and right (1) and, raise the projec- tor to align the image with the screen, then release your fingers
(2). | (1) |
Turn the left and right front adjust- | |
ers for fine adjustment. |
|
Adjust so that there is no shaking | (2) |
of the projector. |
MENU
Care must be taken not to come into contact with the ventilation slots which discharge the heat of the lamp.
AUTO | MENU |
| QUICK |
SOURCE | |
| POWER |
R |
|
EW |
|
OP |
|
S |
|
TU | TAS |
| |
(1)
Lowering the projection image
Lower the front adjusters using the operation described above. Raise the rear adjuster. Turn the left and right front adjusters to make fine adjustments.
Adjust so that there is no shaking of the projector.
| STA |
|
| TUS | POW |
|
| |
|
| ER |
P |
|
|
OW |
|
|
ER |
|
|
SOURCE |
| |
M | Q |
|
U | AU | |
| EN ICK | |
| U | TO |
AUDIO |
|
|
VIDEO |
|
|
PC |
|
|
Rear adjuster
MENU
Focus Adjustment
Turn the focus ring to the right or left and adjust the focus.
Should the size of the projection image extend be- yond the screen or be smaller than the screen, move the projector forward or backward and readjust the focus.