Replacing the Lamp Cartridge
PREPARATION Turn the projector upside down and place it on a soft cloth that has been prepared in advance to prevent scratches. This will assist in lamp cartridge replacement. After replacement, return the projector to the original condition.
1. Disconnect the power cable.
2. Turn the projector upside down.
3. Remove the lamp cover.
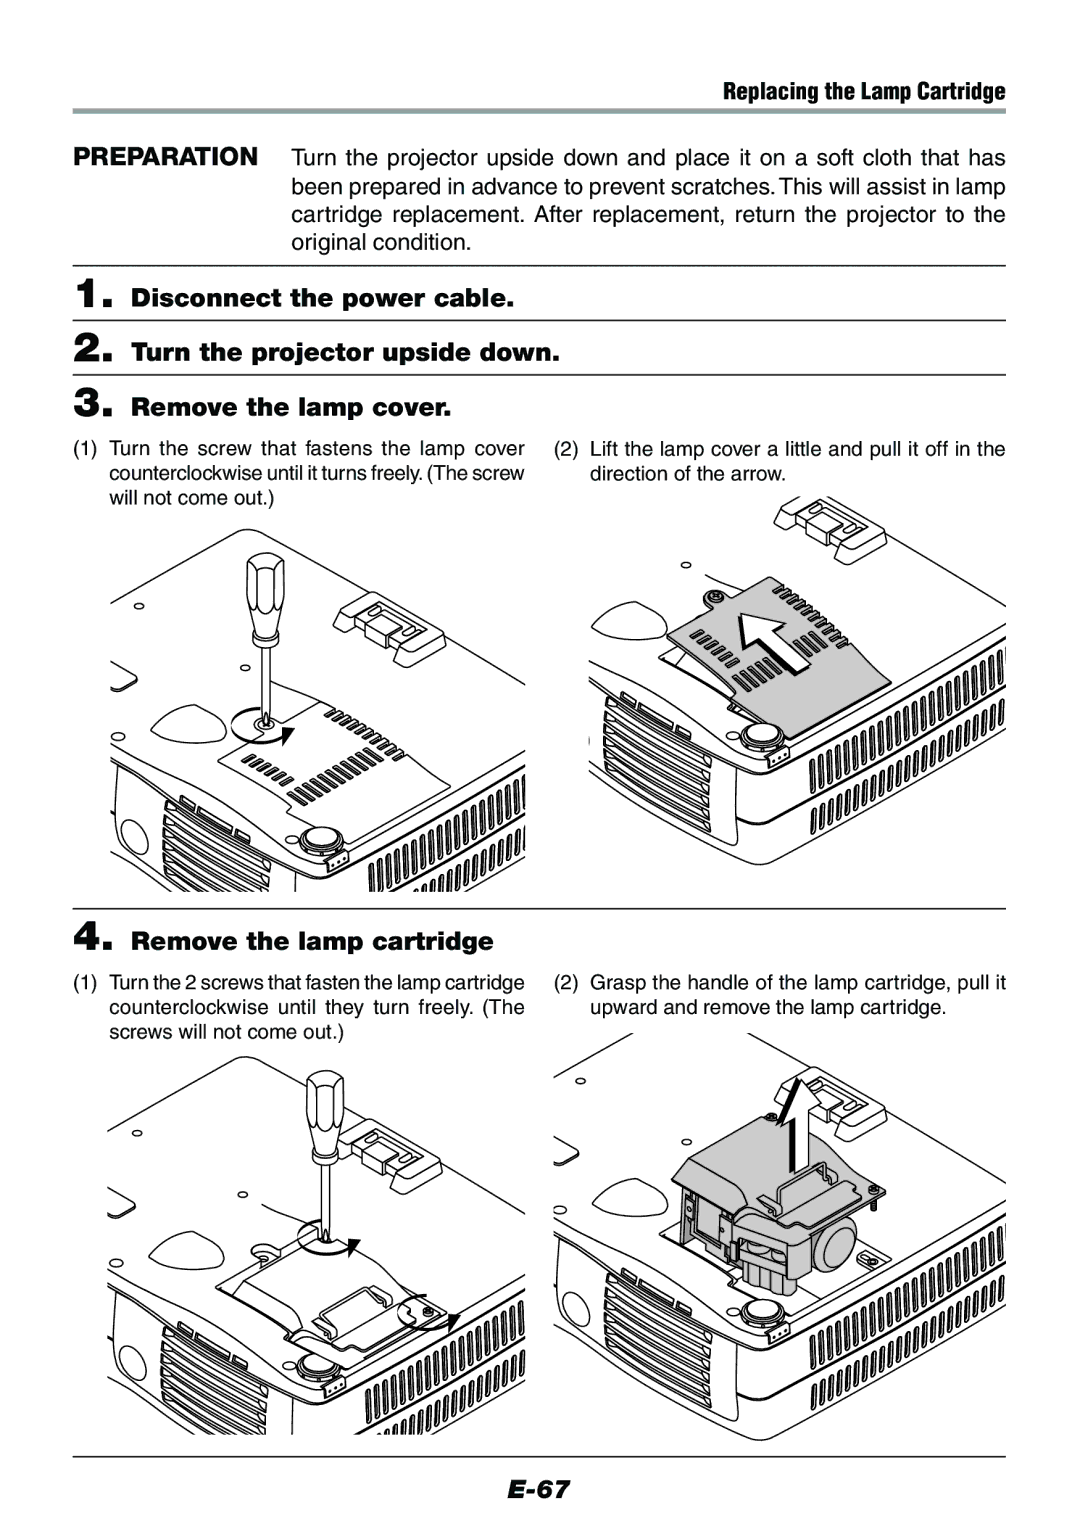
(1)Turn the screw that fastens the lamp cover counterclockwise until it turns freely. (The screw will not come out.)
(2)Lift the lamp cover a little and pull it off in the direction of the arrow.
4. Remove the lamp cartridge
(1)Turn the 2 screws that fasten the lamp cartridge counterclockwise until they turn freely. (The screws will not come out.)
(2)Grasp the handle of the lamp cartridge, pull it upward and remove the lamp cartridge.