E1 MENUS continued
SET CLOCKS
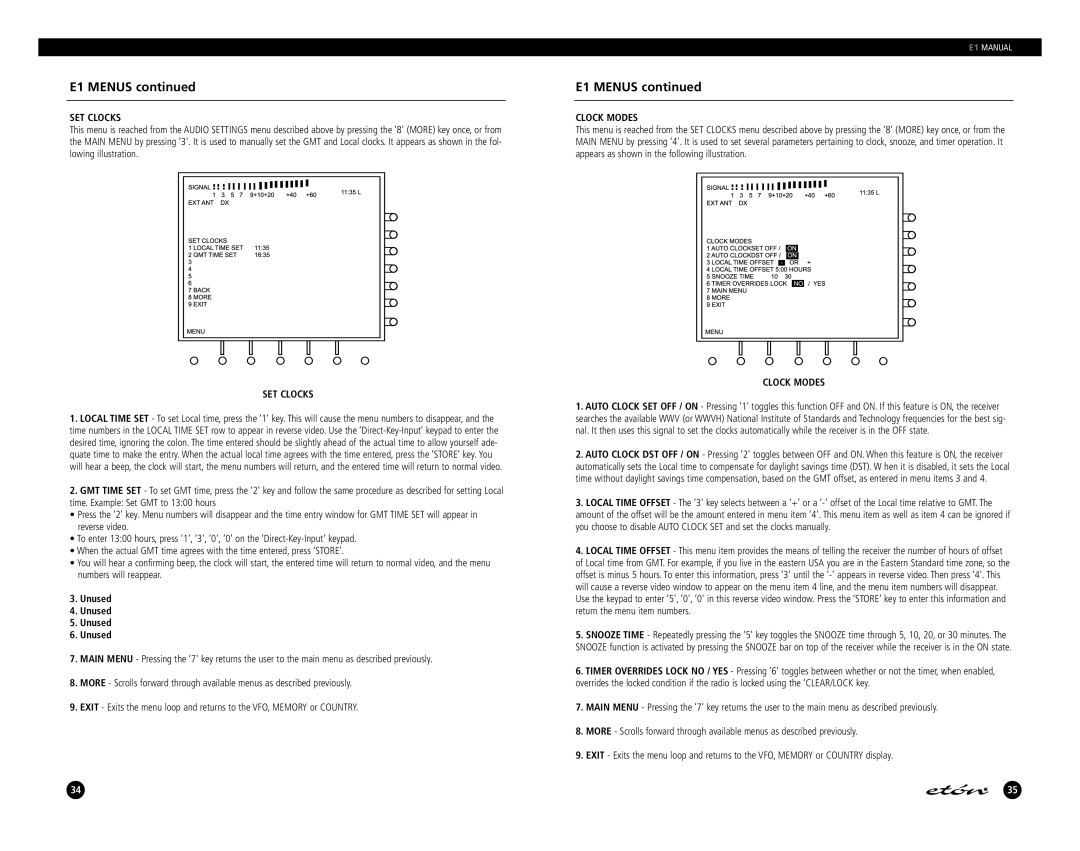
This menu is reached from the AUDIO SETTINGS menu described above by pressing the ‘8' (MORE) key once, or from the MAIN MENU by pressing ‘3'. It is used to manually set the GMT and Local clocks. It appears as shown in the fol- lowing illustration.
SET CLOCKS
1.LOCAL TIME SET - To set Local time, press the ‘1' key. This will cause the menu numbers to disappear, and the time numbers in the LOCAL TIME SET row to appear in reverse video. Use the
2.GMT TIME SET - To set GMT time, press the ‘2' key and follow the same procedure as described for setting Local time. Example: Set GMT to 13:00 hours
• Press the ‘2' key. Menu numbers will disappear and the time entry window for GMT TIME SET will appear in reverse video.
• To enter 13:00 hours, press ‘1', ‘3', ‘0', ‘0' on the
• When the actual GMT time agrees with the time entered, press ‘STORE’.
• You will hear a confirming beep, the clock will start, the entered time will return to normal video, and the menu numbers will reappear.
3.Unused
4.Unused
5.Unused
6.Unused
7.MAIN MENU - Pressing the ‘7' key returns the user to the main menu as described previously.
8.MORE - Scrolls forward through available menus as described previously.
9.EXIT - Exits the menu loop and returns to the VFO, MEMORY or COUNTRY.
34
E1 MANUAL
E1 MENUS continued
CLOCK MODES
This menu is reached from the SET CLOCKS menu described above by pressing the ‘8' (MORE) key once, or from the MAIN MENU by pressing ‘4'. It is used to set several parameters pertaining to clock, snooze, and timer operation. It appears as shown in the following illustration.
CLOCK MODES
1.AUTO CLOCK SET OFF / ON - Pressing ‘1' toggles this function OFF and ON. If this feature is ON, the receiver searches the available WWV (or WWVH) National Institute of Standards and Technology frequencies for the best sig- nal. It then uses this signal to set the clocks automatically while the receiver is in the OFF state.
2.AUTO CLOCK DST OFF / ON - Pressing ‘2' toggles between OFF and ON. When this feature is ON, the receiver automatically sets the Local time to compensate for daylight savings time (DST). W hen it is disabled, it sets the Local time without daylight savings time compensation, based on the GMT offset, as entered in menu items 3 and 4.
3.LOCAL TIME OFFSET - The ‘3' key selects between a ‘+’ or a
4.LOCAL TIME OFFSET - This menu item provides the means of telling the receiver the number of hours of offset of Local time from GMT. For example, if you live in the eastern USA you are in the Eastern Standard time zone, so the offset is minus 5 hours. To enter this information, press ‘3' until the
5.SNOOZE TIME - Repeatedly pressing the ‘5' key toggles the SNOOZE time through 5, 10, 20, or 30 minutes. The SNOOZE function is activated by pressing the SNOOZE bar on top of the receiver while the receiver is in the ON state.
6.TIMER OVERRIDES LOCK NO / YES - Pressing ‘6’ toggles between whether or not the timer, when enabled, overrides the locked condition if the radio is locked using the ‘CLEAR/LOCK key.
7.MAIN MENU - Pressing the ‘7' key returns the user to the main menu as described previously.
8.MORE - Scrolls forward through available menus as described previously.
9.EXIT - Exits the menu loop and returns to the VFO, MEMORY or COUNTRY display.
35