INSTALLATION continued
E1 MANUAL
INSTALLATION continued
RIGHT SIDE AND REAR VIEWS
Telescopic  antenna
Connect the outside antenna feed to the “EXT. ANTEN- NA“ jack located on the left side panel. The best anten- na for any of the previously mentioned frequency bands will depend on the frequency range and time of day for the particular signal in question. Refer to publications such as the ARRL Handbook or ARRL Antenna Manual (available in most public libraries) for help on selection and/or construction of the antennas mentioned above.
VIEWING ANGLE
On the back of the receiver is a hinged panel. This panel can be pulled out, and the receiver tilted back on it to provideetón a convenient viewing angle when operating the
E1 receiver on a table or similar surface in front of you, as shown below.
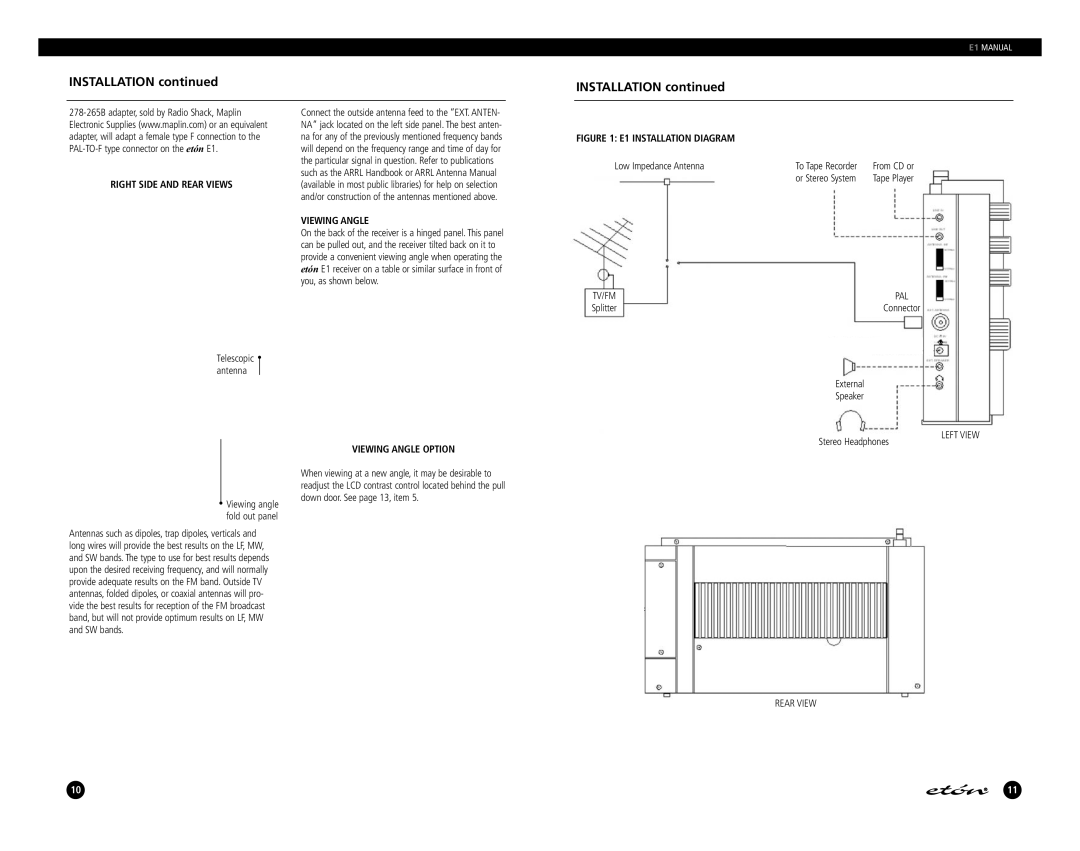
FIGURE 1: E1 INSTALLATION DIAGRAM |
|
|
Low Impedance Antenna | To Tape Recorder | From CD or |
| or Stereo System | Tape Player |
TV/FM | PAL |
Splitter | Connector |
External
Speaker
Stereo Headphones
LEFT VIEW
 Viewing angle fold out panel
Antennas such as dipoles, trap dipoles, verticals and long wires will provide the best results on the LF, MW, and SW bands. The type to use for best results depends upon the desired receiving frequency, and will normally provide adequate results on the FM band. Outside TV antennas, folded dipoles, or coaxial antennas will pro- vide the best results for reception of the FM broadcast band, but will not provide optimum results on LF, MW and SW bands.
VIEWING ANGLE OPTION
When viewing at a new angle, it may be desirable to readjust the LCD contrast control located behind the pull down door. See page 13, item 5.
REAR VIEW
10
11