Serial Digital Interface (SDI) Card Installation
The optional SDI card may be installed in the scaler if it does not already have an input for a serial digital interface signal. We recommend that you send the unit in to Extron for service and updates.
Changes to electronic components must be performed by authorized service personnel only.
Follow these steps to install an SDI card in the DVS 406.
1.Disconnect the AC power cord from the DVS 406 to remove power from the unit. Then disconnect the input/outut cables.
To prevent electric shock, always unplug the DVS 406 scaler from the
AC power source before opening the enclosure.
2.Remove the scaler from the rack or furniture.
3.Remove the cover of the scaler (the top half of the enclosure) by removing the screws, then lifting the cover straight up. See the top cover removal diagram in the “Firmware Upgrade Installation” section.
Do not touch any switches or other electronic components inside the scaler. Doing so could damage the scaler. Electrostatic discharge (ESD) can damage IC chips even though you cannot feel it. You must be electrically grounded before proceeding with any electronic component replacement. A grounding wrist strap is recommended.
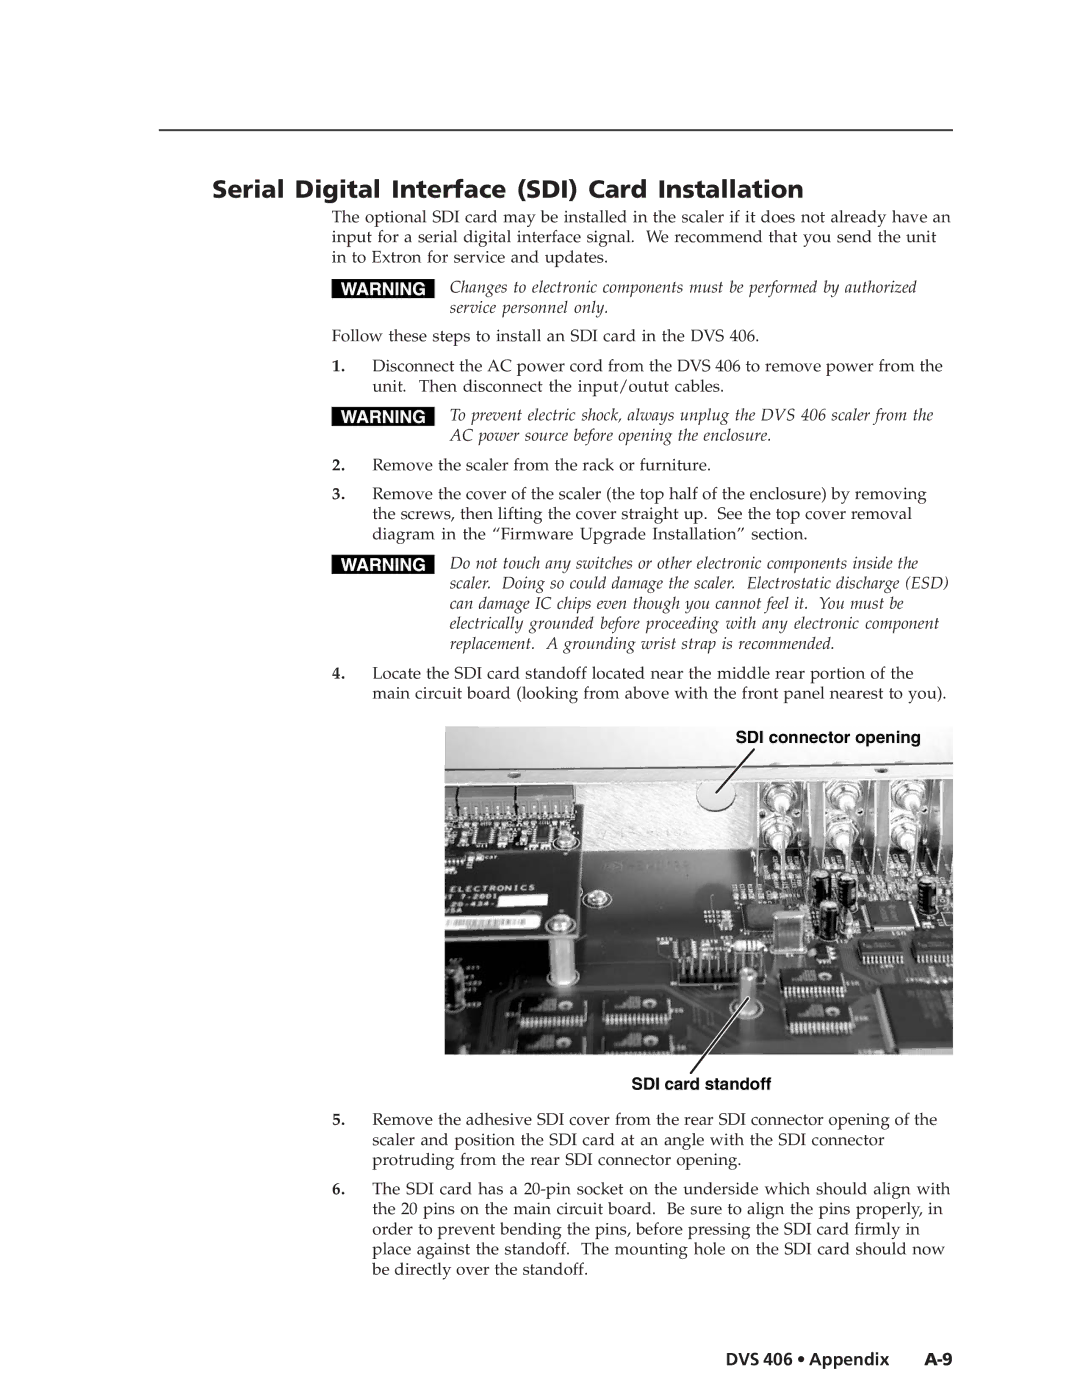
4.Locate the SDI card standoff located near the middle rear portion of the main circuit board (looking from above with the front panel nearest to you).
SDI connector opening
SDI card standoff
5.Remove the adhesive SDI cover from the rear SDI connector opening of the scaler and position the SDI card at an angle with the SDI connector protruding from the rear SDI connector opening.
6.The SDI card has a
DVS 406 • Appendix |
