Quick Start Guide — Extender Series, cont’d
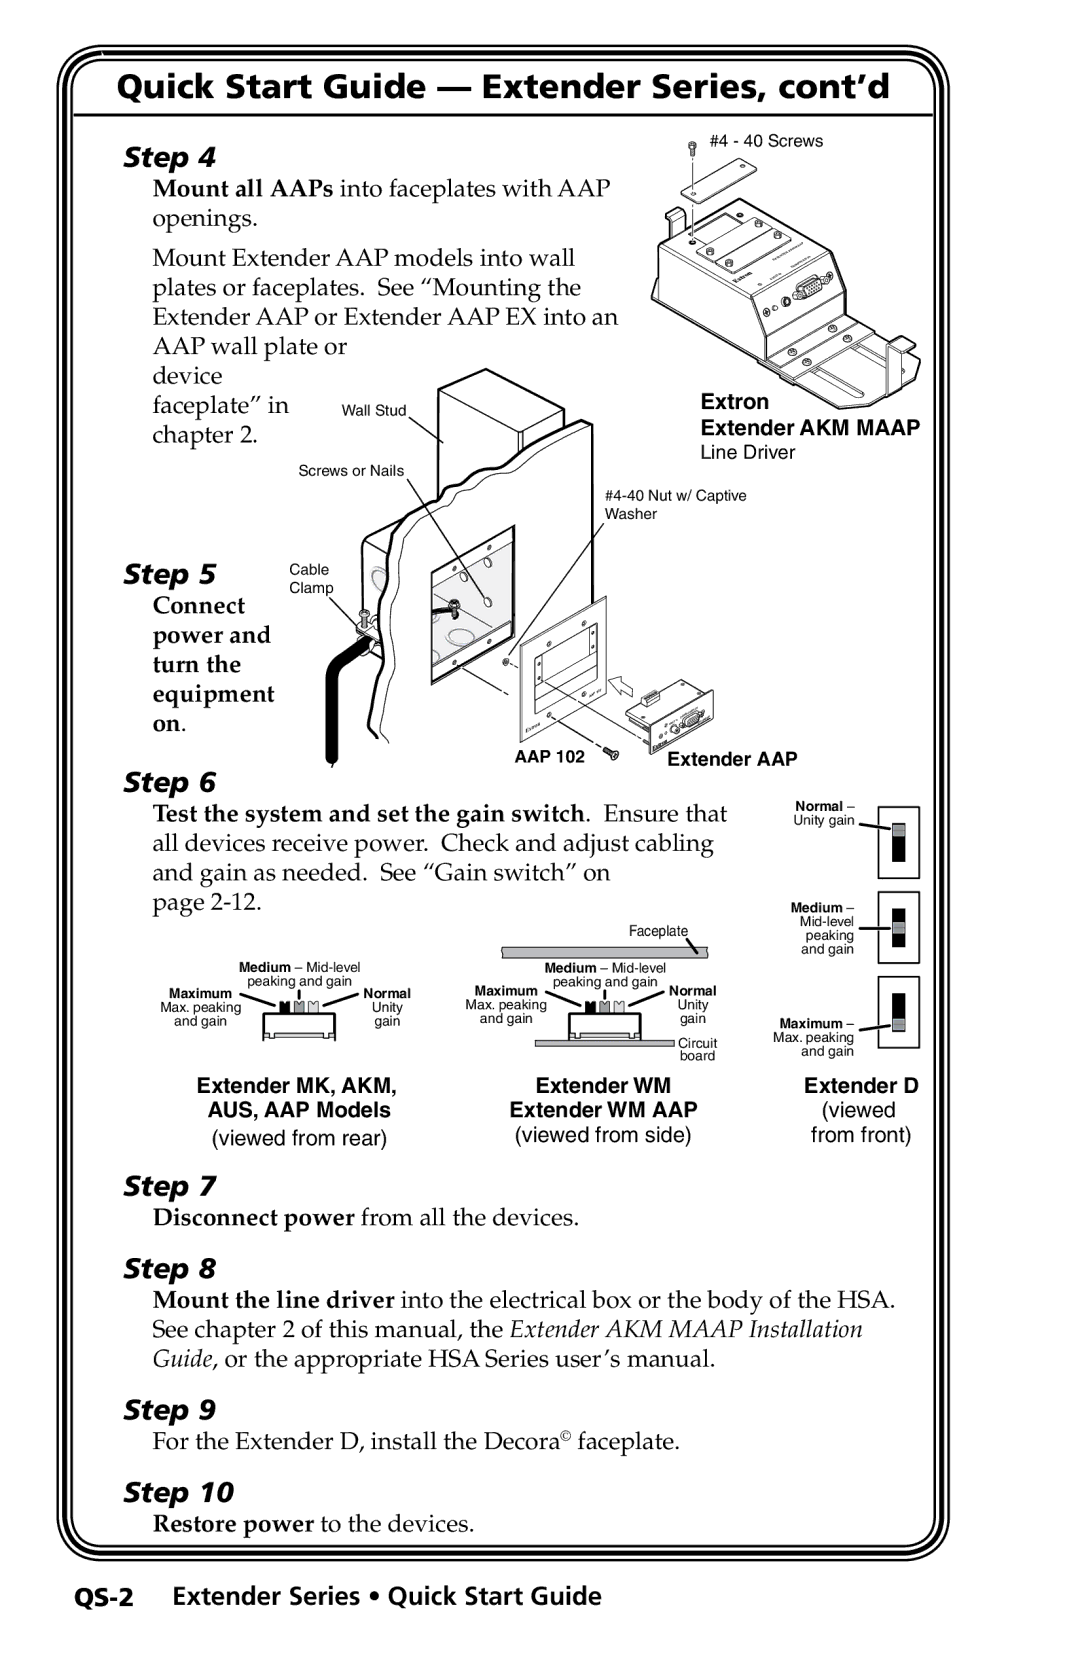
Step 4
Mount all AAPs into faceplates with AAP openings.
an
#4 - 40 Screws
Extron
Extender AKM MAAP
Line Driver
Step 5
Connect power and turn the equipment on.
Cable Clamp
102
AAP
IN
TER
COMPU
on Extr
Step 6
AAP 102 | Extender AAP |
Test the system and set the gain switch. Ensure that all devices receive power. Check and adjust cabling and gain as needed. See “Gain switch” on
page 2‑12.
|
|
|
|
|
|
|
|
|
| Faceplate | |||
Medium – |
|
| Medium – | ||||||||||
Maximum peaking and gain | Normal | Maximum | peaking and gain Normal | ||||||||||
Max. peaking | Unity | Max. peaking |
|
|
|
|
| Unity | |||||
and gain |
|
|
|
| gain | and gain |
|
|
|
|
| gain | |
|
|
|
|
|
|
|
|
|
|
|
|
| Circuit |
|
|
|
|
|
|
|
|
|
|
|
|
| board |
Normal – Unity gain
Medium –
peaking
and gain
Maximum – Max. peaking and gain
Extender MK, AKM, | Extender WM | Extender D |
AUS, AAP Models | Extender WM AAP | (viewed |
(viewed from rear) | (viewed from side) | from front) |
Step 7
Disconnect power from all the devices.
Step 8
Mount the line driver into the electrical box or the body of the HSA. See chapter 2 of this manual, the Extender AKM MAAP Installation Guide, or the appropriate HSA Series user’s manual.
Step 9
For the Extender D, install the Decora© faceplate.
Step 10
Restore power to the devices.