| Assembly |
5 | 6 |
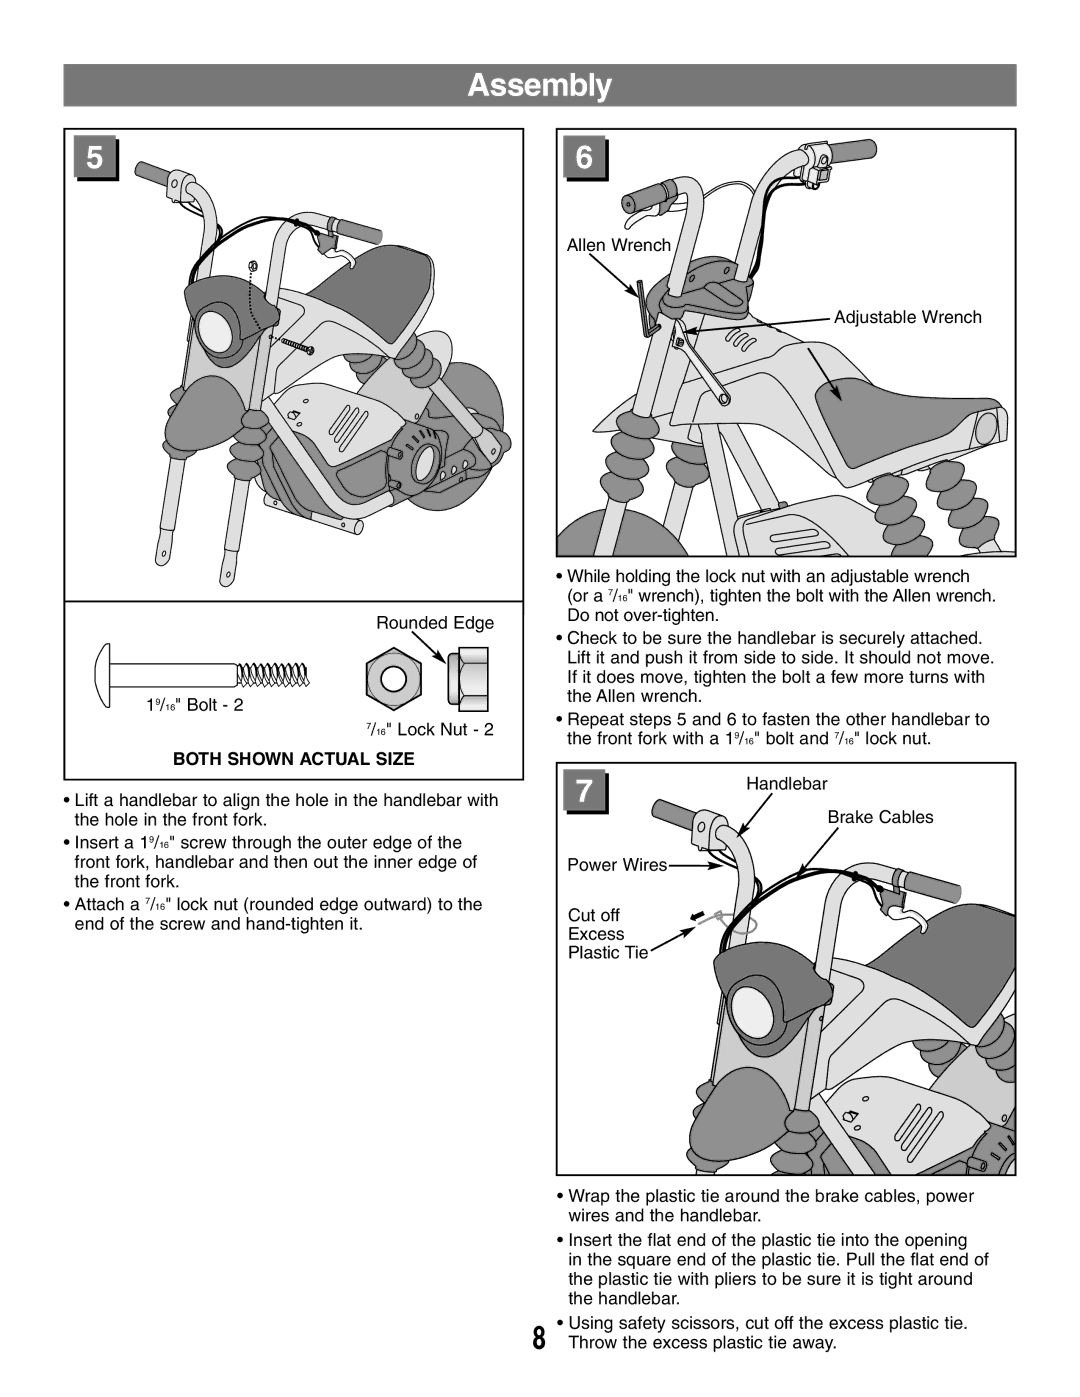
| Allen Wrench |
| Adjustable Wrench |
| • While holding the lock nut with an adjustable wrench | |||
| (or a 7/16" wrench), tighten the bolt with the Allen wrench. | |||
Rounded Edge | Do not |
|
| |
• Check to be sure the handlebar is securely attached. | ||||
| ||||
| Lift it and push it from side to side. It should not move. | |||
| If it does move, tighten the bolt a few more turns with | |||
19/16" Bolt - 2 | the Allen wrench. |
|
| |
7/16" Lock Nut - 2 | • Repeat steps 5 and 6 to fasten the other handlebar to | |||
9 | 7 | /16" lock nut. | ||
| the front fork with a 1 /16" bolt and |
| ||
BOTH SHOWN ACTUAL SIZE |
|
| |
• Lift a handlebar to align the hole in the handlebar with | 7 | Handlebar | |
Brake Cables | |||
the hole in the front fork. |
| ||
• Insert a 19/16" screw through the outer edge of the |
|
| |
front fork, handlebar and then out the inner edge of | Power Wires |
| |
the front fork. |
|
| |
• Attach a 7/16" lock nut (rounded edge outward) to the | Cut off |
| |
end of the screw and |
| ||
Excess |
| ||
|
| ||
| Plastic Tie |
| |
| • Wrap the plastic tie around the brake cables, power | ||
| wires and the handlebar. | ||
| • Insert the flat end of the plastic tie into the opening | ||
| in the square end of the plastic tie. Pull the flat end of | ||
| the plastic tie with pliers to be sure it is tight around | ||
| the handlebar. |
| |
8 | • Using safety scissors, cut off the excess plastic tie. | ||
Throw the excess plastic tie away. | |||
