Inserting a FortiGate-5001FA2 board into a chassis | Hardware installation |
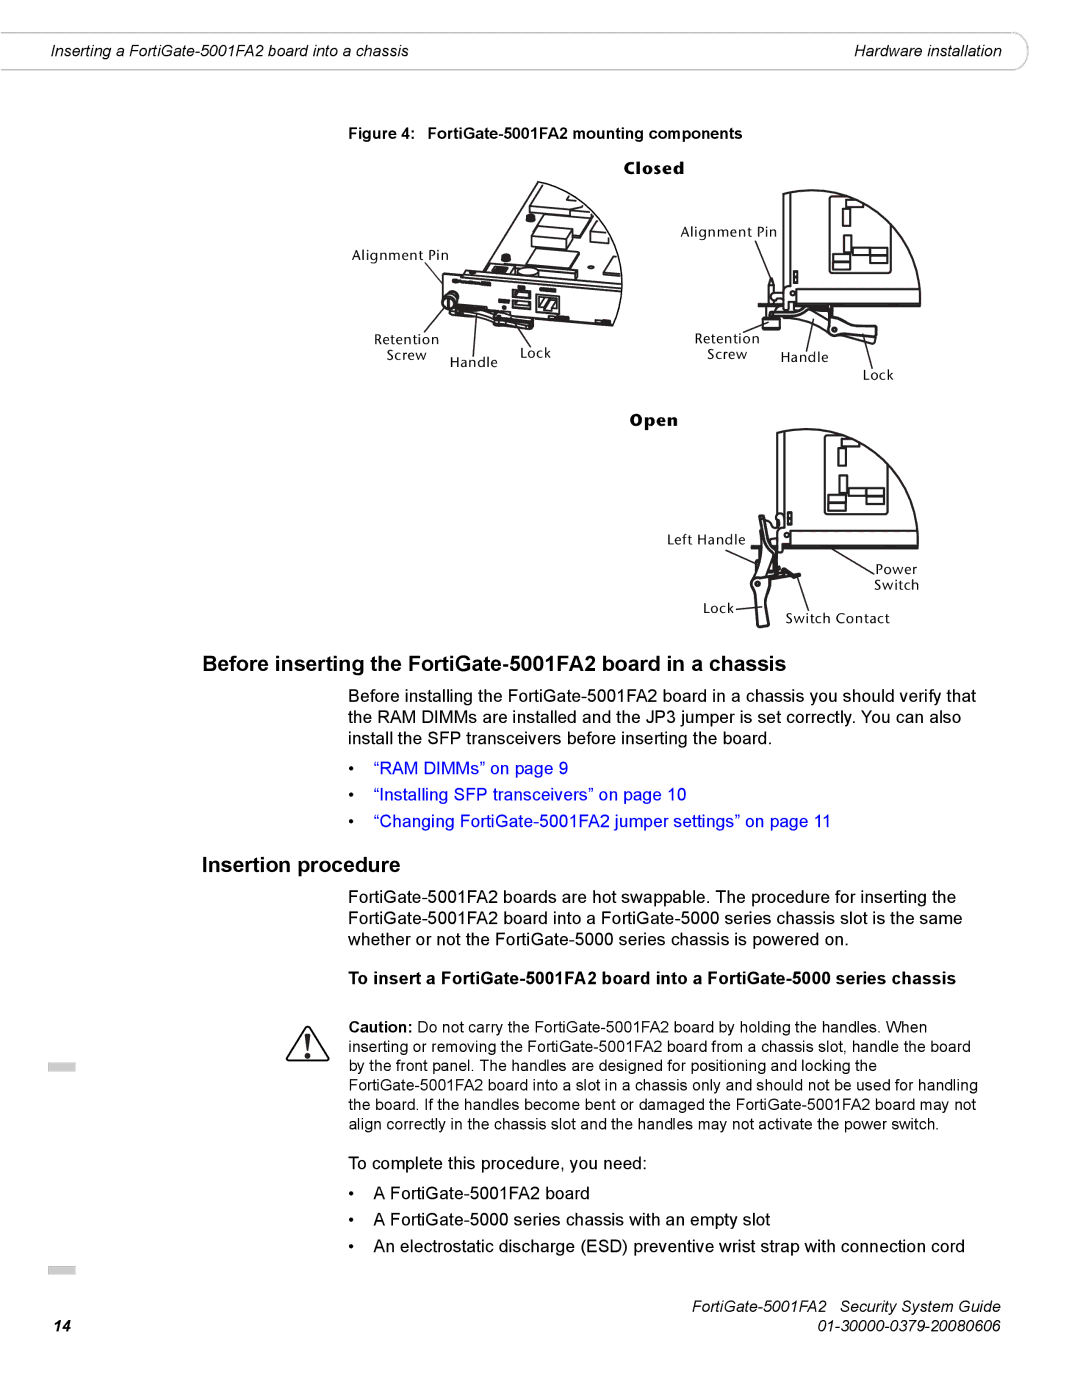
Figure 4: FortiGate-5001FA2 mounting components
Closed
Alignment Pin
Alignment Pin
Retention | | Lock | Retention | |
Screw | Handle | Screw | Handle |
| | | |
Open
Left Handle
Lock 
Lock
 Power
Power
Switch
Switch Contact
Before inserting the FortiGate-5001FA2 board in a chassis
Before installing the FortiGate-5001FA2 board in a chassis you should verify that the RAM DIMMs are installed and the JP3 jumper is set correctly. You can also install the SFP transceivers before inserting the board.
•“RAM DIMMs” on page 9
•“Installing SFP transceivers” on page 10
•“Changing FortiGate-5001FA2 jumper settings” on page 11
Insertion procedure
FortiGate-5001FA2 boards are hot swappable. The procedure for inserting the FortiGate-5001FA2 board into a FortiGate-5000 series chassis slot is the same whether or not the FortiGate-5000 series chassis is powered on.
To insert a FortiGate-5001FA2 board into a FortiGate-5000 series chassis
Caution: Do not carry the FortiGate-5001FA2 board by holding the handles. When
! inserting or removing the FortiGate-5001FA2 board from a chassis slot, handle the board by the front panel. The handles are designed for positioning and locking the FortiGate-5001FA2 board into a slot in a chassis only and should not be used for handling the board. If the handles become bent or damaged the FortiGate-5001FA2 board may not align correctly in the chassis slot and the handles may not activate the power switch.
To complete this procedure, you need:
• A FortiGate-5001FA2 board
• A FortiGate-5000 series chassis with an empty slot
• An electrostatic discharge (ESD) preventive wrist strap with connection cord
| FortiGate-5001FA2 Security System Guide |
14 | 01-30000-0379-20080606 |