D-108 Quick Operation Guide
Mixdown
After overdubbing and
The mixdown signals are usually output from the mixer’s STEREO OUT L/R. Connect the master recorder inputs to the STEREO OUT L/R connectors.
•Initialize the D-108.
•Check the sampling frequency. Select the desired sampling frequency, if necessary. Do not change the sampling frequency until you finish the session.
1.Set all tracks to the SAFE status.
2.Locate the top of the Program on the
3.Set the master recorder to
4.Play the Program from the beginning and adjust the recording level on the master recorder while adjusting the tonal quality and mix balance of the playback sound from the mixer. (Rehearsal)
Adjust the input level on the master recorder so that the STEREO OUT L/R meters on the mixer respond to the same degree as the level meters on the master recorder.
5.Locate the top of the Program.
6.Start recording on the master recorder. (Take)
7.Press the PLAY button on the
8.When mixdown is completed, stop the master recorder and the
Recording in a new Program
The explanation so far has been based on one Program set up when you format a current drive
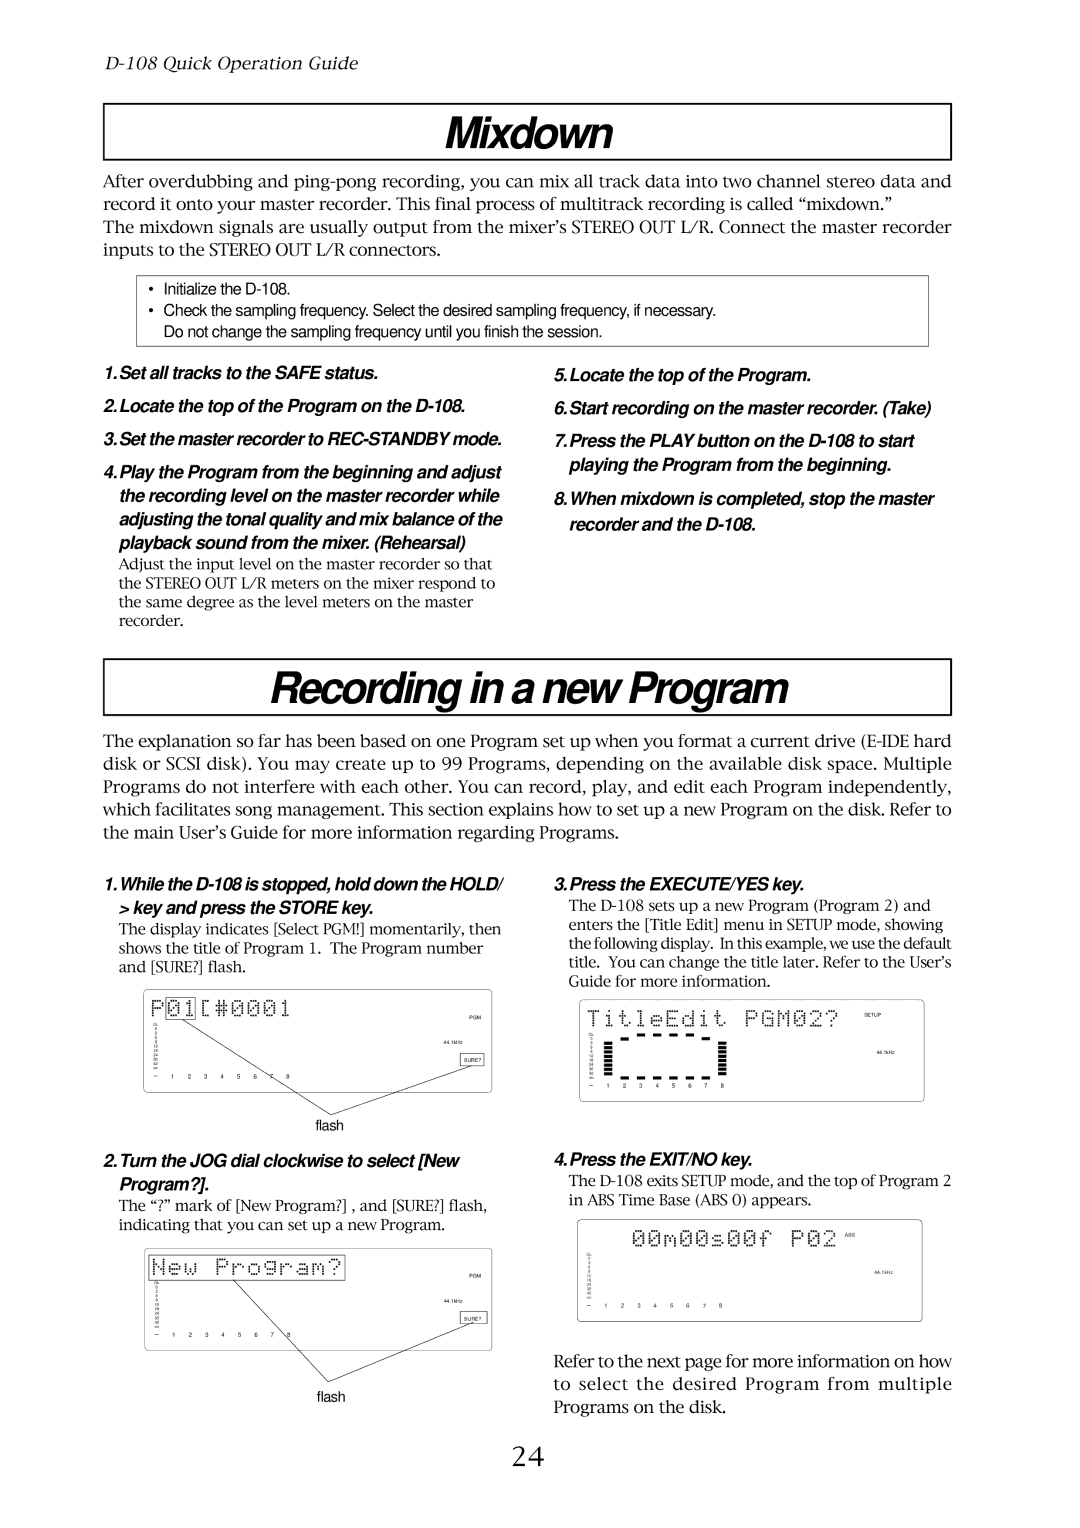
1.While the
The display indicates [Select PGM!] momentarily, then shows the title of Program 1. The Program number and [SURE?] flash.
PGM
OL |
|
|
|
|
|
|
|
|
0 |
|
|
|
|
|
|
|
|
3 |
|
|
|
|
|
|
|
|
6 |
|
|
|
|
|
| 44.1kHz | |
9 |
|
|
|
|
|
| ||
12 |
|
|
|
|
|
|
|
|
18 |
|
|
|
|
|
|
|
|
24 |
|
|
|
|
|
|
|
|
30 |
|
|
|
|
|
|
| SURE? |
42 |
|
|
|
|
|
|
|
|
∞ |
|
|
|
|
|
|
|
|
1 | 2 | 3 | 4 | 5 | 6 | 7 | 8 |
|
flash
2.Turn the JOG dial clockwise to select [New Program?].
The “?” mark of [New Program?] , and [SURE?] flash, indicating that you can set up a new Program.
PGM
OL |
|
|
|
|
|
|
|
|
0 |
|
|
|
|
|
|
|
|
3 |
|
|
|
|
|
|
|
|
6 |
|
|
|
|
|
|
|
|
9 |
|
|
|
|
|
| 44.1kHz | |
12 |
|
|
|
|
|
|
|
|
18 |
|
|
|
|
|
|
|
|
24 |
|
|
|
|
|
|
|
|
30 |
|
|
|
|
|
|
| SURE? |
42 |
|
|
|
|
|
|
|
|
∞ |
|
|
|
|
|
|
|
|
1 | 2 | 3 | 4 | 5 | 6 | 7 | 8 |
|
flash
3.Press the EXECUTE/YES key.
The
|
|
|
|
|
|
|
|
|
|
|
|
|
|
|
| SETUP |
OL |
|
|
|
|
|
|
|
|
|
|
|
|
|
| ||
0 |
|
|
|
|
|
|
|
|
|
|
|
|
|
|
|
|
3 |
|
|
|
|
|
|
|
|
|
|
|
|
|
|
|
|
6 |
|
|
|
|
|
|
|
|
|
|
|
|
|
|
| 44.1kHz |
9 |
|
|
|
|
|
|
|
|
|
|
|
|
|
|
| |
12 |
|
|
|
|
|
|
|
|
|
|
|
|
|
|
|
|
18 |
|
|
|
|
|
|
|
|
|
|
|
|
|
|
|
|
24 |
|
|
|
|
|
|
|
|
|
|
|
|
|
|
|
|
30 |
|
|
|
|
|
|
|
|
|
|
|
|
|
|
|
|
42 |
|
|
|
|
|
|
|
|
|
|
|
|
|
|
|
|
∞ |
|
|
|
|
|
|
|
|
|
|
|
|
|
|
|
|
1 |
| 2 | 3 | 4 | 5 | 6 | 7 | 8 |
| |||||||
4.Press the EXIT/NO key.
The
|
|
|
|
|
|
| ABS |
OL |
|
|
|
|
|
|
|
0 |
|
|
|
|
|
|
|
3 |
|
|
|
|
|
|
|
6 |
|
|
|
|
|
|
|
9 |
|
|
|
|
|
| 44.1kHz |
12 |
|
|
|
|
|
|
|
18 |
|
|
|
|
|
|
|
24 |
|
|
|
|
|
|
|
30 |
|
|
|
|
|
|
|
42 |
|
|
|
|
|
|
|
∞ |
|
|
|
|
|
|
|
1 | 2 | 3 | 4 | 5 | 6 | 7 | 8 |
Refer to the next page for more information on how to select the desired Program from multiple Programs on the disk.
24
