Recording the
12.Make sure that track 2 is in REC READY mode. (If not, press the REC TRK switch on channel
2to select track 2).
Record track indicator 2 on channel 2 lights up and the REC indicator flashes slowly.
13.Press the REC button to start the tape from slightly before the
The REC indicator flashes faster.
It might be a good idea to play the bass in unison with the playback to get in sync for the punch in.
14.Step on the foot switch at the punch in point.
Track 2 will enter input monitor mode and recording mode (the REC indicator lights up continuously). The
2.You can monitor your performance along with the playback from other tracks.
Model
15.Step on the foot switch again at the point you wish to punch out.
The REC indicator again begins to flash fast. The recording mode will be canceled and all tracks will be in the playback mode.
16.Upon completing the
<NOTE>
Skill is required to match the newly replaced sound level to the
Try the following method:
1.While playing the track you want to punch in, adjust the input/playback level fader so that the meter indicates 0 - 3.
2.While rehearsing the new musical instrument, adjust the input/playback level fader so that the level meter lights up to the same degree as the playback tracks.
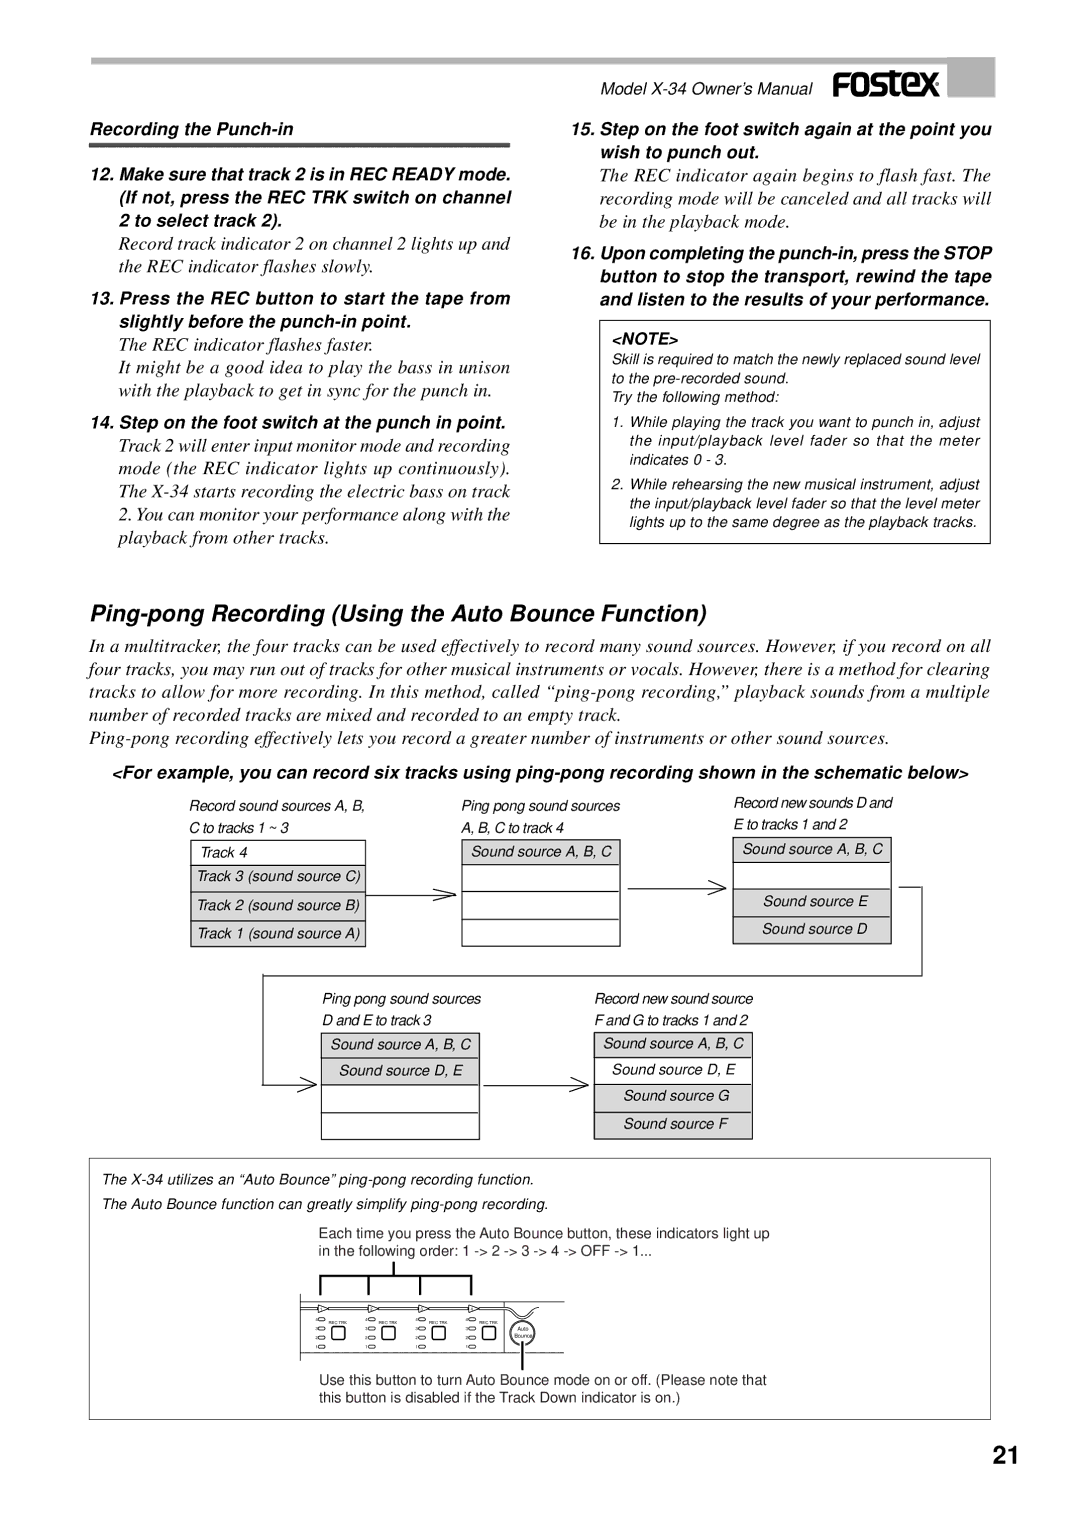
Ping-pong Recording (Using the Auto Bounce Function)
In a multitracker, the four tracks can be used effectively to record many sound sources. However, if you record on all four tracks, you may run out of tracks for other musical instruments or vocals. However, there is a method for clearing tracks to allow for more recording. In this method, called
<For example, you can record six tracks using
Record sound sources A, B, C to tracks 1 ~ 3
Track 4
Track 3 (sound source C)
Track 2 (sound source B)
Track 1 (sound source A)
Ping pong sound sources A, B, C to track 4
Sound source A, B, C
Record new sounds D and E to tracks 1 and 2
Sound source A, B, C
Sound source E
Sound source D
Ping pong sound sources | Record new sound source | |
D and E to track 3 | F and G to tracks 1 and 2 | |
|
|
|
Sound source A, B, C |
| Sound source A, B, C |
Sound source D, E |
| Sound source D, E |
|
| Sound source G |
|
|
|
|
| Sound source F |
|
|
|
The
The Auto Bounce function can greatly simplify
Each time you press the Auto Bounce button, these indicators light up
in the following order: 1
1 | 2 |
| 3 |
| 4 |
4 | 4 | REC TRK | 4 | 4 | REC TRK |
| REC TRK | REC TRK |
| ||
3 | 3 |
| 3 | 3 | Auto |
2 | 2 |
| 2 | 2 | Bounce |
1 | 1 |
| 1 | 1 |
|
Use this button to turn Auto Bounce mode on or off. (Please note that this button is disabled if the Track Down indicator is on.)
21