Model |
|
|
|
| |
<Rear Panel> |
|
|
|
|
|
5 | 4 |
| 3 | 2 | 1 |
| PUNCH | DC IN | ON STANDBY | DOLBY NR | TAPE OUT |
| ON OFF | ||||
| IN/OUT | 12V |
|
| 4321 |
| 10 | 9 | 8 | 7 | 6 |
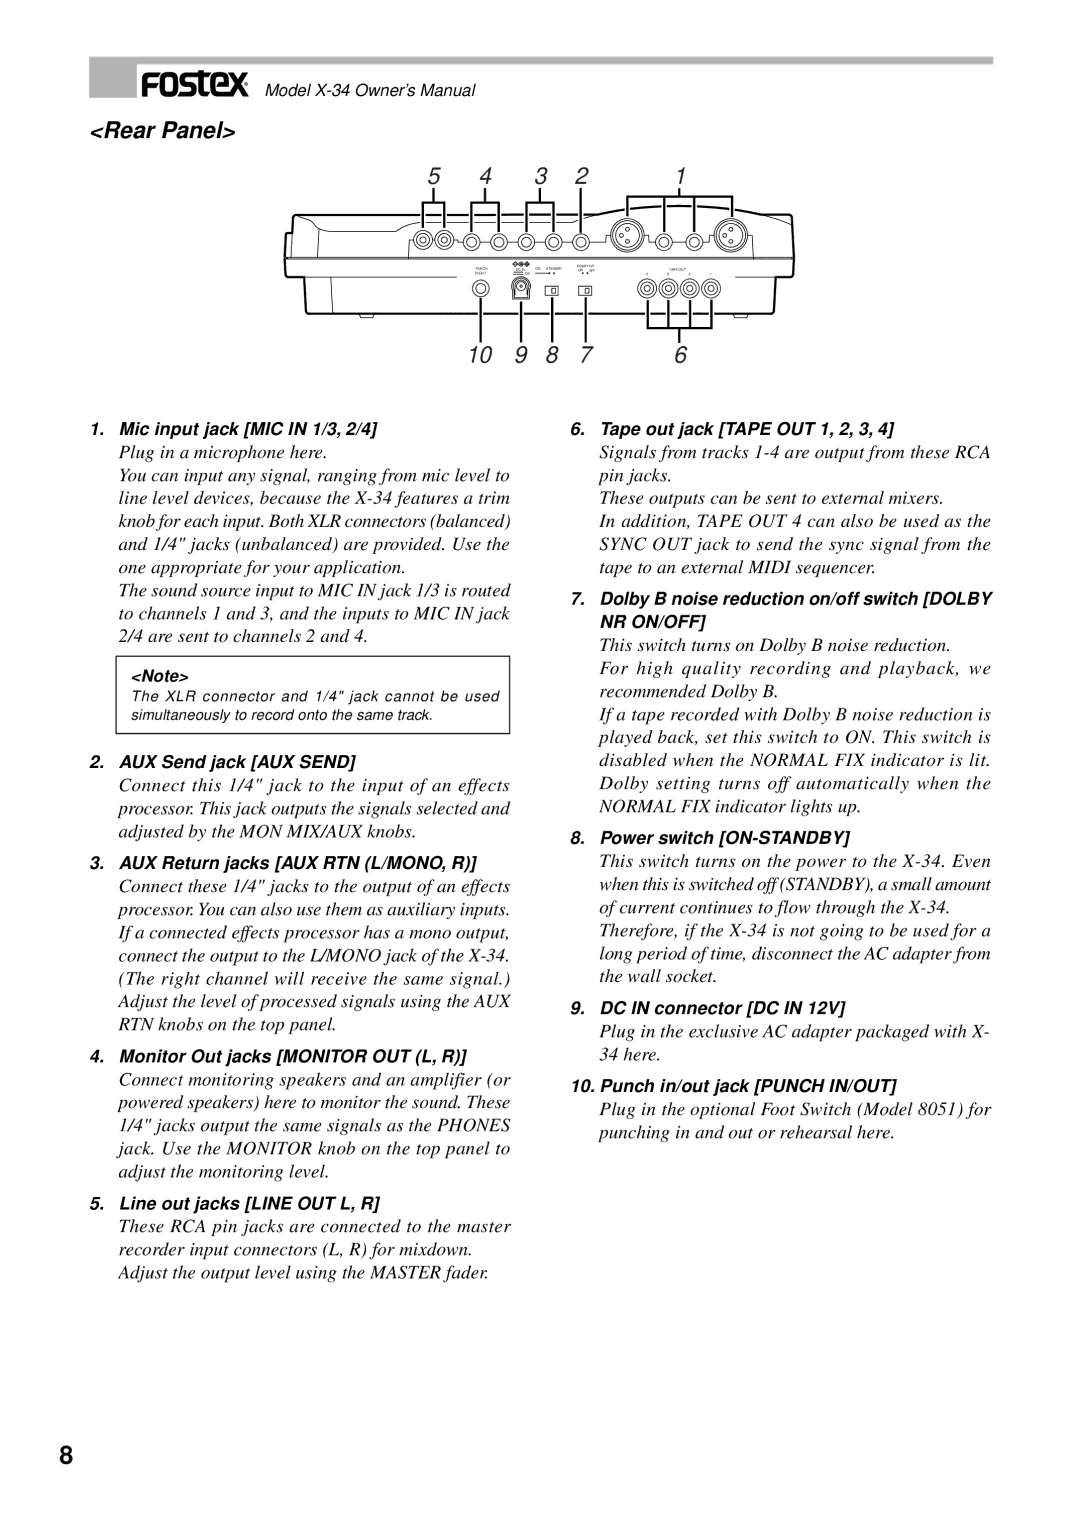
1. Mic input jack [MIC IN 1/3, 2/4] |
|
|
| 6. | Tape out jack [TAPE OUT 1, 2, 3, 4] |
Plug in a microphone here.
You can input any signal, ranging from mic level to line level devices, because the
The sound source input to MIC IN jack 1/3 is routed to channels 1 and 3, and the inputs to MIC IN jack 2/4 are sent to channels 2 and 4.
<Note>
The XLR connector and 1/4" jack cannot be used simultaneously to record onto the same track.
2.AUX Send jack [AUX SEND]
Connect this 1/4" jack to the input of an effects processor. This jack outputs the signals selected and adjusted by the MON MIX/AUX knobs.
3.AUX Return jacks [AUX RTN (L/MONO, R)]
Connect these 1/4" jacks to the output of an effects processor. You can also use them as auxiliary inputs. If a connected effects processor has a mono output, connect the output to the L/MONO jack of the
4.Monitor Out jacks [MONITOR OUT (L, R)]
Connect monitoring speakers and an amplifier (or powered speakers) here to monitor the sound. These 1/4" jacks output the same signals as the PHONES jack. Use the MONITOR knob on the top panel to adjust the monitoring level.
5.Line out jacks [LINE OUT L, R]
These RCA pin jacks are connected to the master recorder input connectors (L, R) for mixdown. Adjust the output level using the MASTER fader.
Signals from tracks
These outputs can be sent to external mixers.
In addition, TAPE OUT 4 can also be used as the SYNC OUT jack to send the sync signal from the tape to an external MIDI sequencer.
7.Dolby B noise reduction on/off switch [DOLBY NR ON/OFF]
This switch turns on Dolby B noise reduction.
For high quality recording and playback, we recommended Dolby B.
If a tape recorded with Dolby B noise reduction is played back, set this switch to ON. This switch is disabled when the NORMAL FIX indicator is lit. Dolby setting turns off automatically when the NORMAL FIX indicator lights up.
8.Power switch [ON-STANDBY]
This switch turns on the power to the
Therefore, if the
9.DC IN connector [DC IN 12V]
Plug in the exclusive AC adapter packaged with X- 34 here.
10.Punch in/out jack [PUNCH IN/OUT]
Plug in the optional Foot Switch (Model 8051) for punching in and out or rehearsal here.
8
