INSTALLATION REQUIREMENTS:

STEP 1 The “WSC” SLEEVE should be positioned so that the DRAIN EXTENSION extends a minimum of 9/16” beyond the OUTSIDE WALL (See Figure 1).

STEP 2 The “WSC” SLEEVE must extend a minimum of 7/8” beyond the INSIDE WALL.

STEP 3 The “WSC” SLEEVE must be installed level side to side.

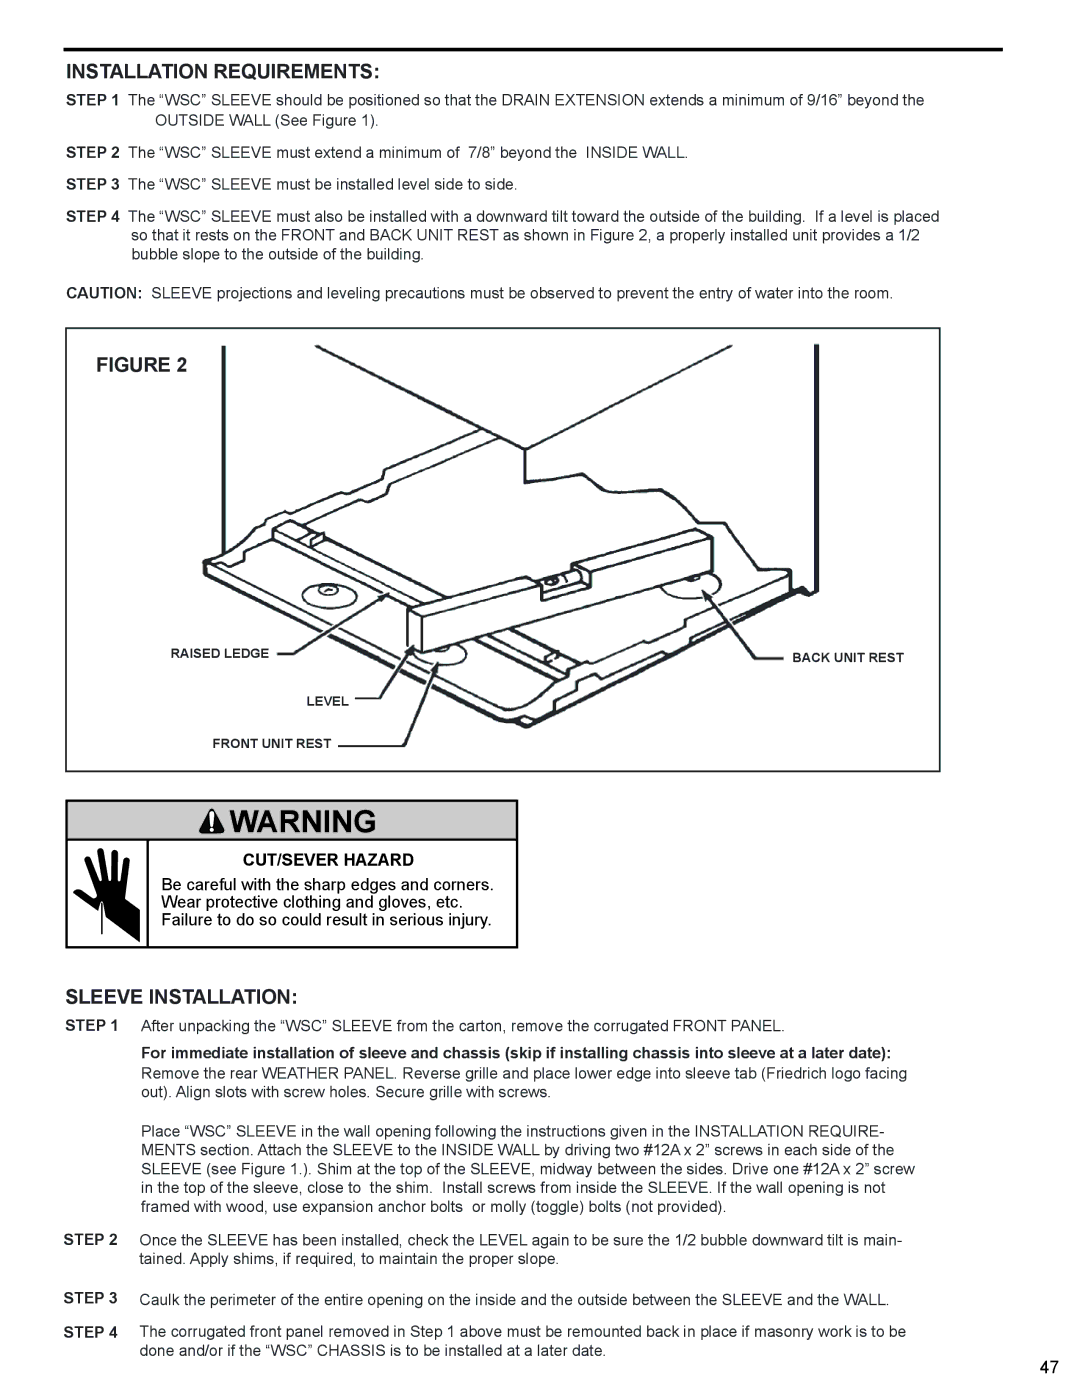
STEP 4 The “WSC” SLEEVE must also be installed with a downward tilt toward the outside of the building. If a level is placed so that it rests on the FRONT and BACK UNIT REST as shown in Figure 2, a properly installed unit provides a 1/2 bubble slope to the outside of the building.

CAUTION: SLEEVE projections and leveling precautions must be observed to prevent the entry of water into the room.

FIGURE 2

RAISED LEDGE

BACK UNIT REST

LEVEL

FRONT UNIT REST

WARNING

MECHANICALCUT/SEVER HAHAZARD

CUT/SEVER

Sharp edges and corners. Be careful with

Be careful with the sharp edges and corners. the sharp edges and corner. Wear protective clothingWear protectiveand gloves,clothingetc. and gloves, etc. Failure to do so could result in serious injury.

Failure to do so could result in serious injury.

SLEEVE INSTALLATION:

STEP 1 After unpacking the “WSC” SLEEVE from the carton, remove the corrugated FRONT PANEL.

For immediate installation of sleeve and chassis (skip if installing chassis into sleeve at a later date):

STEP 2

STEP 3 STEP 4

Remove the rear WEATHER PANEL. Reverse grille and place lower edge into sleeve tab (Friedrich logo facing out). Align slots with screw holes. Secure grille with screws.

Place “WSC” SLEEVE in the wall opening following the instructions given in the INSTALLATION REQUIRE- MENTS section. Attach the SLEEVE to the INSIDE WALL by driving two #12A x 2” screws in each side of the SLEEVE (see Figure 1.). Shim at the top of the SLEEVE, midway between the sides. Drive one #12A x 2” screw in the top of the sleeve, close to the shim. Install screws from inside the SLEEVE. If the wall opening is not framed with wood, use expansion anchor bolts or molly (toggle) bolts (not provided).

Once the SLEEVE has been installed, check the LEVEL again to be sure the 1/2 bubble downward tilt is main- tained. Apply shims, if required, to maintain the proper slope.

Caulk the perimeter of the entire opening on the inside and the outside between the SLEEVE and the WALL.

The corrugated front panel removed in Step 1 above must be remounted back in place if masonry work is to be done and/or if the “WSC” CHASSIS is to be installed at a later date.

47

Page 49
Image 49
Friedrich 2009, 2008 service manual Installation Requirements, MECHANICALCUT/SEVER Hahazard

2009, 2008 specifications

Friedrich 2008 and 2009 represent significant advancements in heating and cooling technology, particularly in the realm of air conditioning systems. Friedrich is known for producing robust and efficient HVAC solutions tailored for both residential and commercial applications. These models are particularly noteworthy for their innovative features and energy-efficient technologies that enhance user comfort and lower operational costs.

One of the main characteristics of the Friedrich 2008 and 2009 models is their emphasis on energy efficiency. Both units are designed to meet or exceed Energy Star standards, which indicates that they use less energy compared to standard models, contributing to greener living solutions. The incorporation of efficient compressors and high SEER (Seasonal Energy Efficiency Ratio) ratings ensures that users save money on their electricity bills while enjoying optimal cooling performance.

The units also feature advanced inverter technology, which allows for variable speed operation. This means that the system can adjust its cooling capacity based on the current temperature needs, resulting in more consistent comfort while reducing wear and tear on the equipment. Additionally, the inverter technology operates more quietly compared to traditional systems, making these models suitable for both home environments and commercial settings.

Friedrich 2008 and 2009 also provide users with enhanced control options. The inclusion of smart technology and Wi-Fi connectivity allows for remote monitoring and temperature adjustments via smartphones or tablets. Users can create schedules, set temperature preferences, and receive maintenance alerts, contributing to a more user-friendly experience.

Moreover, these models are designed with robust construction, featuring durable materials that withstand various weather conditions. Their compact footprint and sleek design make them suitable for window installation, while an array of sizes accommodates spaces of different dimensions.

Additionally, the air filtration systems in Friedrich 2008 and 2009 units improve indoor air quality. They effectively capture dust, allergens, and other particulates, ensuring a healthier environment for occupants.

In summary, Friedrich 2008 and 2009 models stand out for their energy efficiency, innovative inverter technology, smart controls, and robust construction. With a focus on user comfort and environmental responsibility, these models provide reliable solutions for effective heating and cooling in diverse applications.