30" DUAL FUEL SLIDE-IN RANGE INSTALLATION INSTRUCTIONS

(Models with an Electric Oven and a Gas Cooktop)

9.Leveling the Range -

Level the range and set cooktop height before installation in the cut-out opening.

1.Install an oven rack in the center of the oven.

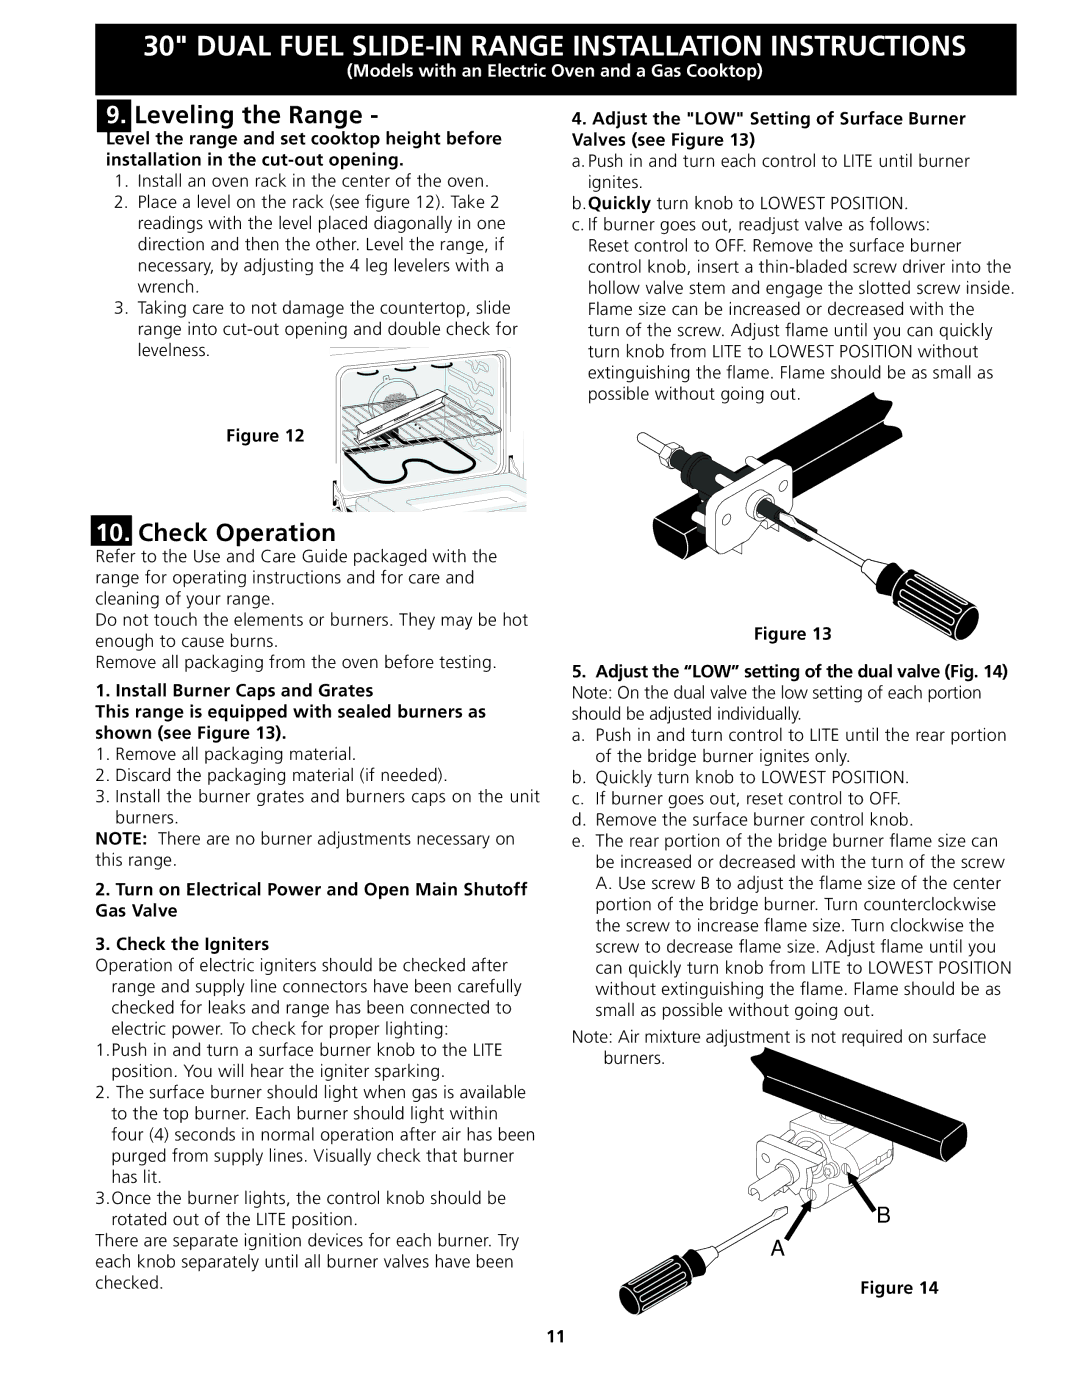
2.Place a level on the rack (see figure 12). Take 2 readings with the level placed diagonally in one direction and then the other. Level the range, if necessary, by adjusting the 4 leg levelers with a wrench.

3.Taking care to not damage the countertop, slide range into cut-out opening and double check for levelness.

Figure 12

10.Check Operation

Refer to the Use and Care Guide packaged with the range for operating instructions and for care and cleaning of your range.

Do not touch the elements or burners. They may be hot enough to cause burns.

Remove all packaging from the oven before testing.

1. Install Burner Caps and Grates

This range is equipped with sealed burners as shown (see Figure 13).

1.Remove all packaging material.

2.Discard the packaging material (if needed).

3.Install the burner grates and burners caps on the unit burners.

NOTE: There are no burner adjustments necessary on this range.

2.Turn on Electrical Power and Open Main Shutoff Gas Valve

3.Check the Igniters

Operation of electric igniters should be checked after range and supply line connectors have been carefully checked for leaks and range has been connected to electric power. To check for proper lighting:

1.Push in and turn a surface burner knob to the LITE position. You will hear the igniter sparking.

2.The surface burner should light when gas is available to the top burner. Each burner should light within four (4) seconds in normal operation after air has been purged from supply lines. Visually check that burner has lit.

3.Once the burner lights, the control knob should be rotated out of the LITE position.

There are separate ignition devices for each burner. Try each knob separately until all burner valves have been checked.

4.Adjust the "LOW" Setting of Surface Burner Valves (see Figure 13)

a. Push in and turn each control to LITE until burner ignites.

b.Quickly turn knob to LOWEST POSITION. c. If burner goes out, readjust valve as follows:

Reset control to OFF. Remove the surface burner control knob, insert a thin-bladed screw driver into the hollow valve stem and engage the slotted screw inside. Flame size can be increased or decreased with the turn of the screw. Adjust flame until you can quickly turn knob from LITE to LOWEST POSITION without extinguishing the flame. Flame should be as small as possible without going out.

Figure 13

5.Adjust the “LOW” setting of the dual valve (Fig. 14) Note: On the dual valve the low setting of each portion should be adjusted individually.

a. Push in and turn control to LITE until the rear portion of the bridge burner ignites only.

b. Quickly turn knob to LOWEST POSITION. c. If burner goes out, reset control to OFF. d. Remove the surface burner control knob.

e. The rear portion of the bridge burner flame size can be increased or decreased with the turn of the screw A. Use screw B to adjust the flame size of the center portion of the bridge burner. Turn counterclockwise the screw to increase flame size. Turn clockwise the screw to decrease flame size. Adjust flame until you can quickly turn knob from LITE to LOWEST POSITION without extinguishing the flame. Flame should be as small as possible without going out.

Note: Air mixture adjustment is not required on surface burners.

B

A

Figure 14

11

Page 11
Image 11
Frigidaire CPDS3085KF Leveling the Range, Check Operation, Adjust the LOW Setting of Surface Burner Valves see Figure

CPDS3085KF, 318201679 (0903) specifications

The Frigidaire 318201679 (0903) is a premium oven replacement part designed for the CPDS3085KF model, enhancing the cooking experience with its advanced features and technologies. With a focus on reliability and efficiency, this appliance part stands out as a key element in ensuring optimal performance for home chefs.

One of the main features of the Frigidaire 318201679 is its high-quality construction, designed to withstand the rigors of daily cooking. It is built with durable materials, making it resistant to wear and tear associated with constant use. This durability not only extends the life of the oven but also ensures consistent cooking results over time.

The part is engineered with precision, making installation straightforward and user-friendly. Homeowners can replace the oven part with minimal effort, ensuring that their cooking appliance returns to full functionality without the need for professional assistance. This ease of installation is a notable advantage for those who prefer to handle repairs themselves.

In terms of technology, the Frigidaire 318201679 benefits from modern advancements that enhance its operability. It features advanced heating and cooking technologies that promote even heat distribution, ensuring that food is cooked uniformly. This eliminates the common problem of hot spots, providing a more satisfactory cooking experience.

Another characteristic worth mentioning is the component's compatibility with various cooking styles. Whether baking, roasting, or broiling, the 318201679 delivers reliable performance, making it an excellent choice for diverse culinary applications. Its versatility aligns with the needs of today’s home cooks, who seek both convenience and quality in their kitchen appliances.

Additionally, this part is designed for energy efficiency, helping consumers save on energy costs while minimizing their environmental impact. By optimizing power usage, the Frigidaire 318201679 not only supports sustainable cooking practices but also contributes to lower utility bills.

In summary, the Frigidaire 318201679 (0903) is an essential component for the CPDS3085KF oven, featuring robust construction, user-friendly installation, advanced cooking technologies, versatility, and energy efficiency. These characteristics collectively enhance the cooking experience, making it a reliable choice for any culinary enthusiast.