4.On the "TCPA Set" line, select a TCPA limit desired. (30s, 1, 2, 3, 4, 5, 6, 12M)
5.Press the [ACQ/ENTER] key.
6.Press the [MENU] key to close the menu.
The flashing of the triangle plot symbol and vector remain on the screen until the danger- ous situation is no longer present or you in- tentionally terminate tracking of the target by using the [SELECT/CANCEL] key.
Lost Target Alarm
When the system detects a loss of a tracked target, the target symbol becomes a flashing diamond.
Installation of ARP-10
Necessary Parts
ARP-10 (000-086-852)
Name | Type | Code No. | Qty |
|
|
|
|
18P9007 | 1 | ||
|
|
|
|
Spacer | 3 | ||
|
|
|
|
Spring Washer | M3 C5191W | 3 | |
|
|
|
|
** | M3x8 C2700W | 3 | |
Pan Head Screw |
|
| |
|
|
| 5 |
Pan Head Screw | 3x8 SWRM10 | 3 | |
(w/washer) * |
|
|
|
* Not used.
**:Use three screws only.
Mounting (For technician only)
1. Remove the cover from the display unit as follows.
1 Unscrew four binding screws (M4 x
10).
2 Unfasten six binding screws (M3 x
10).
3 Remove three rubber covers to loosen three hex nuts.
4 Loosen two hex nuts.
11
2
2
4
| 1 | 3 | 1 |
|
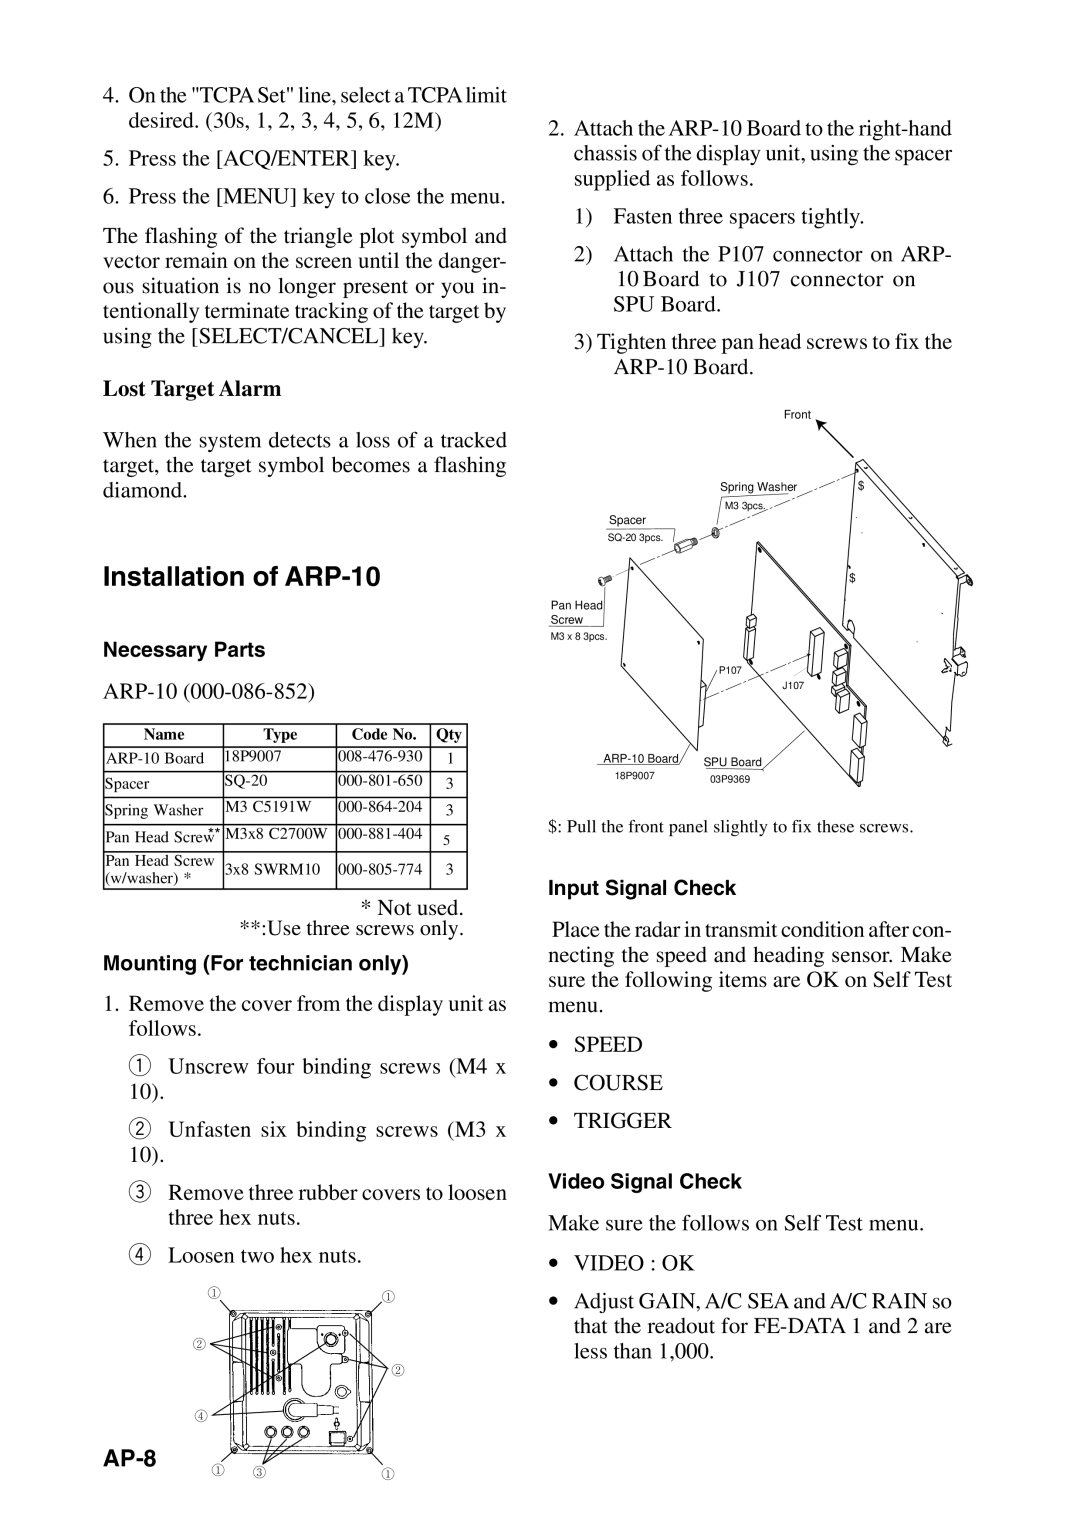
2.Attach the
1)Fasten three spacers tightly.
2)Attach the P107 connector on ARP- 10 Board to J107 connector on SPU Board.
3)Tighten three pan head screws to fix the
Front
Spring Washer | $ |
M3 3pcs.
Spacer
$
Pan Head
Screw
M3 x 8 3pcs.
P107
J107
SPU Board | |
18P9007 | 03P9369 |
|
$: Pull the front panel slightly to fix these screws.
Input Signal Check
Place the radar in transmit condition after con- necting the speed and heading sensor. Make sure the following items are OK on Self Test menu.
•SPEED
•COURSE
•TRIGGER
Video Signal Check
Make sure the follows on Self Test menu.
•VIDEO : OK
•Adjust GAIN, A/C SEA and A/C RAIN so that the readout for
