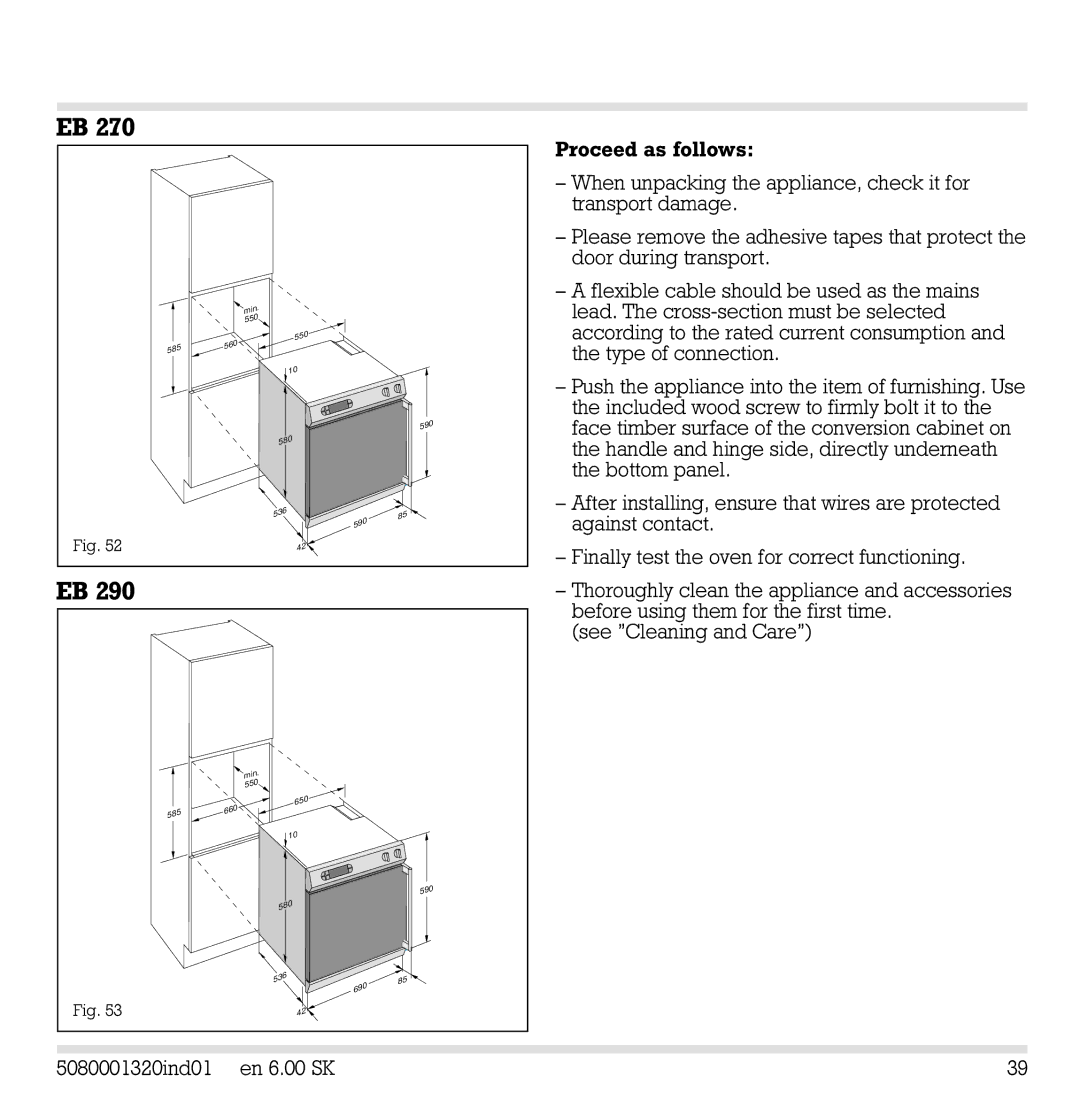
EB 270
|
| min | . |
|
|
| 550 |
| |
|
| 560 | 550 |
|
| 585 |
|
| |
|
|
|
| |
|
|
| 10 |
|
|
|
|
| 590 |
|
|
| 580 |
|
|
|
| 536 | 85 |
|
|
|
| 590 |
Fig. 52 |
|
| 42 |
|
EB 290
|
| min | . |
|
|
| 550 |
| |
|
| 660 | 650 |
|
| 585 |
|
| |
|
|
|
| |
|
|
| 10 |
|
|
|
|
| 590 |
|
|
| 580 |
|
|
|
| 536 | 85 |
|
|
|
| 690 |
Fig. 53 |
|
| 42 |
|
Proceed as follows:
–When unpacking the appliance, check it for transport damage.
–Please remove the adhesive tapes that protect the door during transport.
–A flexible cable should be used as the mains lead. The
–Push the appliance into the item of furnishing. Use the included wood screw to firmly bolt it to the face timber surface of the conversion cabinet on the handle and hinge side, directly underneath the bottom panel.
–After installing, ensure that wires are protected against contact.
–Finally test the oven for correct functioning.
–Thoroughly clean the appliance and accessories before using them for the first time.
(see ”Cleaning and Care”)
5080001320ind01 en 6.00 SK | 39 |
