Magnum | Installation and User Guide 03/06) |
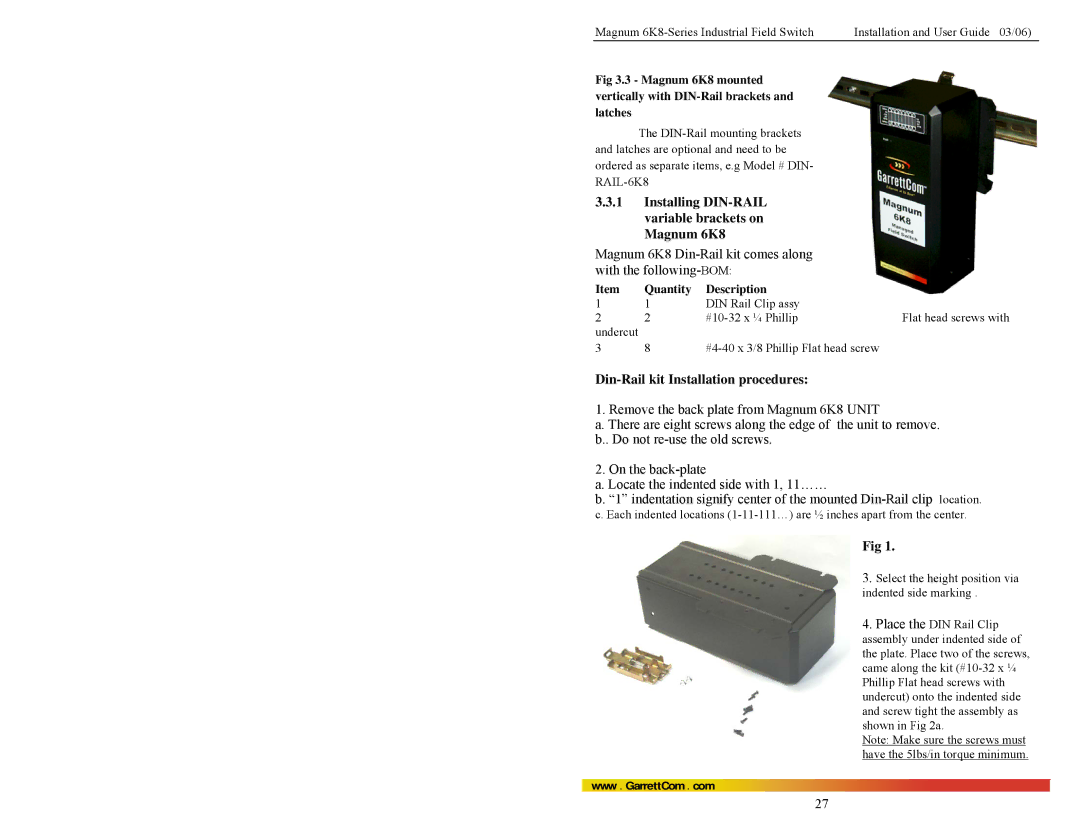
Fig 3.3 - Magnum 6K8 mounted vertically with
The
3.3.1Installing DIN-RAIL variable brackets on Magnum 6K8
Magnum 6K8 Din-Rail kit comes along with the following-BOM:
Item | Quantity | Description |
|
1 | 1 | DIN Rail Clip assy |
|
2 | 2 | Flat head screws with | |
undercut |
|
|
|
3 | 8 |
|
Din-Rail kit Installation procedures:
1. Remove the back plate from Magnum 6K8 UNIT
a. There are eight screws along the edge of the unit to remove. b.. Do not
2. On the
a. Locate the indented side with 1, 11……
b. “1” indentation signify center of the mounted
Fig 1.
3. Select the height position via indented side marking .
4. Place the DIN Rail Clip assembly under indented side of the plate. Place two of the screws, came along the kit
Note: Make sure the screws must have the 5lbs/in torque minimum.
www . GarrettCom . com
27