Window Installation Instructions
3REMOVE THE FRONT GRILLE (IF ATTACHED) (cont.)
BPull the bottom grille
corners out to release the lower tabs on each side.
NOTE: Do not pull the bottom edge toward you more than 3″ or
you may damage the tabs of the grille.
CLift the grille up and off the top tabs.
4REMOVE THE AIR CONDITIONER FROM THE CASE
ARemove the 2 screws on each side of the case. Keep these for later use.
Front of air conditioner
BSlide the air conditioner from the case by gripping the base pan handle and pulling forward while bracing the case.
Front of air conditioner
Remove packing cardboard and tape, if present.
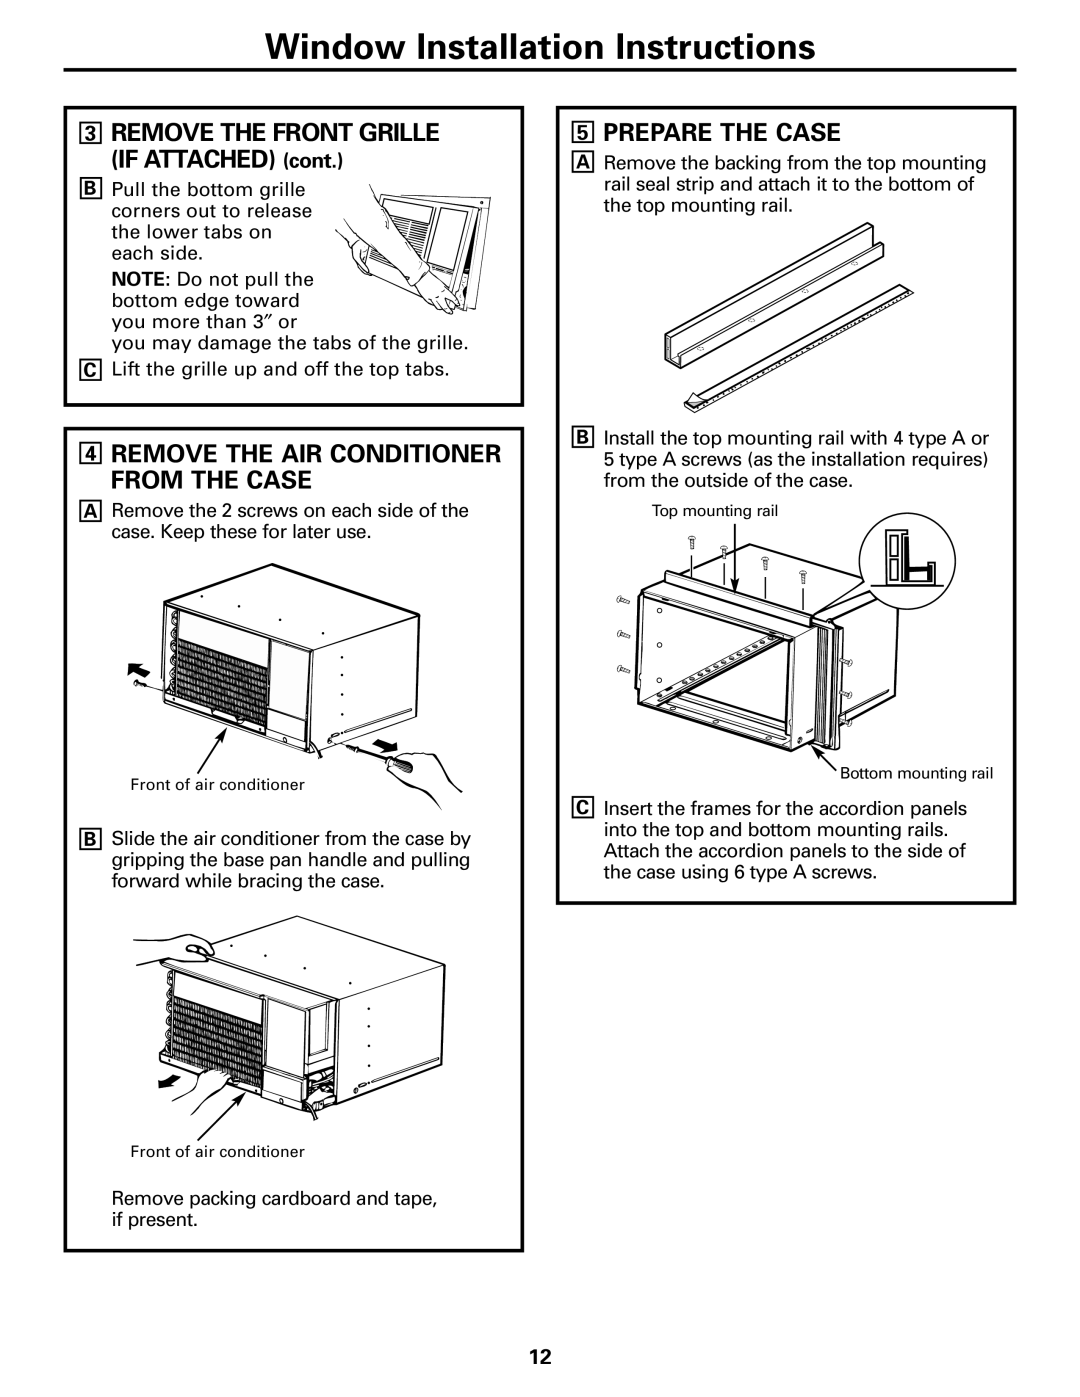
5PREPARE THE CASE
ARemove the backing from the top mounting rail seal strip and attach it to the bottom of the top mounting rail.
BInstall the top mounting rail with 4 type A or 5 type A screws (as the installation requires) from the outside of the case.
Top mounting rail
Bottom mounting rail
CInsert the frames for the accordion panels into the top and bottom mounting rails. Attach the accordion panels to the side of the case using 6 type A screws.
12