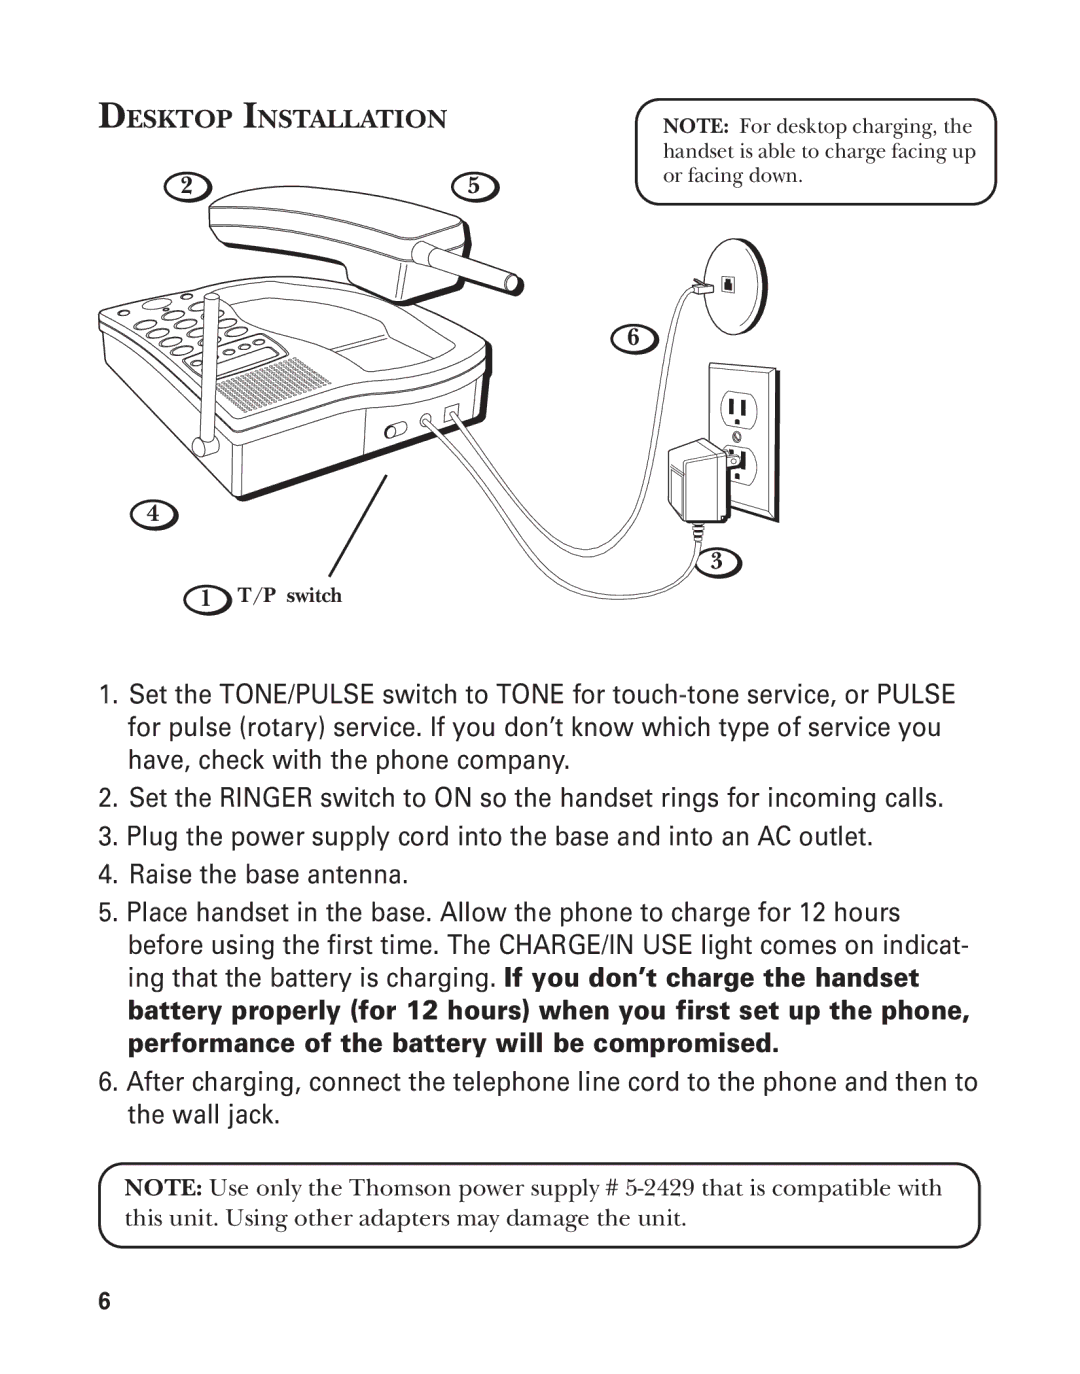
DESKTOP INSTALLATION
25
4
1 T/P switch
NOTE: For desktop charging, the handset is able to charge facing up or facing down.
6
3
1.Set the TONE/PULSE switch to TONE for
2.Set the RINGER switch to ON so the handset rings for incoming calls.
3.Plug the power supply cord into the base and into an AC outlet.
4.Raise the base antenna.
5.Place handset in the base. Allow the phone to charge for 12 hours before using the first time. The CHARGE/IN USE light comes on indicat- ing that the battery is charging. If you don’t charge the handset battery properly (for 12 hours) when you first set up the phone, performance of the battery will be compromised.
6.After charging, connect the telephone line cord to the phone and then to the wall jack.
NOTE: Use only the Thomson power supply #
6
