9ven Shelves
The shelvesare
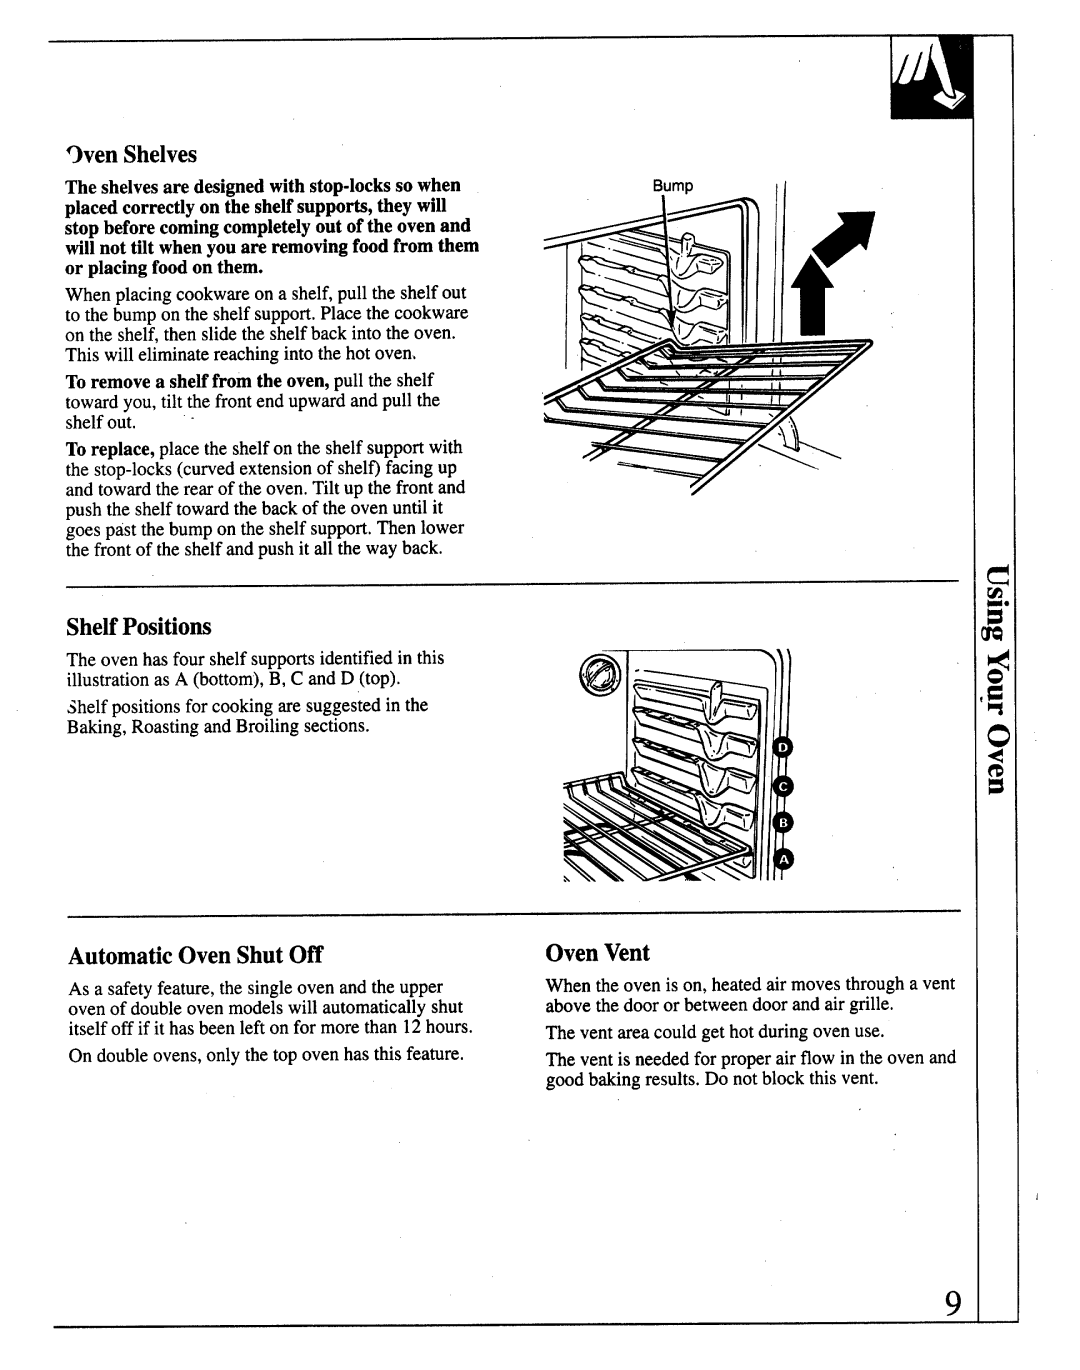
Whenplacingcookwareon a shelf,pull the shelfout to the bumpon the shelfsupport,Placethe cookware on the shelf,then slidethe shelfback into the oven.
This will eliminatereachinginto the hot oven.
To remove a shelf from the oven,pull the shelf towardyou,tilt the frontend upwardand pull the
shelfout. -
Toreplace,placethe shelfon the shelfsupportwith the
Bump
II
I 1
, 1
.
ShelfPositions
The ovenhas four shelfsupportsidentifiedin this illustrationas A (bottom),B, C and D (top).
Shelfpositionsfor cookingare suggestedin the Baking,Roastingand Broilingsections.
AutomaticOven Shut Off
As a safetyfeature,the singleoven and the upper ovenof doubleovenmodelswill automaticallyshut itselfoff if it has been left on for morethan 12hours.
On doubleovens,onlythe top ovenhas this feature.
OvenVent
When the oven is on, heatedair movesthrougha vent abovethe door or betweendoor and air grille.
The vent area couldget hot duringovenuse.
The ventis neededfor properair flow in the oven and goodbakingresults.Do not blockthis vent.
9
