Instructions

Using the probe.

For many foods, especially roasts and poultry, internal food temperature is the best test for doneness. The temperature probe takes the guesswork out of roasting by cooking foods to the exact doneness you want.

Operating Instructions Safety

The temperature probe has a skewer-like probe at one end and a plug at the other end that goes into the outlet in the oven.

NOTE: Double oven models have a probe in the upper oven only.

Use of probes other than the one provided with this product may result in damage to the probe.

Use the handles of the probe and plug when inserting and removing them from the meat and outlet.

To avoid damaging your probe, do not use tongs to pull on the cable when removing it.

To avoid breaking the probe, make sure food is completely defrosted before inserting.

Cable

Plug

Probe

Handles

To prevent possible burns, do not unplug the probe from the outlet until the oven has cooled.

Never leave your probe inside the oven during a self-cleaning cycle.

Do not store the probe in the oven.

Care and Cleaning

After preparing the meat and placing it on a trivet or on the broiler pan grid, follow these directions for proper probe placement.

Lay the probe on the outside of the meat along the top or side and mark with your finger where the edge of the meat comes to on the probe. The point should rest in the center of the thickest meaty part of the roast.

Insert the probe completely into the meat. It should not touch the bone, fat or gristle.

For roasts with no bone, insert the probe into the meatiest part of the roast. For bone-in ham or lamb, insert the probe into the center of the lowest large muscle or joint.

Insert the probe into the center of dishes such as meat loaf or casseroles. When cooking fish, insert the probe from just above the gill into the meatiest area, parallel to the backbone.

Insert the probe into the meatiest part of the inner thigh from below and parallel to the leg of a whole turkey.

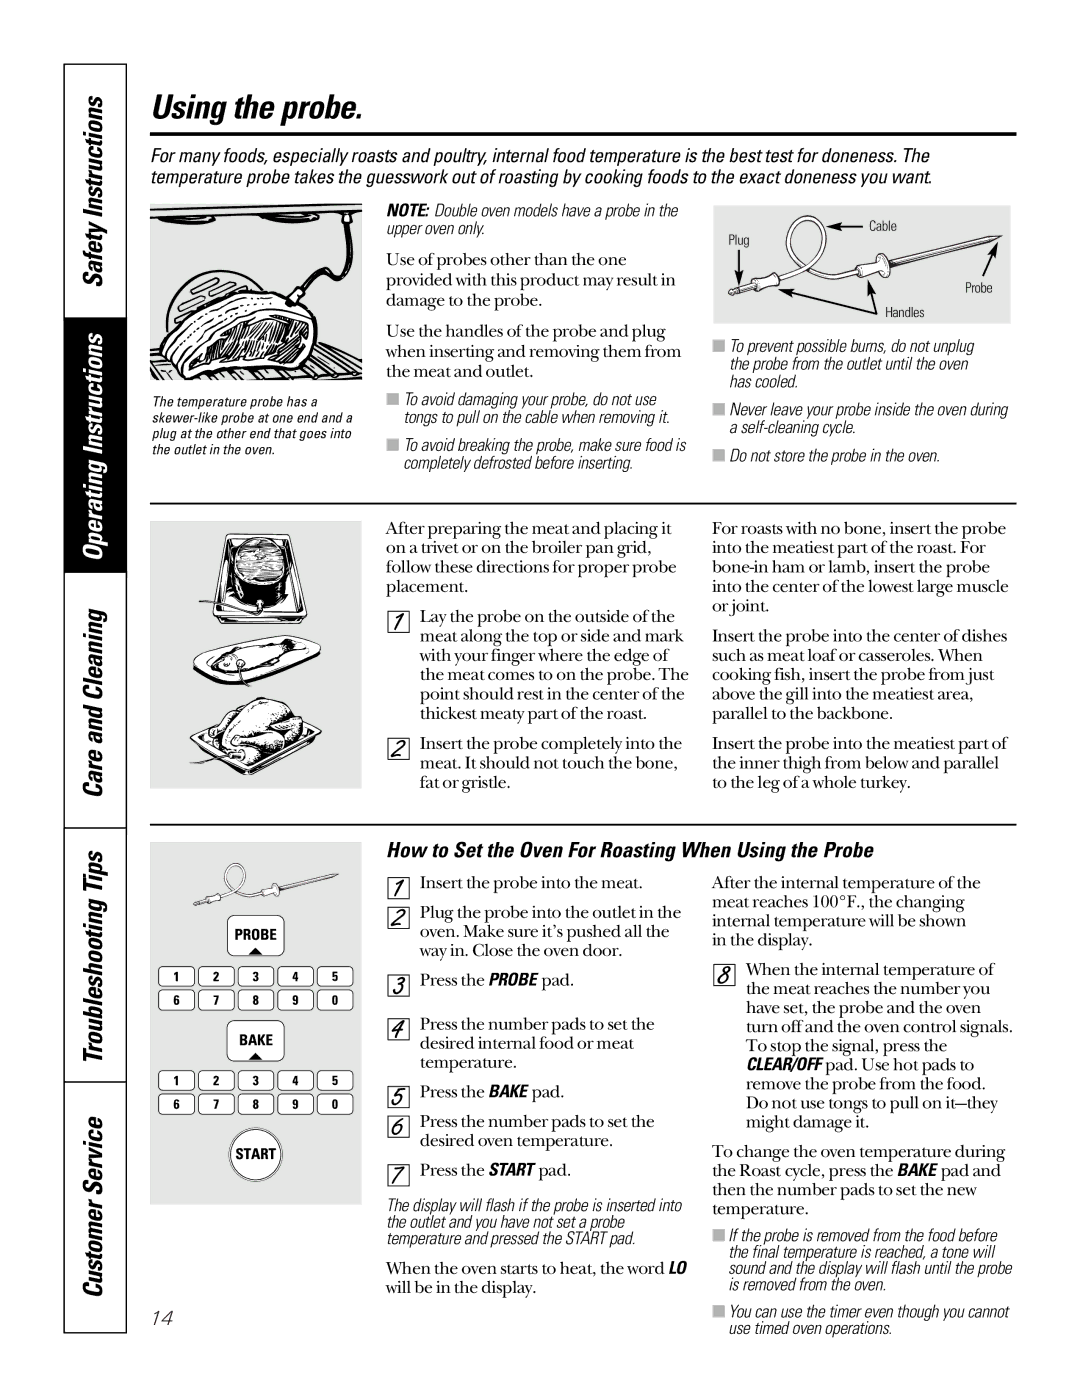
How to Set the Oven For Roasting When Using the Probe

Customer Service Troubleshooting Tips

Insert the probe into the meat.

Plug the probe into the outlet in the oven. Make sure it’s pushed all the way in. Close the oven door.

Press the PROBE pad.

Press the number pads to set the desired internal food or meat temperature.

Press the BAKE pad.

Press the number pads to set the desired oven temperature.

Press the START pad.

The display will flash if the probe is inserted into the outlet and you have not set a probe temperature and pressed the START pad.

When the oven starts to heat, the word LO will be in the display.

14

After the internal temperature of the meat reaches 100°F., the changing internal temperature will be shown in the display.

When the internal temperature of the meat reaches the number you have set, the probe and the oven turn off and the oven control signals. To stop the signal, press the CLEAR/OFF pad. Use hot pads to remove the probe from the food. Do not use tongs to pull on it—they might damage it.

To change the oven temperature during the Roast cycle, press the BAKE pad and then the number pads to set the new temperature.

If the probe is removed from the food before the final temperature is reached, a tone will sound and the display will flash until the probe is removed from the oven.

You can use the timer even though you cannot use timed oven operations.

Page 14
Image 14
GE JTP56BABB, jt950, jk910, jk950, jt910, JT950SASS Using the probe, How to Set the Oven For Roasting When Using the Probe

JT950WAWW, JT950SASS, jt910, jk950, jk910 specifications

The GE JTP56BABB is a versatile built-in wall oven that combines advanced cooking technologies with user-friendly features, making it a popular choice for home chefs. Its sleek design and stainless steel finish seamlessly integrate into any kitchen decor. One noteworthy feature of the JTP56BABB is its True European Convection system. This technology uses a third heating element and a fan to circulate hot air, ensuring even cooking results and reducing cook times.

Another key feature is the oven's self-cleaning capability, which simplifies maintenance by using high temperatures to burn away food residue. The JTP56BABB also comes equipped with an integrated digital control panel that offers a variety of cooking modes, including bake, broil, and roast. The large capacity of 5.0 cubic feet allows for cooking multiple dishes at once, making it ideal for larger families or entertaining guests.

The GE JT950 is another exceptional wall oven, featuring an advanced combination of convection and microwave cooking. This model allows users to prepare meals faster while maintaining great flavor and texture. The oven includes a sensor cooking feature that automatically adjusts cooking times and power levels for optimal results. Its sleek design includes a glass touch display that simplifies menu navigation and settings adjustments.

The GE JK910 and JK950 models are highlight in the GE lineup, emphasizing similar advanced cooking techniques. The JK910 offers a spacious 5.0 cubic feet of cooking space and includes a warming drawer, which is perfect for keeping food at serving temperature without overcooking. It also boasts a self-cleaning function and precision temperature probe for perfectly cooked meats.

The JK950 takes it a step further by offering additional features, including Wi-Fi connectivity. This allows users to control and monitor their oven remotely via a smartphone app, providing unparalleled convenience. Both models also include glide racks that slide in and out smoothly, making it easy to access your food without mess.

Finally, the GE JT910 is perfect for those who prioritize efficient baking and roasting. Its Smart Oven technology provides multiple pre-set cooking modes, while its stainless steel finish offers durability and modern aesthetic appeal. With features like the self-cleaning option and spacious interior, the JT910 is designed to meet the demands of even the most enthusiastic cooks.