Installing the Bracket and Camera
4.1MOUNTING THE BRACKET
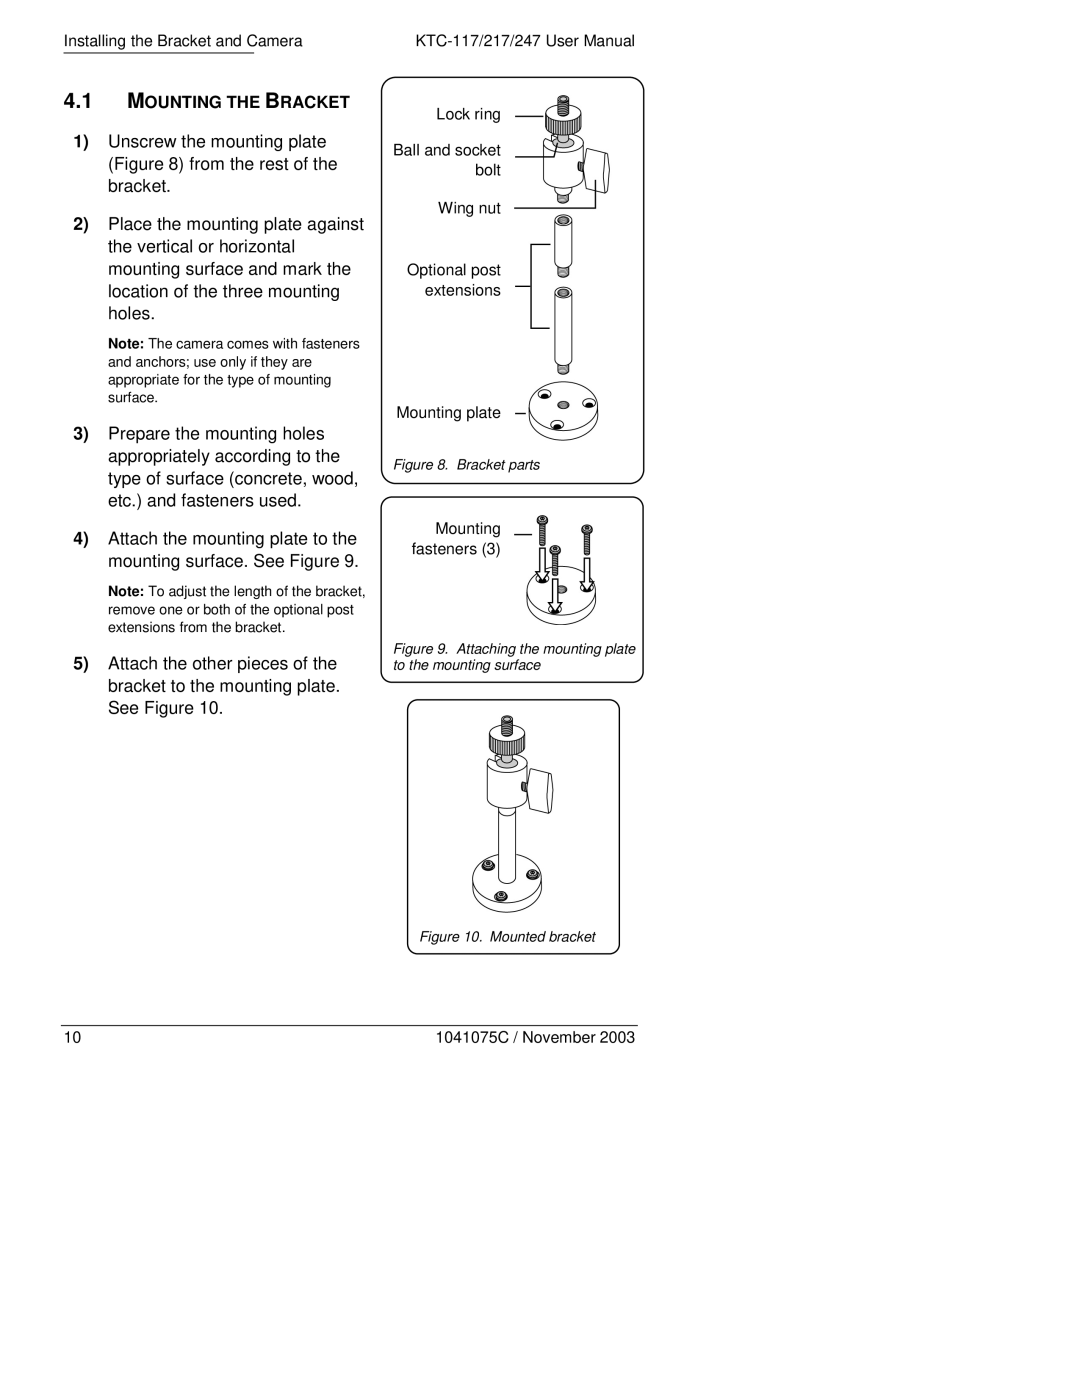
1)Unscrew the mounting plate (Figure 8) from the rest of the bracket.
2)Place the mounting plate against the vertical or horizontal mounting surface and mark the location of the three mounting holes.
Note: The camera comes with fasteners and anchors; use only if they are appropriate for the type of mounting surface.
3)Prepare the mounting holes appropriately according to the type of surface (concrete, wood, etc.) and fasteners used.
4)Attach the mounting plate to the mounting surface. See Figure 9.
Note: To adjust the length of the bracket, remove one or both of the optional post extensions from the bracket.
5)Attach the other pieces of the bracket to the mounting plate. See Figure 10.
Lock ring
Ball and socket bolt
Wing nut
Optional post extensions
Mounting plate
Figure 8. Bracket parts
Mounting fasteners (3)
Figure 9. Attaching the mounting plate to the mounting surface
Figure 10. Mounted bracket
10 | 1041075C / November 2003 |