Setting Up the VCR
Startup
10. Set the ALERT SOUND feature.
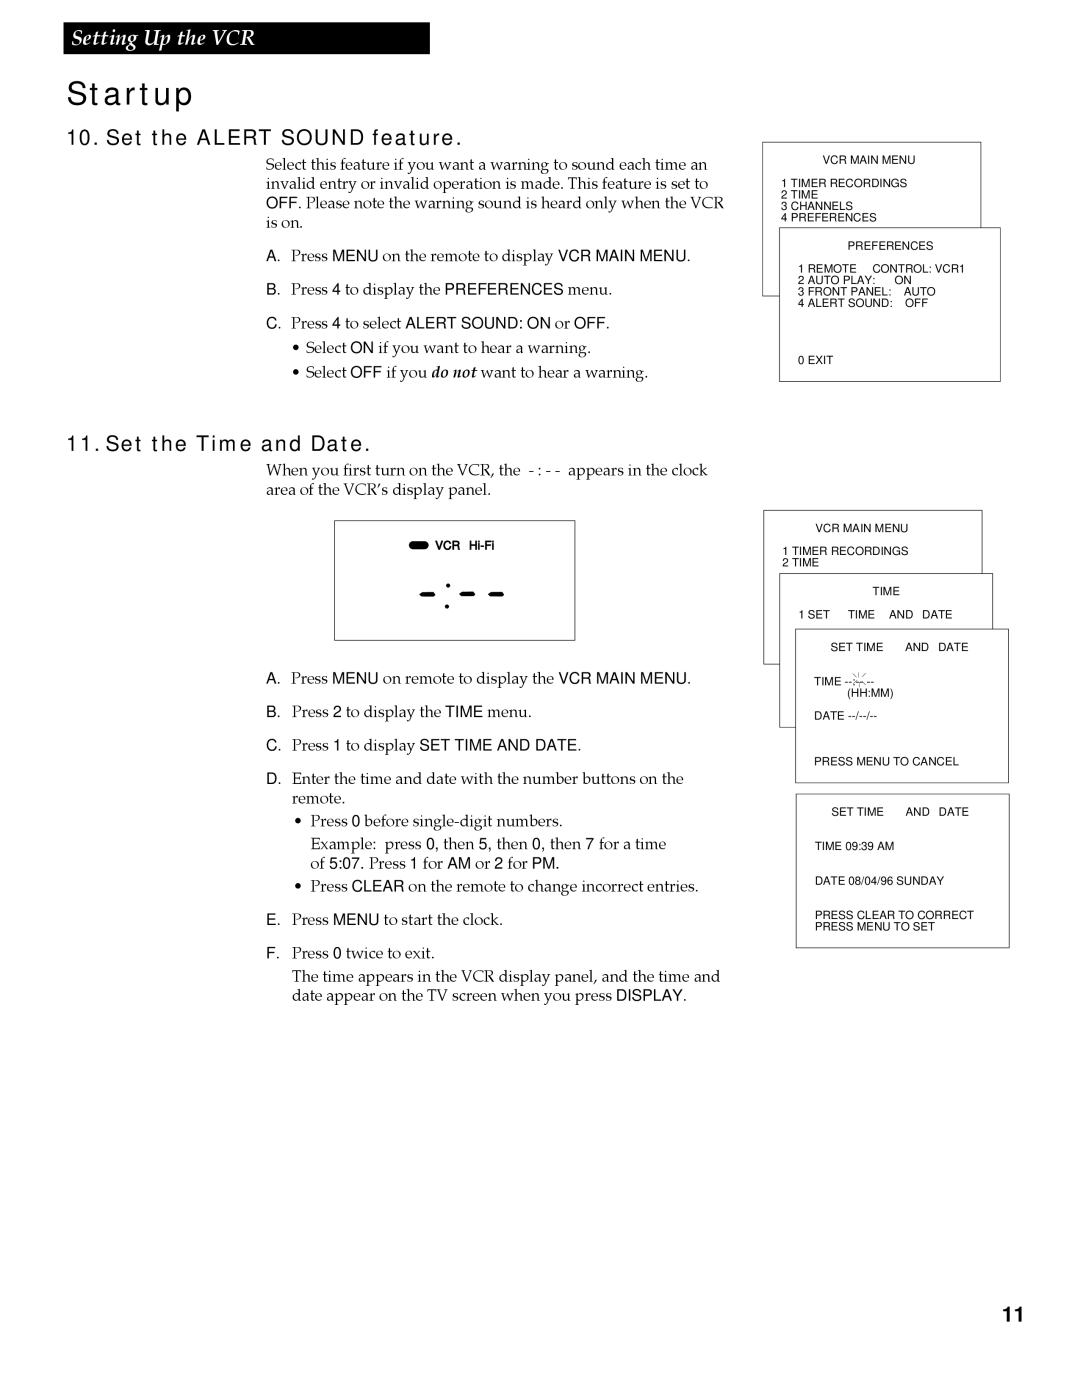
Select this feature if you want a warning to sound each time an invalid entry or invalid operation is made. This feature is set to OFF. Please note the warning sound is heard only when the VCR is on.
A. Press MENU on the remote to display VCR MAIN MENU.
B. Press 4 to display the PREFERENCES menu.
C. Press 4 to select ALERT SOUND: ON or OFF.
¥Select ON if you want to hear a warning.
¥Select OFF if you do not want to hear a warning.
VCR MAIN MENU
1 TIMER RECORDINGS
2 TIME
3 CHANNELS
4 PREFERENCES
PREFERENCES
1 REMOTE CONTROL: VCR1
2 AUTO PLAY: ON
3 FRONT PANEL: AUTO
4 ALERT SOUND: OFF
0 EXIT
11. Set the Time and Date.
When you first turn on the VCR, the
VCR
A. Press MENU on remote to display the VCR MAIN MENU.
B. Press 2 to display the TIME menu.
C. Press 1 to display SET TIME AND DATE.
D. Enter the time and date with the number buttons on the remote.
¥Press 0 before
Example: press 0, then 5, then 0, then 7 for a time of 5:07. Press 1 for AM or 2 for PM.
¥Press CLEAR on the remote to change incorrect entries.
E. Press MENU to start the clock.
F. Press 0 twice to exit.
The time appears in the VCR display panel, and the time and date appear on the TV screen when you press DISPLAY.
VCR MAIN MENU
1 TIMER RECORDINGS
2 TIME
TIME
1 SET TIME AND DATE
SET TIME AND DATE
TIME ![]() --:--
--:--
(HH:MM) DATE
PRESS MENU TO CANCEL
SET TIME AND DATE
TIME 09:39 AM
DATE 08/04/96 SUNDAY
PRESS CLEAR TO CORRECT PRESS MENU TO SET
11
