About the automatic icemaker.

ge.com

A newly-installed refrigerator may take 12–24 hours to begin making ice.

Safety

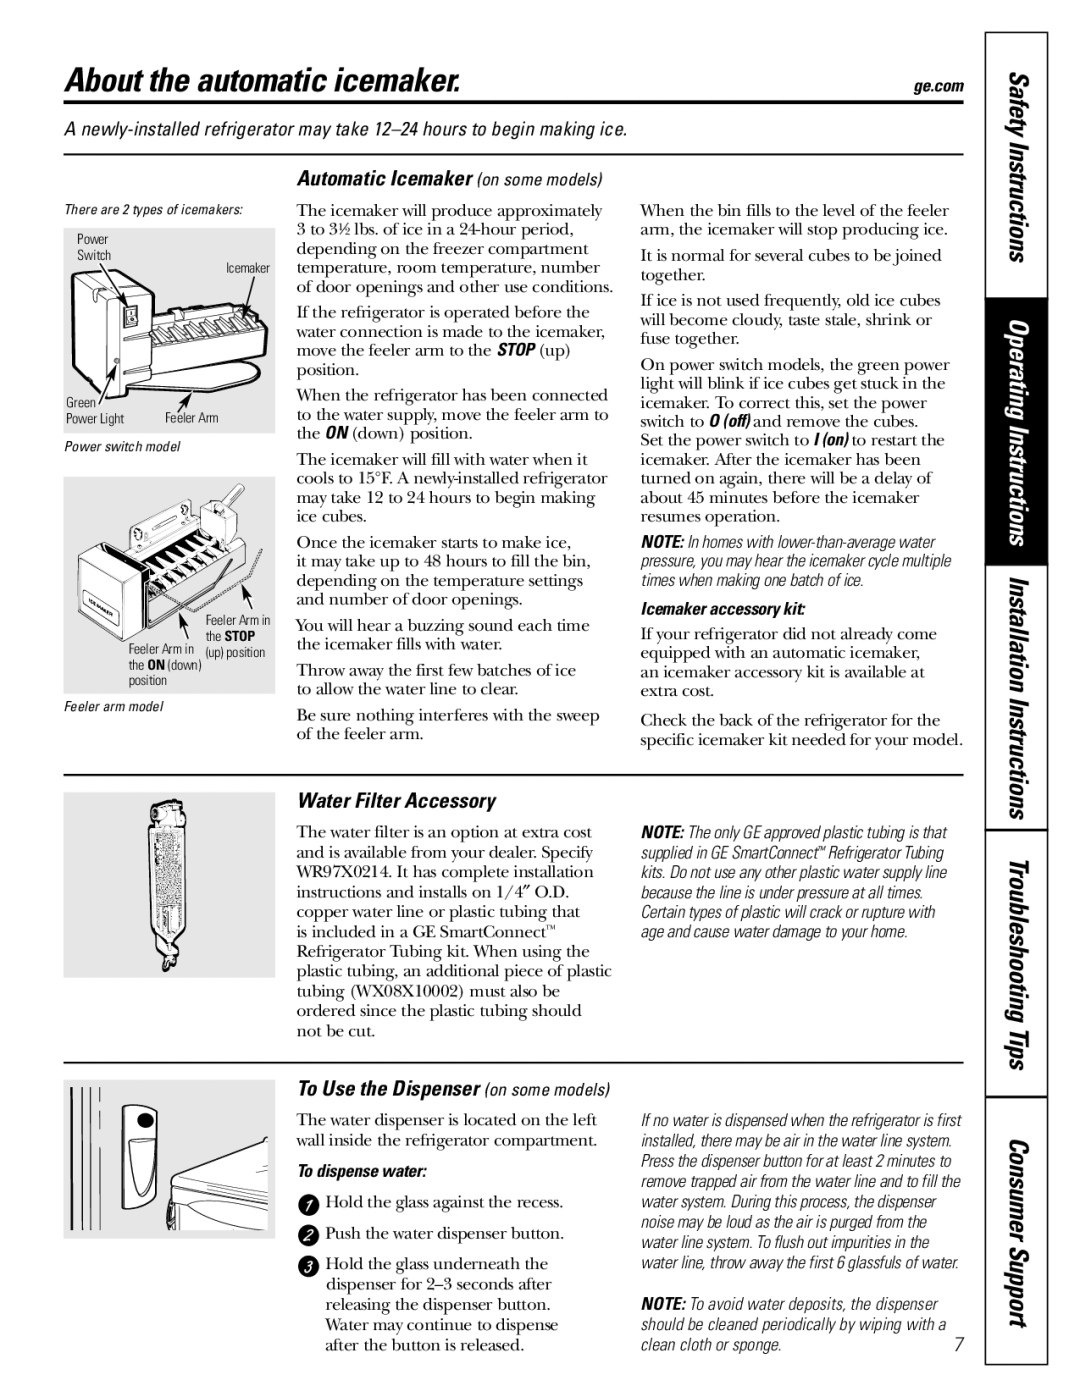
There are 2 types of icemakers:

Power

Switch

Icemaker

Green

Feeler Arm

Power Light

Power switch model

Feeler Arm in

the STOP

Feeler Arm in (up) position the ON (down)

position

Feeler arm model

Automatic Icemaker (on some models)

The icemaker will produce approximately 3 to 312 lbs. of ice in a 24-hour period, depending on the freezer compartment temperature, room temperature, number of door openings and other use conditions.

If the refrigerator is operated before the water connection is made to the icemaker, move the feeler arm to the STOP (up) position.

When the refrigerator has been connected to the water supply, move the feeler arm to the ON (down) position.

The icemaker will fill with water when it cools to 15°F. A newly-installed refrigerator may take 12 to 24 hours to begin making ice cubes.

Once the icemaker starts to make ice,

it may take up to 48 hours to fill the bin, depending on the temperature settings and number of door openings.

You will hear a buzzing sound each time the icemaker fills with water.

Throw away the first few batches of ice to allow the water line to clear.

Be sure nothing interferes with the sweep of the feeler arm.

When the bin fills to the level of the feeler arm, the icemaker will stop producing ice.

It is normal for several cubes to be joined together.

If ice is not used frequently, old ice cubes will become cloudy, taste stale, shrink or fuse together.

On power switch models, the green power light will blink if ice cubes get stuck in the icemaker. To correct this, set the power switch to O (off) and remove the cubes. Set the power switch to I (on) to restart the icemaker. After the icemaker has been turned on again, there will be a delay of about 45 minutes before the icemaker resumes operation.

NOTE: In homes with lower-than-average water pressure, you may hear the icemaker cycle multiple times when making one batch of ice.

Icemaker accessory kit:

If your refrigerator did not already come equipped with an automatic icemaker, an icemaker accessory kit is available at extra cost.

Check the back of the refrigerator for the specific icemaker kit needed for your model.

Instructions Operating Instructions Installation Instructions

Water Filter Accessory

The water filter is an option at extra cost and is available from your dealer. Specify WR97X0214. It has complete installation instructions and installs on 1/4″ O.D. copper water line or plastic tubing that is included in a GE SmartConnectRefrigerator Tubing kit. When using the plastic tubing, an additional piece of plastic tubing (WX08X10002) must also be ordered since the plastic tubing should not be cut.

NOTE: The only GE approved plastic tubing is that supplied in GE SmartConnectRefrigerator Tubing kits. Do not use any other plastic water supply line because the line is under pressure at all times.

Certain types of plastic will crack or rupture with age and cause water damage to your home.

Troubleshooting Tips

To Use the Dispenser (on some models)

The water dispenser is located on the left wall inside the refrigerator compartment.

To dispense water:

Hold the glass against the recess.

Push the water dispenser button.

Hold the glass underneath the dispenser for 2–3 seconds after releasing the dispenser button. Water may continue to dispense after the button is released.

If no water is dispensed when the refrigerator is first installed, there may be air in the water line system. Press the dispenser button for at least 2 minutes to remove trapped air from the water line and to fill the water system. During this process, the dispenser noise may be loud as the air is purged from the water line system. To flush out impurities in the water line, throw away the first 6 glassfuls of water.

NOTE: To avoid water deposits, the dispenser


should be cleaned periodically by wiping with a

7

clean cloth or sponge.

Consumer Support

Page 7
Image 7
GE 197D3354P013, WX08X10015 About the automatic icemaker, Safety, Troubleshooting Tips, Automatic Icemaker on some models

197D3354P013, WX08X10006, WX08X10025, WX08X10015 specifications

The GE WX08X10015, WX08X10025, WX08X10006, and 197D3354P013 are essential components designed for enhancing the functionality and performance of GE appliances, particularly in laundry applications. These parts are popular for their reliable construction, compatibility, and advanced features that ensure seamless operation.

The GE WX08X10015 is a high-quality washer hose that is engineered for adding flexibility and durability to your washing machine. It typically features a reinforced design to prevent kinks and leaks, ensuring that water flows smoothly without interruptions. The hose is also resistant to extreme temperatures, making it suitable for various washing machine environments. The installation process is straightforward, allowing homeowners to easily replace existing hoses without the need for professional assistance.

On the other hand, the GE WX08X10025 offers a similar application with an extended length that caters to varying laundry room configurations. This appliance part is designed to connect the washing machine to the water supply, providing a consistent and secure water flow during wash cycles. Its robust construction means that it can withstand high pressures, making it a reliable choice for both top-loading and front-loading washing machines.

The GE WX08X10006 is another important hose option, known for its features that allow for an effective drain during laundry cycles. This hose plays a critical role in removing water from the washing machine after each cycle, ensuring that the machine operates efficiently. The drainage hose is typically engineered to fit standard washing machine drain outlets, promoting a hassle-free installation and maintenance experience.

Lastly, the 197D3354P013 is a versatile part that serves as a coupling or connector within washing machine setups. Its design includes durable materials that ensure longevity and resistance to wear and tear. This part is crucial for establishing secure connections between various components, thus maintaining the overall integrity of the washing system.

The combined characteristics of these GE appliance parts highlight their importance in maintaining effective laundry operations. From reliable water connection hoses to efficient drainage solutions and sturdy connectors, these components enhance usability and extend the lifespan of washing machines. Their advanced engineering reflects GE's commitment to quality and performance, making them invaluable to any household laundry setup.