ASSEMBLY AND ADJUSTMENT
![]() Warning: DO NOT connect to power source until assembly is complete. Failure to comply could result in accidental starting and serious personal injury
Warning: DO NOT connect to power source until assembly is complete. Failure to comply could result in accidental starting and serious personal injury
![]() Warning: If any part is missing or damaged, do not attempt to assembly the table saw, plug in the power source, or turn the switch on until the missing or damaged part is obtained and it installed properly.
Warning: If any part is missing or damaged, do not attempt to assembly the table saw, plug in the power source, or turn the switch on until the missing or damaged part is obtained and it installed properly.
English
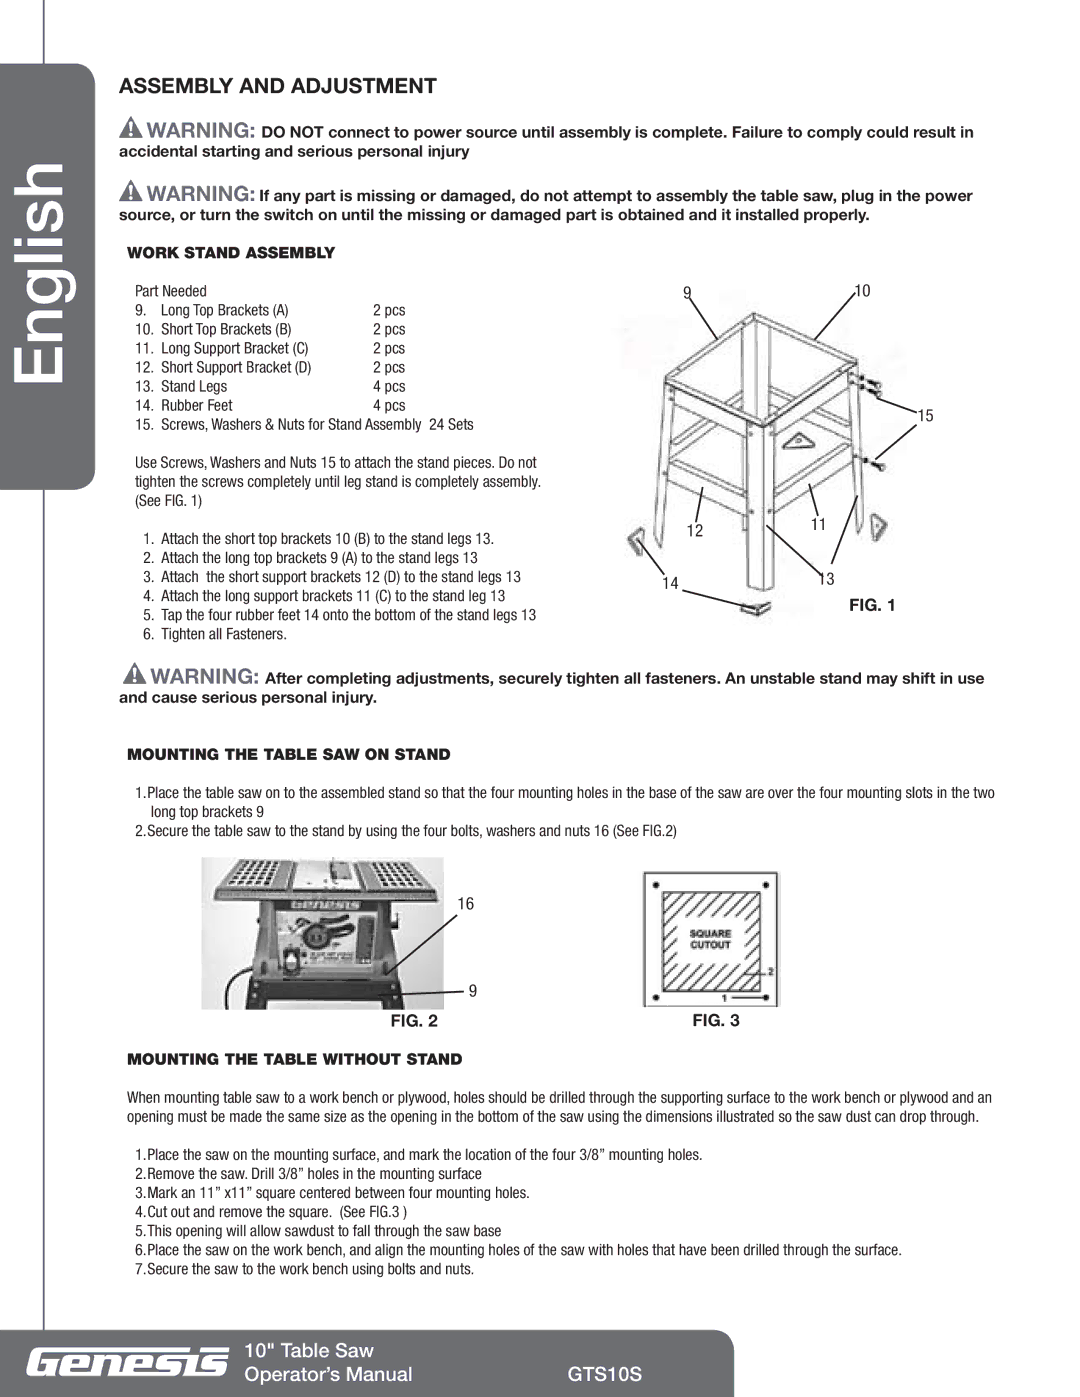
WORK STAND ASSEMBLY |
| |
Part Needed |
| |
9. | Long Top Brackets (A) | 2 pcs |
10. | Short Top Brackets (B) | 2 pcs |
11. | Long Support Bracket (C) | 2 pcs |
12. | Short Support Bracket (D) | 2 pcs |
13. | Stand Legs | 4 pcs |
14. | Rubber Feet | 4 pcs |
15. | Screws, Washers & Nuts for Stand Assembly 24 Sets | |
Use Screws, Washers and Nuts 15 to attach the stand pieces. Do not tighten the screws completely until leg stand is completely assembly. (See FIG. 1)
1.Attach the short top brackets 10 (B) to the stand legs 13.
2.Attach the long top brackets 9 (A) to the stand legs 13
3.Attach the short support brackets 12 (D) to the stand legs 13
4.Attach the long support brackets 11 (C) to the stand leg 13
5.Tap the four rubber feet 14 onto the bottom of the stand legs 13
6.Tighten all Fasteners.
910
![]() 15
15
1211
1413
FIG. 1
![]() Warning: After completing adjustments, securely tighten all fasteners. An unstable stand may shift in use and cause serious personal injury.
Warning: After completing adjustments, securely tighten all fasteners. An unstable stand may shift in use and cause serious personal injury.
MOUNTING THE TABLE SAW ON STAND
1.Place the table saw on to the assembled stand so that the four mounting holes in the base of the saw are over the four mounting slots in the two long top brackets 9
2.Secure the table saw to the stand by using the four bolts, washers and nuts 16 (See FIG.2)
16
| 9 |
FIG. 2 | FIG. 3 |
MOUNTING THE TABLE WITHOUT STAND
When mounting table saw to a work bench or plywood, holes should be drilled through the supporting surface to the work bench or plywood and an opening must be made the same size as the opening in the bottom of the saw using the dimensions illustrated so the saw dust can drop through.
1.Place the saw on the mounting surface, and mark the location of the four 3/8” mounting holes.
2.Remove the saw. Drill 3/8” holes in the mounting surface
3.Mark an 11” x11” square centered between four mounting holes.
4.Cut out and remove the square. (See FIG.3 )
5.This opening will allow sawdust to fall through the saw base
6.Place the saw on the work bench, and align the mounting holes of the saw with holes that have been drilled through the surface.
7.Secure the saw to the work bench using bolts and nuts.
10" Table Saw |
|
Operator’s Manual | GTS10S |