English
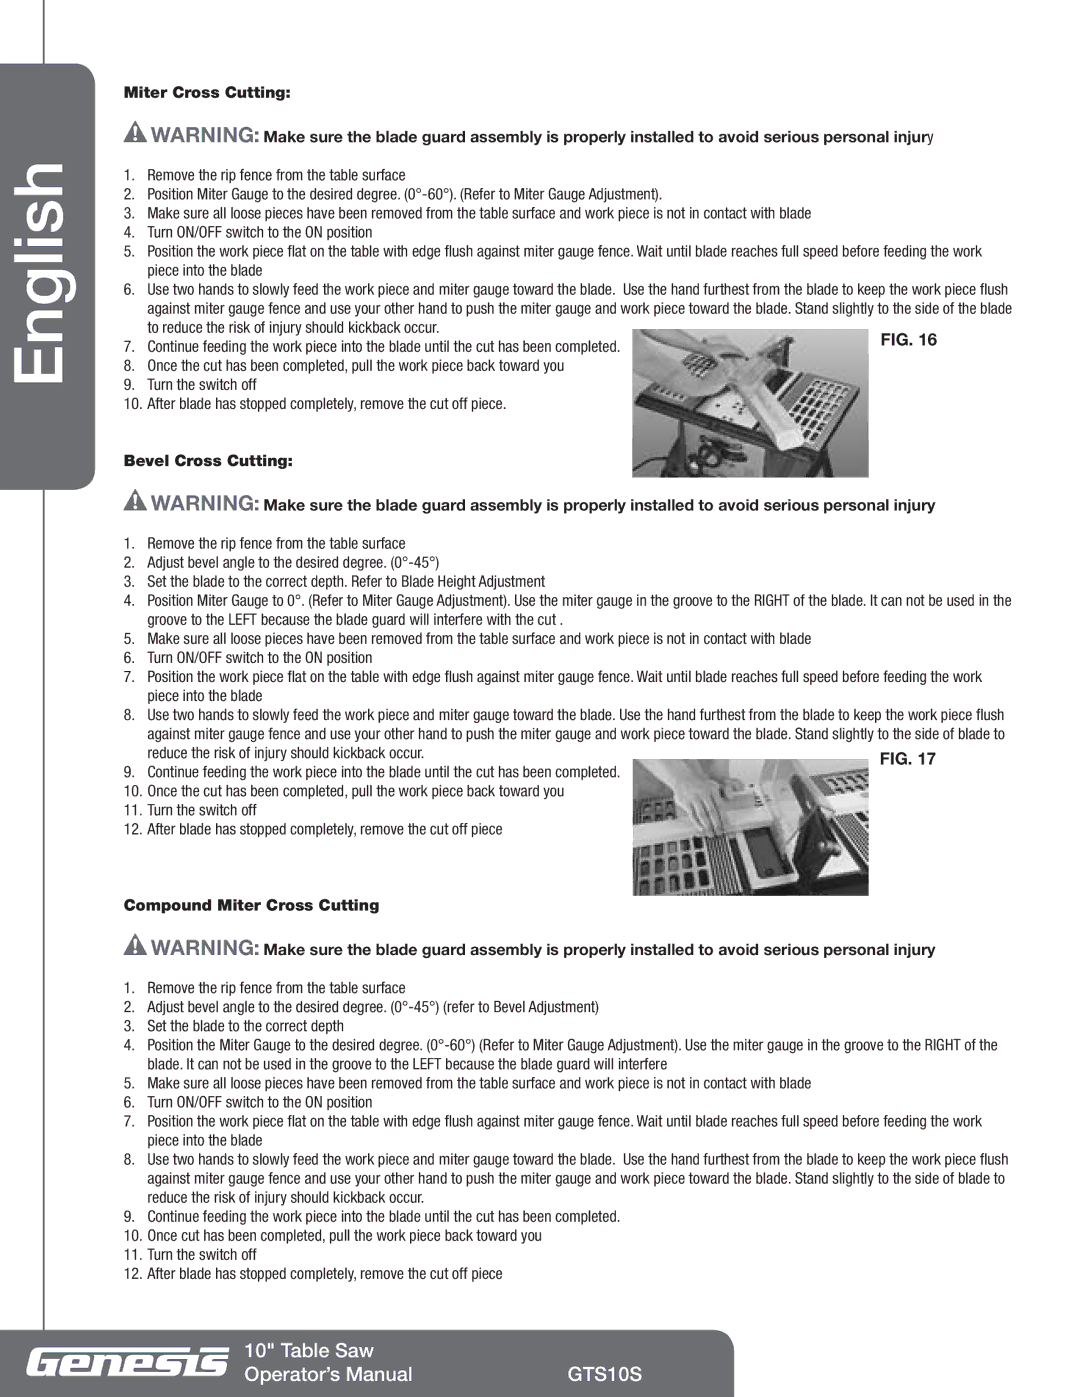
Miter Cross Cutting:
![]() Warning: Make sure the blade guard assembly is properly installed to avoid serious personal injury
Warning: Make sure the blade guard assembly is properly installed to avoid serious personal injury
1.Remove the rip fence from the table surface
2.Position Miter Gauge to the desired degree.
3.Make sure all loose pieces have been removed from the table surface and work piece is not in contact with blade
4.Turn ON/OFF switch to the ON position
5.Position the work piece flat on the table with edge flush against miter gauge fence. Wait until blade reaches full speed before feeding the work piece into the blade
6.Use two hands to slowly feed the work piece and miter gauge toward the blade. Use the hand furthest from the blade to keep the work piece flush
against miter gauge fence and use your other hand to push the miter gauge and work piece toward the blade. Stand slightly to the side of the blade to reduce the risk of injury should kickback occur.
7. Continue feeding the work piece into the blade until the cut has been completed.
8.Once the cut has been completed, pull the work piece back toward you
9.Turn the switch off
10.After blade has stopped completely, remove the cut off piece.
Bevel Cross Cutting:
![]() Warning: Make sure the blade guard assembly is properly installed to avoid serious personal injury
Warning: Make sure the blade guard assembly is properly installed to avoid serious personal injury
1.Remove the rip fence from the table surface
2.Adjust bevel angle to the desired degree.
3.Set the blade to the correct depth. Refer to Blade Height Adjustment
4.Position Miter Gauge to 0°. (Refer to Miter Gauge Adjustment). Use the miter gauge in the groove to the RIGHT of the blade. It can not be used in the groove to the LEFT because the blade guard will interfere with the cut .
5.Make sure all loose pieces have been removed from the table surface and work piece is not in contact with blade
6.Turn ON/OFF switch to the ON position
7.Position the work piece flat on the table with edge flush against miter gauge fence. Wait until blade reaches full speed before feeding the work piece into the blade
8.Use two hands to slowly feed the work piece and miter gauge toward the blade. Use the hand furthest from the blade to keep the work piece flush against miter gauge fence and use your other hand to push the miter gauge and work piece toward the blade. Stand slightly to the side of blade to
| reduce the risk of injury should kickback occur. | FIG. 17 |
9. | Continue feeding the work piece into the blade until the cut has been completed. |
|
10. | Once the cut has been completed, pull the work piece back toward you |
|
11. | Turn the switch off |
|
12. | After blade has stopped completely, remove the cut off piece |
|
Compound Miter Cross Cutting
![]() Warning: Make sure the blade guard assembly is properly installed to avoid serious personal injury
Warning: Make sure the blade guard assembly is properly installed to avoid serious personal injury
1.Remove the rip fence from the table surface
2.Adjust bevel angle to the desired degree.
3.Set the blade to the correct depth
4.Position the Miter Gauge to the desired degree.
5.Make sure all loose pieces have been removed from the table surface and work piece is not in contact with blade
6.Turn ON/OFF switch to the ON position
7.Position the work piece flat on the table with edge flush against miter gauge fence. Wait until blade reaches full speed before feeding the work piece into the blade
8.Use two hands to slowly feed the work piece and miter gauge toward the blade. Use the hand furthest from the blade to keep the work piece flush against miter gauge fence and use your other hand to push the miter gauge and work piece toward the blade. Stand slightly to the side of blade to reduce the risk of injury should kickback occur.
9.Continue feeding the work piece into the blade until the cut has been completed.
10.Once cut has been completed, pull the work piece back toward you
11.Turn the switch off
12.After blade has stopped completely, remove the cut off piece
10" Table Saw |
|
Operator’s Manual | GTS10S |