Step 3:
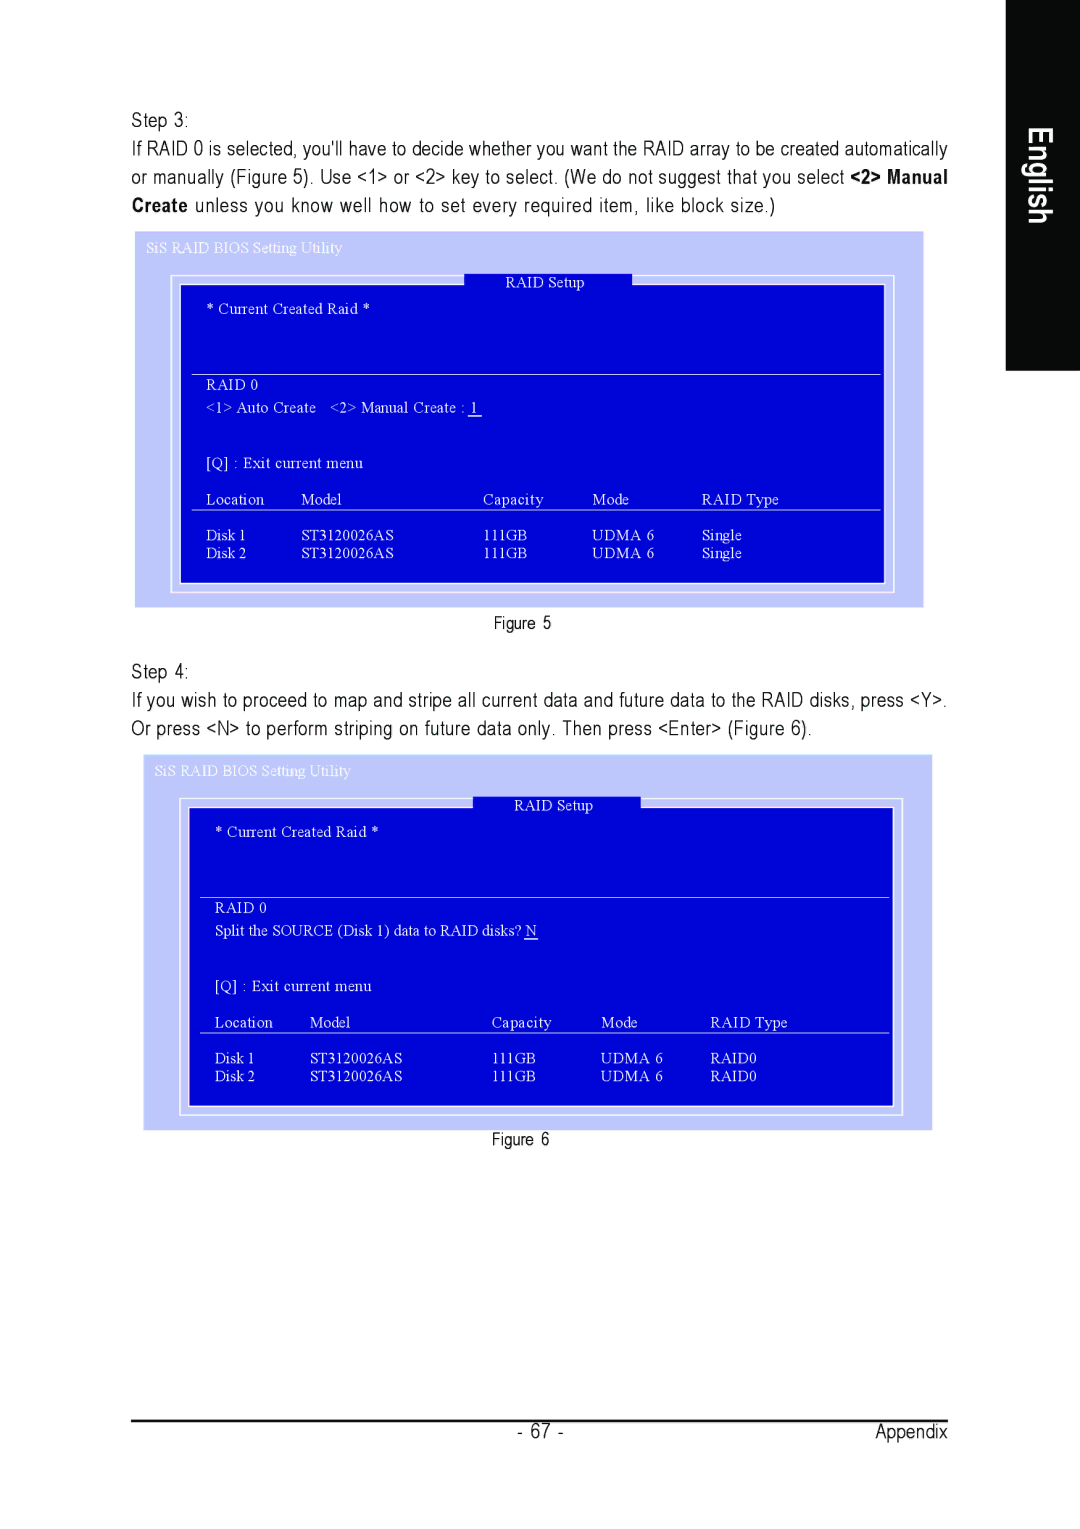
If RAID 0 is selected, you'll have to decide whether you want the RAID array to be created automatically or manually (Figure 5). Use <1> or <2> key to select. (We do not suggest that you select <2> Manual Create unless you know well how to set every required item, like block size.)
SiS RAID BIOS Setting Utility
RAID Setup
* Current Created Raid *
RAID 0
<1> Auto Create <2> Manual Create : 1
[Q] : Exit current menu |
|
|
| |
Location | Model | Capacity | Mode | RAID Type |
Disk 1 | ST3120026AS | 111GB | UDMA 6 | Single |
Disk 2 | ST3120026AS | 111GB | UDMA 6 | Single |
Figure 5
Step 4:
If you wish to proceed to map and stripe all current data and future data to the RAID disks, press <Y>. Or press <N> to perform striping on future data only. Then press <Enter> (Figure 6).
SiS RAID BIOS Setting Utility
RAID Setup
* Current Created Raid *
RAID 0
Split the SOURCE (Disk 1) data to RAID disks? N
[Q] : Exit current menu |
|
|
| |
Location | Model | Capacity | Mode | RAID Type |
Disk 1 | ST3120026AS | 111GB | UDMA 6 | RAID0 |
Disk 2 | ST3120026AS | 111GB | UDMA 6 | RAID0 |
Figure 6
English
- 67 - | Appendix |
