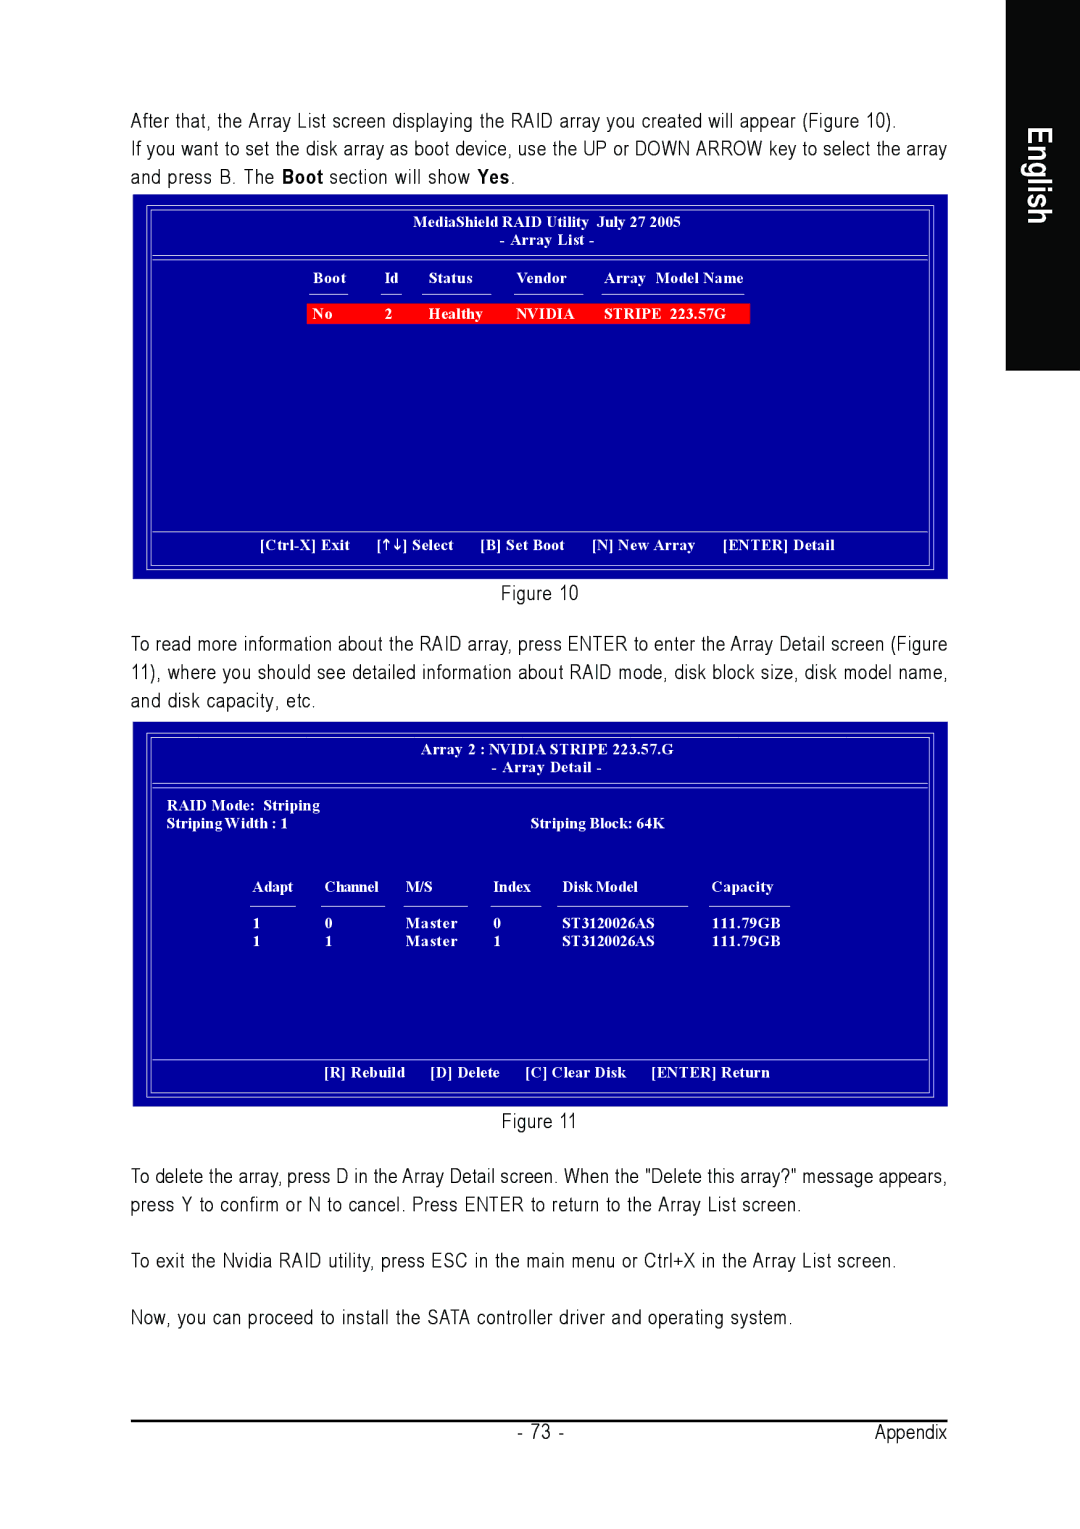
After that, the Array List screen displaying the RAID array you created will appear (Figure 10).
If you want to set the disk array as boot device, use the UP or DOWN ARROW key to select the array and press B. The Boot section will show Yes.
MediaShield RAID Utility July 27 2005
- Array List -
Boot | Id | Status |
| Vendor | Array Model Name |
No | 2 | Healthy | NVIDIA | STRIPE 223.57G | |
[ | ] Select | [B] Set Boot | [N] New Array [ENTER] Detail | ||
Figure 10
To read more information about the RAID array, press ENTER to enter the Array Detail screen (Figure 11), where you should see detailed information about RAID mode, disk block size, disk model name, and disk capacity, etc.
|
| Array 2 : NVIDIA STRIPE 223.57.G |
| |||
|
|
| - Array Detail - |
| ||
RAID Mode: Striping |
|
|
|
|
|
|
Striping Width : 1 |
|
|
|
| Striping Block: 64K |
|
Adapt | Channel | M/S | Index | Disk Model | Capacity | |
1 | 0 | Master | 0 |
| ST3120026AS | 111.79GB |
1 | 1 | Master | 1 |
| ST3120026AS | 111.79GB |
| [R] Rebuild | [D] Delete | [C] Clear Disk [ENTER] Return | |||
Figure 11
To delete the array, press D in the Array Detail screen. When the "Delete this array?" message appears, press Y to confirm or N to cancel. Press ENTER to return to the Array List screen.
To exit the Nvidia RAID utility, press ESC in the main menu or Ctrl+X in the Array List screen.
Now, you can proceed to install the SATA controller driver and operating system.
English
- 73 - | Appendix |
