8 Channel Audio Setup
To achieve 8-Channel Audio, you have to connect the front panel audio module to the F_AUDIO connector on the motherboard. Then select the type of equipment from the pop up menu. Note that the audio module should be the HD (High Definition) specification.
STEP 1 :
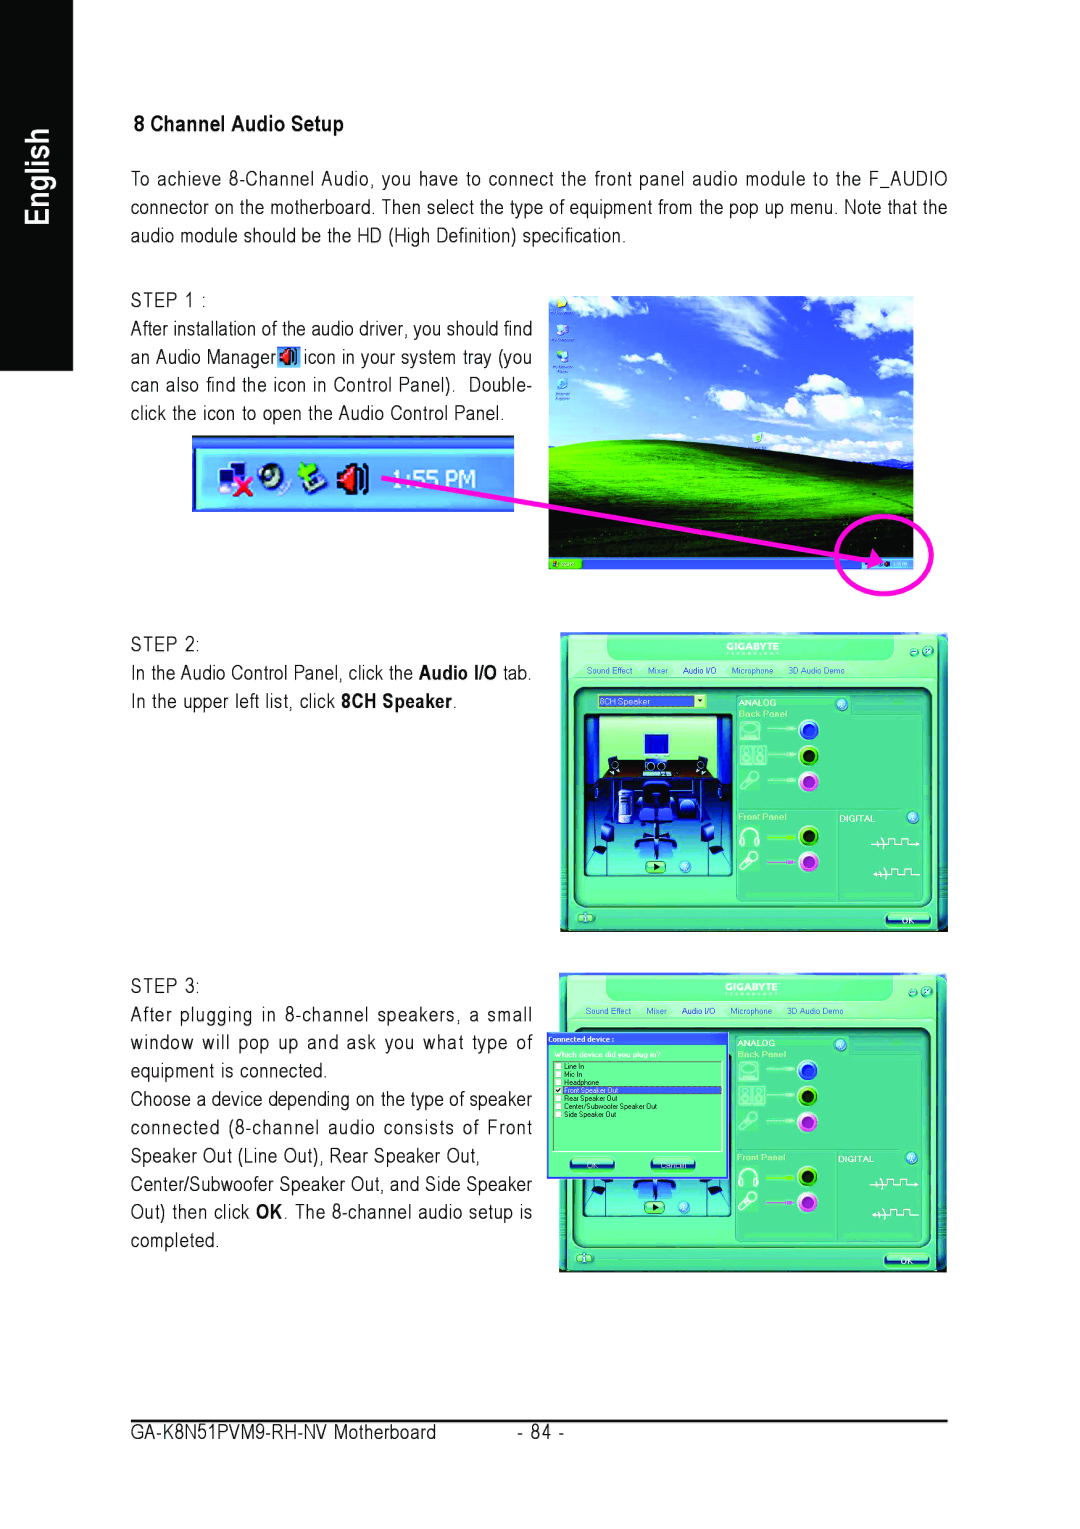
After installation of the audio driver, you should find an Audio Manager icon in your system tray (you can also find the icon in Control Panel). Double- click the icon to open the Audio Control Panel.
STEP 2:
In the Audio Control Panel, click the Audio I/O tab.
In the upper left list, click 8CH Speaker.
STEP 3:
After plugging in 8-channel speakers, a small window will pop up and ask you what type of equipment is connected.
Choose a device depending on the type of speaker connected (8-channel audio consists of Front Speaker Out (Line Out), Rear Speaker Out, Center/Subwoofer Speaker Out, and Side Speaker Out) then click OK. The 8-channel audio setup is completed.

![]() icon in your system tray (you can also find the icon in Control Panel). Double- click the icon to open the Audio Control Panel.
icon in your system tray (you can also find the icon in Control Panel). Double- click the icon to open the Audio Control Panel.