4-2-2 Updating the BIOS with the @BIOS Utility
A. Before You Begin:
1.In Windows, close all applications and TSR (Terminate and Stay Resident) programs. This helps prevent unexpected failures when performing a BIOS update.
2.During the BIOS update process, ensure the Internet connection is stable and do NOT interrupt the Internet connection (for example, avoid a power loss or switching off the Internet). Failure to do so may result in a corrupted BIOS or a system that is unable to start.
3.Do not use the C.O.M. (Corporate Online Management) function when using @BIOS.
4.GIGABYTE product warranty does not cover any BIOS damage or system failure resulting from an inadequate BIOS flashing.
B. Installing and Using @BIOS:
Use the motherboard driver disk included with the motherboard to install @BIOS.
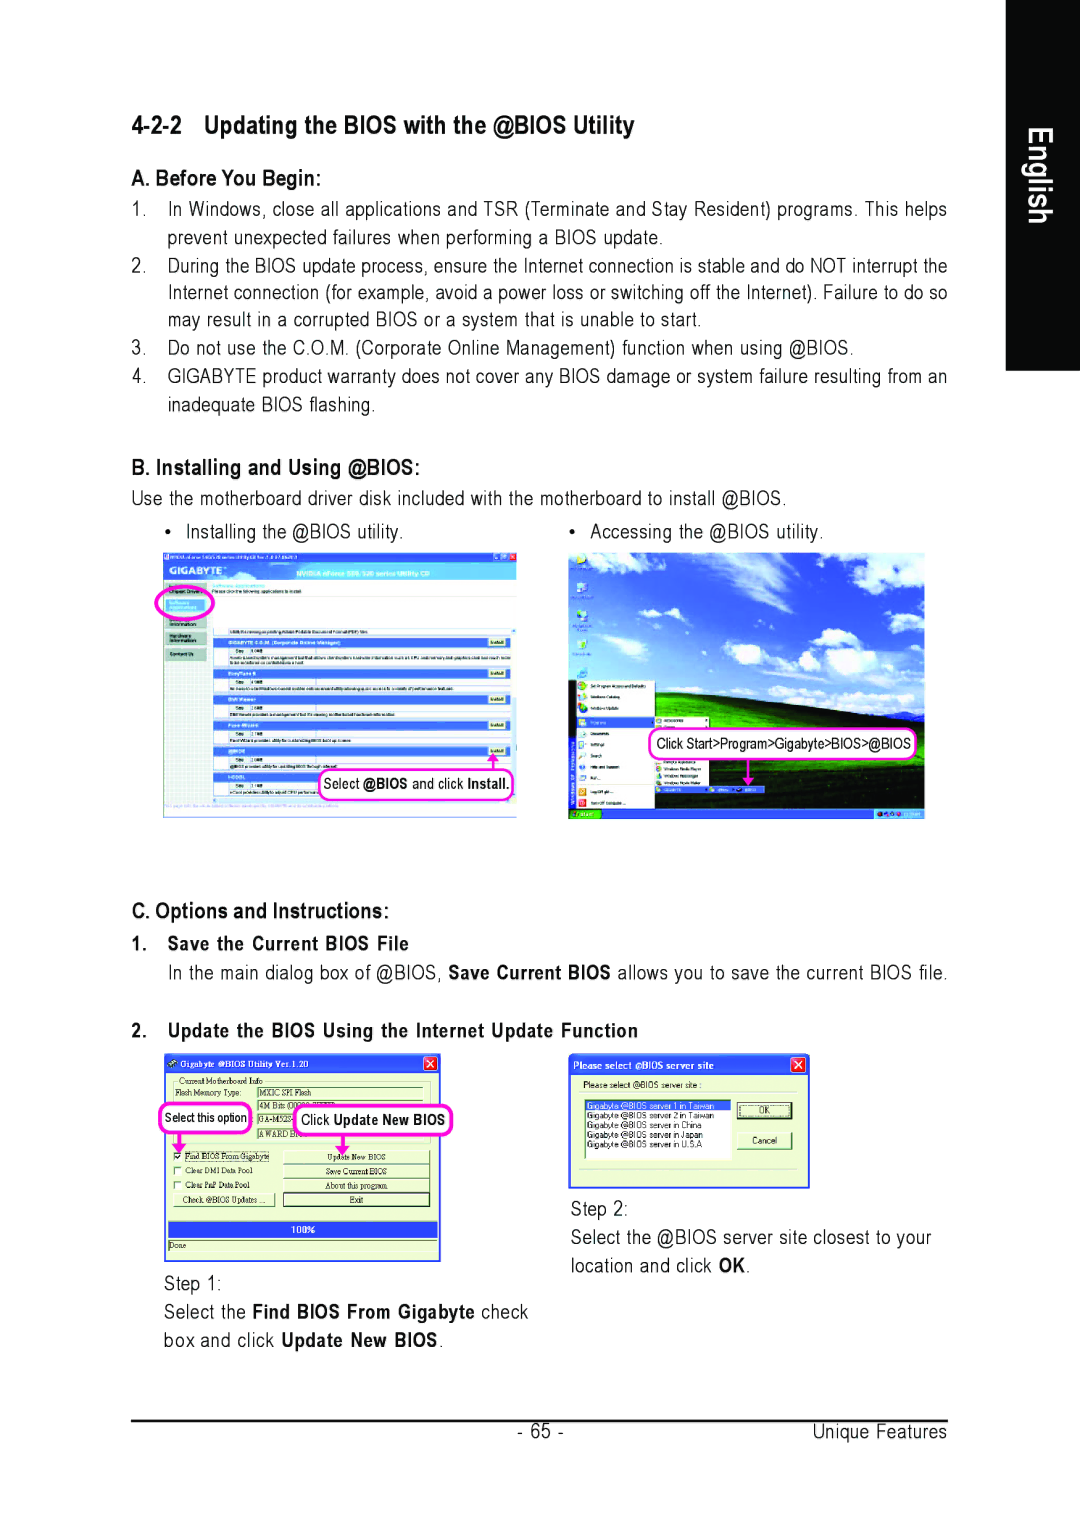
• Installing the @BIOS utility. | • Accessing the @BIOS utility. |
English
Click Start>Program>Gigabyte>BIOS>@BIOS
Select @BIOS and click Install.
C. Options and Instructions:
1.Save the Current BIOS File
In the main dialog box of @BIOS, Save Current BIOS allows you to save the current BIOS file.
2.Update the BIOS Using the Internet Update Function
Select this option | Click Update New BIOS |
Step 1:
Select the Find BIOS From Gigabyte check box and click Update New BIOS.
Step 2:
Select the @BIOS server site closest to your location and click OK.
- 65 - | Unique Features |