5830_CIB_1ATT 8/14/02 9:47 PM Page 5
Wall Installation |
| |
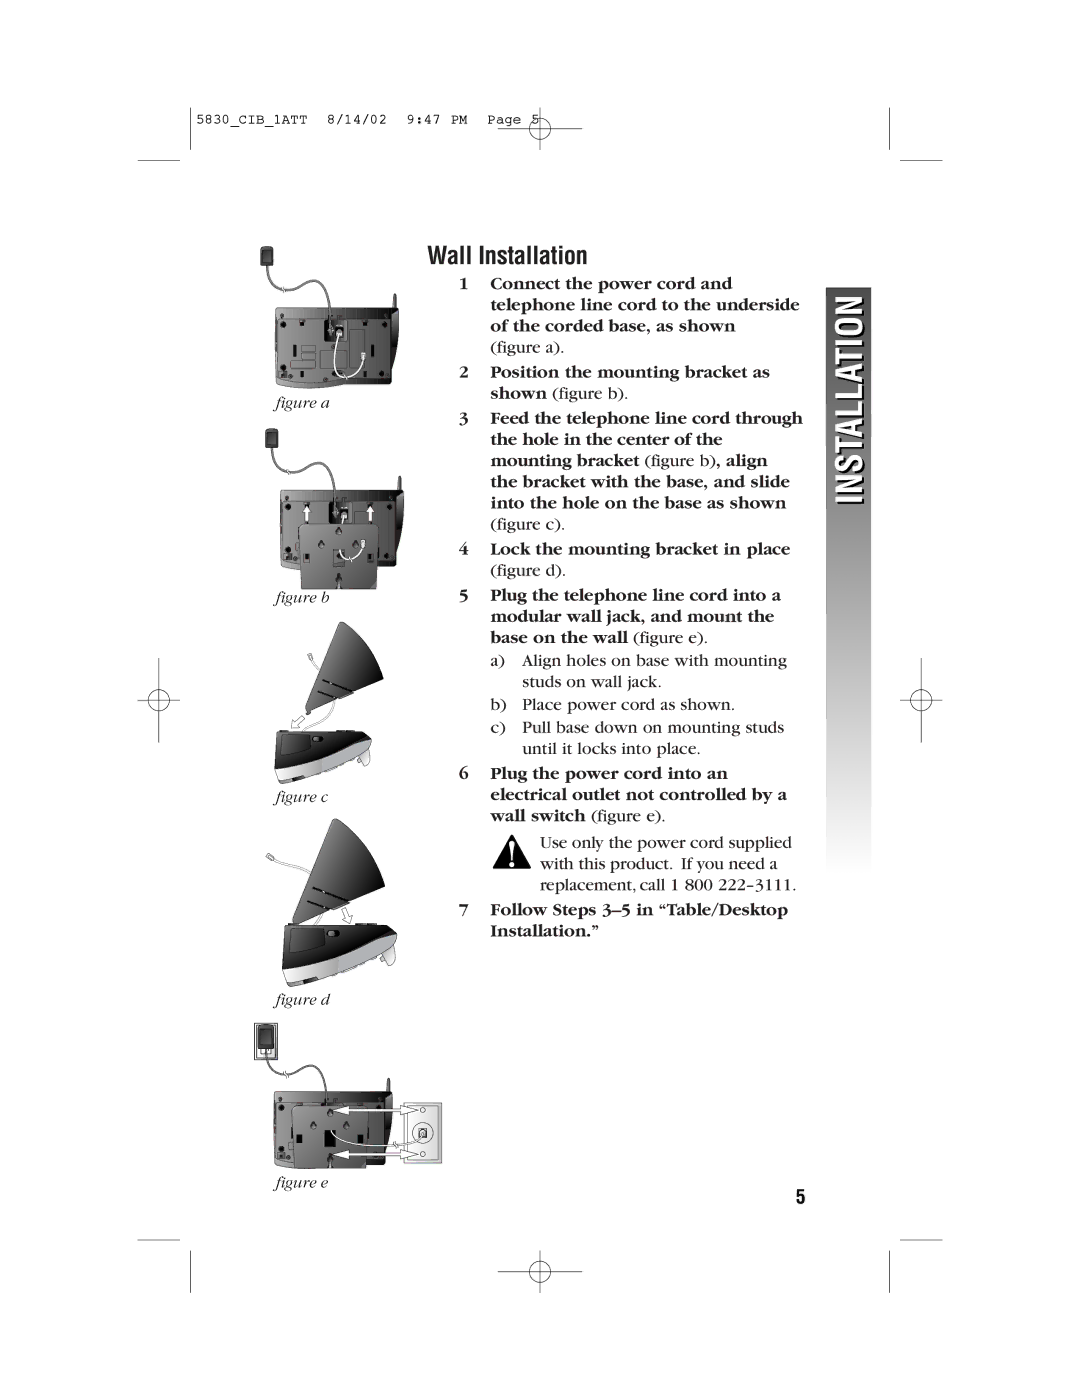
1 | Connect the power cord and | INSTALLATION |
| telephone line cord to the underside | |
|
| |
| of the corded base, as shown |
|
| (figure a). |
|
2 | Position the mounting bracket as |
|
figure a | shown (figure b). |
|
|
| |
3 | Feed the telephone line cord through |
|
| the hole in the center of the |
|
| mounting bracket (figure b), align |
|
| the bracket with the base, and slide |
|
| into the hole on the base as shown |
|
(figure c). |
4 Lock the mounting bracket in place |
figure b
figure c
(figure d).
5Plug the telephone line cord into a modular wall jack, and mount the base on the wall (figure e).
a)Align holes on base with mounting studs on wall jack.
b)Place power cord as shown.
c)Pull base down on mounting studs until it locks into place.
6Plug the power cord into an electrical outlet not controlled by a wall switch (figure e).
Use only the power cord supplied with this product. If you need a replacement, call 1 800
7 Follow Steps
Installation.”
figure d
figure e
5